iPhone Data Recovery
 iOS System Recovery
 iOS Data Backup & Restore
 iOS Unlocker
 iPhone Password Manager
 Location Changer
 Android Data Recovery
 Broken Android Data Extraction
 Android Data Backup & Restore
 Android Unlocker
 FoneTrans for iOS
 iPhone Data Eraser
 iPhone Cleaner
 HEIC Converter
 HyperTrans
 WhatsApp Transfer for iOS
 Mac Sweep
 Data Retriever
 Mac Data Retriever
 Video Converter Ultimate
 Screen Recorder
 Phone Mirror
 Recover PC Data Now
Recover the lost/deleted data from computer, hard drive, flash drive, memory card, digital camera and more.
Everything About Windows File Recovery with Alternatives
 Updated by
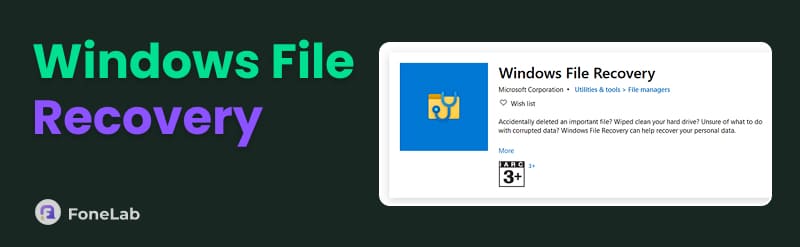
 Do you need to recover deleted files Windows? If so, you may have already heard about its File Recovery tool that you can install from the Microsoft Store, but is it really the best option for you? Find out the answer by reading the provided information in the following sections. We will discuss what the tool is all about. This way, you will know if it will be a suitable method for you.
Aside from that, further information about this Windows-specialized recovery tool will be included, allowing you to understand its functions in greater depth.. However, while this Microsoft utility offers effectiveness and some advantages in recovering lost or deleted data, it remains unpopular with other users. So, if you find yourself in the same situation, don’t worry, because we also provide the best alternatives, from built-in to third-party tools. See them below.

Guide List
Part 1. What is Windows File Recovery
To put it simply, the Windows Data Recovery software is a free command-line tool from Microsoft with the main purpose of recovering lost or deleted files from local storage devices. It can be acquired from the Microsoft Store and is currently available on Windows 10 2004 version and above. Meanwhile, the storage devices this tool supports include internal hard drives, external USB drives, and SD cards, allowing you to restore documents, photos, videos, etc.
Unlike the usual recovery programs, this one has no graphical interface. Everything runs through typed commands in a terminal window, which is why many users find it more complex than the others. Microsoft designed it primarily for technical users, so it requires some basic knowledge of command syntax and file system structures. If you are a new user, or it’s your first time trying to recover data, you may find it intimidating or frustrating to use.
Part 2. The Three Modes of Operation of Windows File Recovery
The Windows File Recovery app or program offers three distinct recovery modes. Each mode is dedicated to a specific type of data loss scenario, so choosing the right mode is critical for getting successful results. That said, familiarize yourself with them below.
- • Default Mode - It uses the Master File Table (MFT) to locate and restore deleted files. It is fast and straightforward but has a limited scope and is less effective for older or corrupted data.
- • Segment Mode - It scans the drive segment by segment, looking for file signatures. It does not rely on the MFT, making it useful for recovering older files. It also works on drives that are corrupted or have been reformatted.
- • Signature Mode - Searches for specific file headers and footers on the drive. It is the most thorough option and works on any file system, including FAT and exFAT. However, it is also the slowest and recovers files without their original names or folder structure.
Part 3. Requirements & Best Practices
Like other recovery methods, this Windows recovery software has specific requirements. As mentioned, it needs Windows 10 version 2004 or newer. Additionally, at least 512 MB RAM, admin rights, and enough free space on a separate drive to save recovered files.
On the other hand, to maximize success, among the best practices you should do are: stop using the affected drive instantly after data loss, always save recovered files to another drive, and check your file system beforehand. However, you should also know that results are never guaranteed. Success will also depend on your drive health, file age, etc.
Part 4. How to Use Windows File Recovery
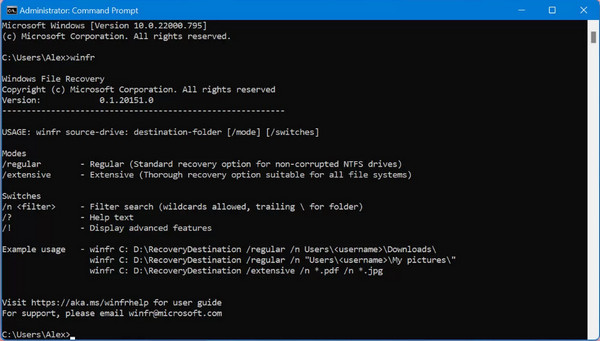
Using the tool is straightforward if you understand the command structure. First, open Command Prompt as an administrator, then type ‘winfr’ followed by the source drive, destination drive, and recovery mode. For reference, the basic command should look like this: winfr C: D: /regular for Default mode. The tool will briefly scan the drive and show progress in the window. Wait until it completes, and once done, it will display a summary of your recovered files along with their folder locations. You can then navigate to that folder to check your restored data.
Part 5. Alternatives to Windows File Recovery
As mentioned, this program doesn’t appeal to many users, especially after finding out how it fails in some situations. For instance, it struggles with heavily overwritten drives; users with external USB drives or SD cards often experience poor results, and it can’t recover permanently deleted files that third-party cleaners have wiped. Hence, here are some better alternatives.
Option 1. Previous Versions
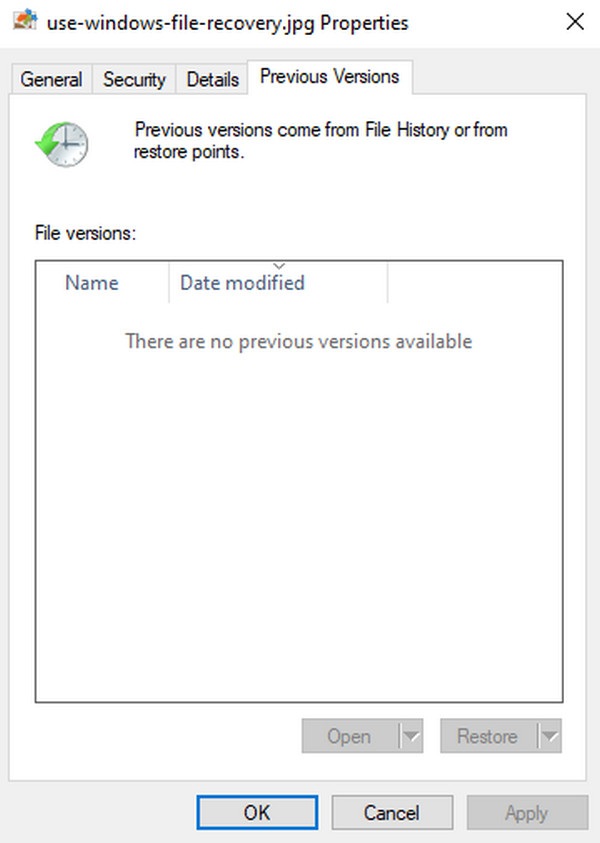
Previous Versions is a built-in Windows feature that lets you restore older copies of files and folders. It relies on restore points or File History backups that Windows creates automatically; thus, having File History enabled beforehand is necessary, or the list of your file’s previous versions won’t be available. Its advantage is simplicity—no commands or complex settings.
Follow the simple process below to learn how to recover deleted files on Windows through Previous Versions:
Step 1Right-click the file or folder you hope to restore and select Restore previous versions from the pop-up menu. A window will appear, showing the available older versions of your file.
Step 2Choose the version you need based on the date and time, then hit Restore to recover it. The file can then be restored to its original location.
Option 2. FoneLab Data Retriever
Meanwhile, deleted computer data recovery becomes much more efficient and convenient if you have a dedicated tool like FoneLab Data Retriever. For those who find command-line tools intimidating or confusing, this is the perfect solution, as its interface and functions are designed to suit everyone, from beginners to experienced users.
FoneLab Data Retriever works on both Windows and Mac and supports an extensive range of storage devices, including internal hard drives, external USBs, memory cards, and digital cameras. Hence, you no longer have to worry about the Windows’ recovery program’s function falling short. This tool can serve you instead, recovering photos, emails, documents, and more.
FoneLab Data Retriever - recover the lost/deleted data from computer, hard drive, flash drive, memory card, digital camera and more.
- Recover photos, videos, documents and more data with ease.
- Preview data before recovery.
Follow the simple steps below as an example of Windows data recovery with FoneLab Data Retriever:
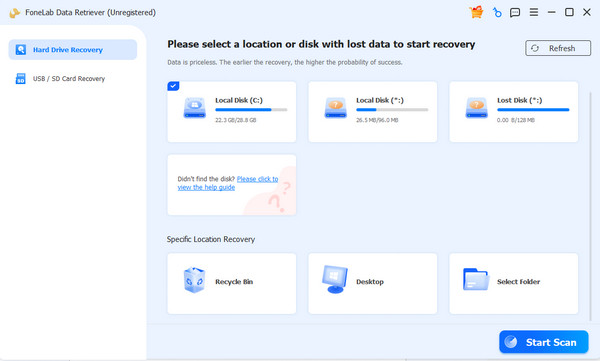
Step 1Start with the Free Download button to save and install FoneLab Data Retriever. Once the program is ready, click Start to display the interface. From there, check the hard drive that previously stored the file you wish to get back and select Start Scan.
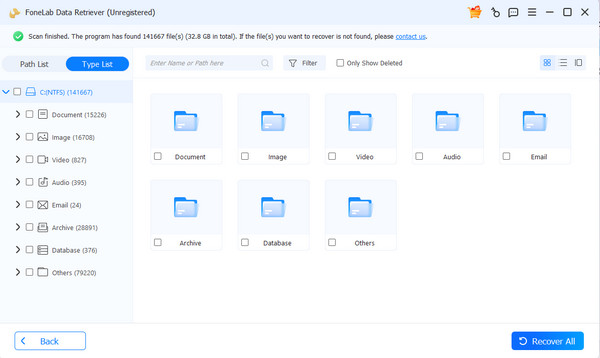
Step 2The results interface will show you different file type folders. Simply open them to explore the deleted files and find the one you need. Afterward, mark its checkbox before going for the Recover All button.
Part 6. FAQs about Windows File Recovery
Does Windows File Recovery recover permanently deleted files?
Sometimes, but only if they haven't been overwritten. If they have, recovery is very unlikely.
Can I preview files before recovering them?
Unfortunately, you can’t with the Windows recovery tool, but don’t worry. FoneLab Data Retriever has that capability, so feel free to use it instead.
The Windows File Recovery software is a free but limited command-line tool, so if you need a simpler and more reliable experience, third-party alternatives like FoneLab Data Retriever are often the better choices.