- Part 1. What Is Time Machine on Mac
- Part 2. Preparation Checklist for Time Machine on Mac
- Part 3. Restoring Your Entire Mac from Time Machine
- Part 4. Restoring Individual Files from Time Machine
- Part 5. What If You Don't Have a Time Machine Backup?
- Part 6. Comparison: Which Recovery Method Do You Need?
- Part 7. FAQs about Time Machine on Mac
Recover the lost/deleted data from computer, hard drive, flash drive, memory card, digital camera and more.
Use Time Machine on Mac for Individual and Multiple Data Recovery
 Updated by
 Greetings! I was cleaning my Mac storage this morning. Unfortunately, I accidentally deleted some of my important files. I have tried to recover them, but I failed. My sister told me that I can use Time Machine to restore them. Is it true? Please help me. Thank you!
Time Machine on Mac is a great tool to back up your data. It can restore it anytime. Do you want to know more about the recovery tool? This article will guide you through the tool, including the best alternative tool. Continue reading in this article to find the important information you need to know.

Guide List
- Part 1. What Is Time Machine on Mac
- Part 2. Preparation Checklist for Time Machine on Mac
- Part 3. Restoring Your Entire Mac from Time Machine
- Part 4. Restoring Individual Files from Time Machine
- Part 5. What If You Don't Have a Time Machine Backup?
- Part 6. Comparison: Which Recovery Method Do You Need?
- Part 7. FAQs about Time Machine on Mac
Part 1. What Is Time Machine on Mac
What is Time Machine on Mac? Time Machine is a tool on your Mac that allows you to back up your data automatically after setting it up. It supports different data types, including your system files, apps, documents, and photos. The best thing about it is that you can restore the backups anytime. You can connect an external hard drive or a USB. It can back up your data every 24 hours.
Part 2. Preparation Checklist for Time Machine on Mac
There are a few preparations you need to know before using Time Machine on your Mac. You need to get a backup drive for the Time Machine backups. Also, you need to check the available storage on your Mac. Ensure that macOS is up to date to avoid issues during the backup process.
Moreover, users must decide which data they need to back up with the mentioned tool. Also, you need to format the backup drive properly. Because Time Machine will erase and reformat the drive.
Part 3. Restoring Your Entire Mac from Time Machine
Time Machine can restore your entire backup on your Mac. In this case, no data will be left behind. You will be sure about the data you need to restore. However, ensure that Mac has enough space to hold the restored data after the restore process. How to restore Mac from Time Machine? The steps below will guide you to the best results.
Connect the Time Machine backup drive. Then, turn on your Mac. During the setup process, click the Time Machine Backup button. Click the Continue button to proceed. Select the Time Machine backup you prefer to restore. Wait for the restoration process to complete afterward.
Part 4. Restoring Individual Files from Time Machine
The good thing about Time Machine is that it allows you to restore individual files from your backups. In this case, you do not need to restore unnecessary data that you no longer need. However, it can be hard for you if you want to recover hundreds of data files in a day. You need to select them individually. Please see the steps below as your guide.
Open Time Machine on your Mac. You can see it from the main interface of the Mac. Then, the backups from Time Machine will appear. You can use the arrows to browse the backup you prefer. Then, select the data you prefer to recover. Finally, please click the Restore button at the bottom of the main interface. You can check the restored data from the recent files in Finder.

Part 5. What If You Don't Have a Time Machine Backup?
Not everyone knows and uses Time Machine to create backup for their Mac data. But if you do not use Time Machine, there are other methods that can be used to recover your data. See the 2 best methods below.
1. Using Migration Assistant
Migration Assistant is a built-in tool that allows you to transfer data to your Mac through a backup. It includes your settings, apps, files, accounts, and more. It can be an alternative to Time Machine. Use the tool below.
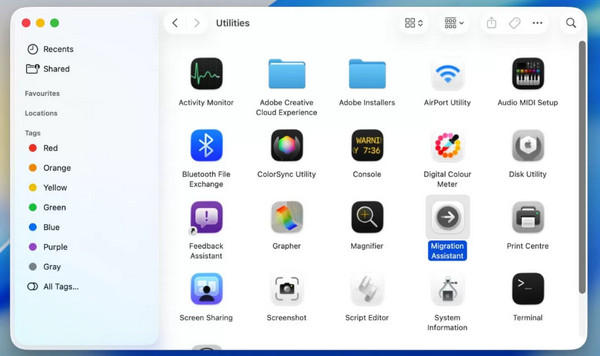
Step 1Plug your external hard drive and open Migration Assistant. Select the Utilities folder. Choose the mentioned tool’s name.
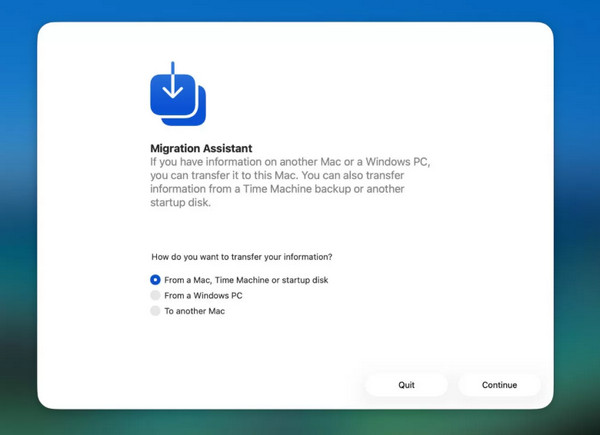
Step 2Choose where you want to get the backup from and click the Continue button. Please imitate the on-screen instructions to complete the restore process.
2. Use FoneLab Data Retriever for Mac
Besides the Apple way, you can also use a Mac data recovery tool to retrieve your files or data. FoneLab Data Retriever is one of them. It is a great tool for Mac deleted data recovery due to its fast recovery process and the fact that it does not rely on an internet connection. You can recover your images, videos, documents, music, and more. Please use the steps below to know how to use the tool.
FoneLab Data Retriever - recover the lost/deleted data from computer, hard drive, flash drive, memory card, digital camera and more.
- Recover photos, videos, documents and more data with ease.
- Preview data before recovery.
Step 1Click the Free Download button to download FoneLab Data Retriever on your Mac. Then, set up, install, and open it.
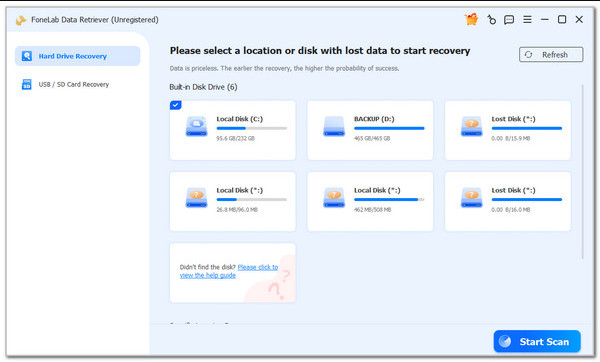
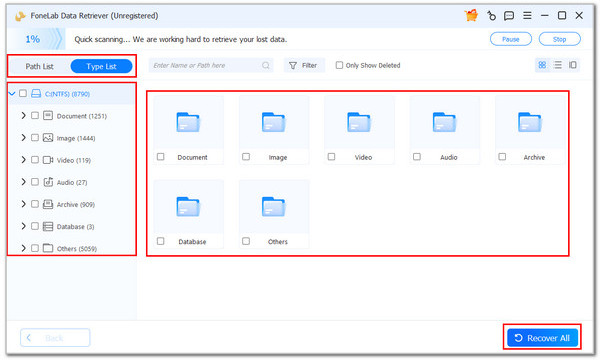
Step 2Choose the location where you want to find your lost or deleted data. Then, click it and choose the Start Scan button. The results will be revealed on the next screen.
Step 3Choose the data you want to retrieve. Then, click the Recover All button at the bottom right. Wait for the process to be completed.
Part 6. Comparison: Which Recovery Method Do You Need?
| Method | Connection | Speed | Required Skills |
| Time Machine | None | Moderate | Moderate |
| Migration Assistant | USB | Slow | Professional |
| FoneLab Data Retriever | None | Fast | Beginner |
Part 7. FAQs about Time Machine on Mac
Can you restore from Time Machine to new Mac?
Yes. You can use the Migration Assistant program during the setup process. Choose the From a Mac, Time Machine Backup button. Connect your Time Machine external hard drive. You can also use the Browse Time Machine Backups button.
Why is Time Machine not in my menu bar?
It might be hidden from the menu bar of your Mac. To make it visible, select the Apple button at the top left corner. Then, choose the System Settings button. Click the Control Center button and scroll down until you see Time Machineuntil the Time Machine tool. Select the Show in Menu Bar button.
Why can't I access my Time Machine?
There are probably issues regarding your Mac Time Machine. A disconnected drive, corrupted backups, and network problems might be affecting the tool, causing it not to function as expected.
In conclusion, you can restore Mac from Time Machine using your backups—whether an individual file or the whole backup. FoneLab Data Retriever is also here to help you retrieve deleted data on your Mac, which is the best alternative to Time Machine. It can recover images, videos, documents, and more data types. Downloading the tool will help you learn more about its features!