Recover the lost/deleted data from computer, hard drive, flash drive, memory card, digital camera and more.
How to Restore A Single Photo from Time Machine Easily
 Updated by Lisa Ou / Nov 01, 2023 09:00
If you search how to recover deleted photos from Time Machine, you might get methods don't support recovering a single image or file. They only often restore an entire backup or folder, depending on the strategy you will use. Hence, it's understandable if you'd like to know how to recover the deleted photos from your Time Machine individually. But the question is, is that possible?
Well, you can now stop wondering, as this article brings you all the necessary answers to your concerns. You will be enlightened if it is possible to restore a single picture from your Time Machine backup. And if something doesn't go your way, the alternatives will be in the following parts. Thus, check them out to see which option would work best for you. You don't need to get lost in the processes since each part's guidelines are already included below.


Guide List
Part 1. Can You Restore A Single Photo from Time Machine
“How to restore a single photo from Time Machine?” Once and for all, know that restoring a picture or any single file from the Time Machine is impossible. It only lets you recover a full photo library or folder, but you cannot open it and restore only one of its contents. Time Machine doesn’t support it, which is unfortunate for people who only want to recover a single file. But if you really want to perform the recovery on Time Machine, you can restore your photo library or folder in the Photos app or by clicking the Time Machine icon on your Mac.
Hence, we added one of the options below as a bonus if you want to try the recovery on Time Machine. However, this will surely take a while, so we recommend you proceed to the following part, and we will introduce the other helpful strategies for this matter.
Before that, check out the hassle-free procedure below to restore your photo library from the Time Machine backup on Mac:
Step 1On your Mac desktop’s top right side, you will see the Time Machine icon next to the battery status symbol. Click it to reveal the options, then pick the Enter Time Machine tab. Ensure your backup disk is connected to your Mac so that your backups will be shown once the Time Machine window is on the screen.

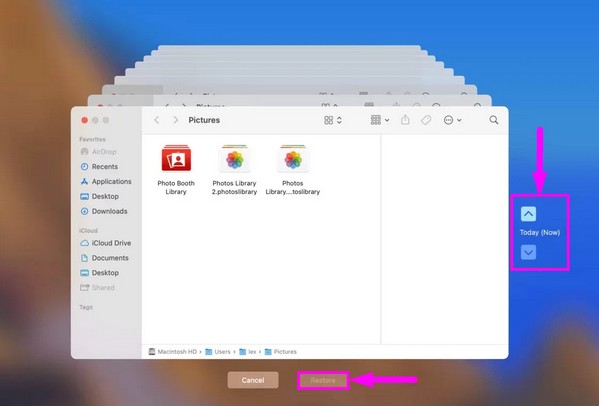
Step 2Once your available backups appear, locate the photo library to restore using the search icon at the top right or the up and down arrows on the rightmost side. Once located, select the library, then hit the Restore tab underneath to recover it on your Mac.
Part 2. How to Restore A Single Photo on Mac
Since Time Machine doesn’t allow recovery for a single photo, see the alternative methods we have prepared below. We ensured to choose a program and a built-in service that will let you restore individual files, and we assembled their descriptions and guidelines afterward.
Option 1. With FoneLab Mac Data Retriever
FoneLab Mac Data Retriever is a trustworthy program for retrieving several data types on your Mac. Its capabilities include restoring photos, emails, documents, videos, and more. Hence, it will be a huge help once you install it on your macOS since you can restore your pictures effortlessly. It also works for other computers, hard drives, Apple devices, etc.
Meanwhile, unlike Time Machine, FoneLab Mac Data Retriever lets you selectively recover photos and other files. Thus, don’t worry if you need to bring back only one of your deleted photos. You don’t need to waste time recovering an entire library since it allows individual data recovery. Also, it has more features you can explore once it’s on your Mac.
FoneLab Data Retriever - recover the lost/deleted data from computer, hard drive, flash drive, memory card, digital camera and more.
- Recover photos, videos, documents and more data with ease.
- Preview data before recovery.
View the painless instructions below to restore a single deleted photo on your Mac with FoneLab Mac Data Retriever:
Step 1Use your Mac browser’s address bar to find the FoneLab Mac Data Retriever site online. After that, hit the Free Download tab on its lower left page to store the installer on your Mac. Once downloaded, open the file and finish the installation by dragging its icon into the Applications folder. Finally, open the newly installed app to run on your Mac.

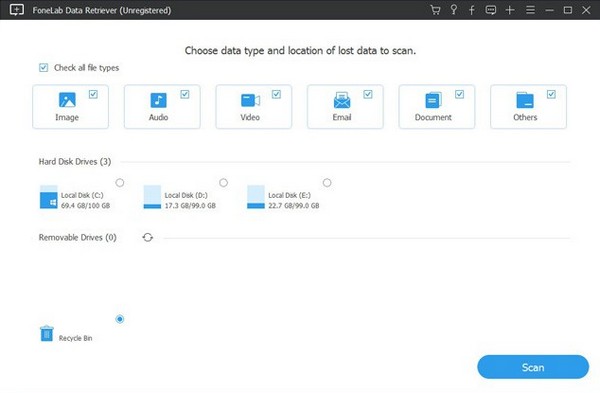
Step 2When the tool’s initial interface is launched, click the Start button inside the Mac Data Recovery box on the left side. The data types will then be exhibited on the following interface. Check the Image option and select the hard disk drive that stores your photo on the next box. Then, hit the Scan tab on the lower part.
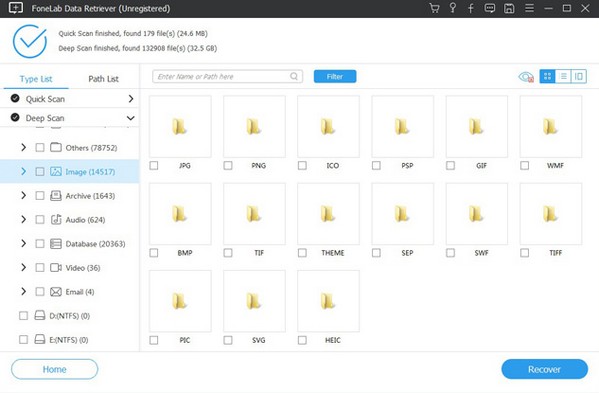
Step 3The program will quickly scan the images in your chosen disk drive, but you may also run a Deep Scan. Once scanned, open the image folders on the interface and explore them by scrolling until you find the photo you wish to recover. You can click it to preview, and once selected, press the Recover button to bring them back to your Mac.
FoneLab Data Retriever - recover the lost/deleted data from computer, hard drive, flash drive, memory card, digital camera and more.
- Recover photos, videos, documents and more data with ease.
- Preview data before recovery.
Option 2. Using iCloud
iCloud is a cloud service built-in on Apple devices like Mac. If your files are synced on iCloud, you will have a high chance of restoring them, especially if the deletion has been only recently made. Your photos and other synced data are stored in the iCloud Drive, and once you delete them, they will automatically transfer to the Recently Deleted section. However, we suggest the previous method if your photos are not synced to iCloud.
Stick to the manageable guidelines below to restore one of your deleted photos on Mac using iCloud:
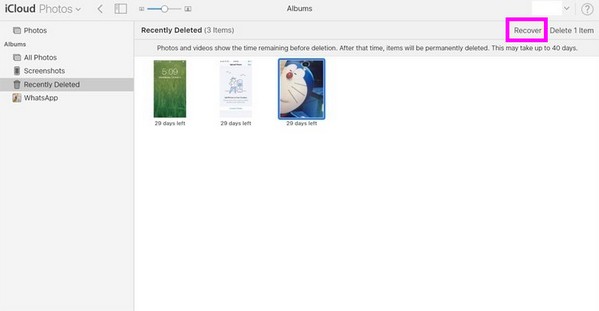
Step 1Get into the iCloud website and log in using your Apple ID. Afterward, proceed to the Photos section and click the Recently Deleted tab on the page’s sidebar.
Step 2Next, locate the file you have deleted by scrolling through the Recently Deleted page. Once located, select the photo and hit Recover to restore the file.
This method is only effective if you have only deleted the photo recently. But if 30 days have passed, you will no longer find the image in the Recently Deleted section. They only stay there for a limited time, so kindly use another method if the picture you hope to restore is not available anymore.
FoneLab Data Retriever - recover the lost/deleted data from computer, hard drive, flash drive, memory card, digital camera and more.
- Recover photos, videos, documents and more data with ease.
- Preview data before recovery.
Part 3. FAQs about How to Restore A Single Photo from Time Machine
1. How to open photo library from Time Machine backup?
Unfortunately, you cannot open the photo libraries on your Time Machine backup unless you restore them. Time Machine doesn't support viewing your photo library content, so viewing them on its interface is impossible. But if you want to preview your deleted photos before recovery, try installing the FoneLab Mac Data Retriever on your Mac. It's a recovery tool that allows you to view the files you wish to restore. Also, you can choose the files you wish to recover individually, saving you time.
2. What happens when I activate the Time Machine?
If you turn on the Time Machine on your Mac, your content will automatically be backed up hourly, daily, and weekly. Then, you can restore them by group or folder once needed.
FoneLab Data Retriever - recover the lost/deleted data from computer, hard drive, flash drive, memory card, digital camera and more.
- Recover photos, videos, documents and more data with ease.
- Preview data before recovery.
We are grateful that you trust the information and methods we have assembled in the article above. We hope you can visit the FoneLab Mac Data Retriever site again if you encounter more concerns.