Recover the lost/deleted data from computer, hard drive, flash drive, memory card, digital camera and more.
5 Efficient Techniques to Recover Deleted Mac Files
 Updated by
 Are you seeking the best method to restore deleted files on Mac? Whether you have accidentally erased an important file or want to restore a valuable one you previously decided to delete, finding an effective recovery method may be challenging, especially if it’s your first time. Don’t worry, however. Most of the time, these deleted files are not permanently deleted. They simply become invisible to the operating system while waiting to be overwritten. But how will you restore them?
Before the recovery, we recommend that the immediate action you take after losing your data is to stop using the drive. This way, any new data you save, whether from downloading, transferring, etc., won’t overwrite the deleted content. Also, do not empty your Trash so that you can easily bring back the files that haven’t yet been deleted permanently.
Additionally, avoid running disk repair tools or disk utilities until you’ve attempted recovery, as these can modify the drive’s structure. That being said, once you’re ready for data recovery, review the most efficient techniques we have provided in the following sections. The details and step-by-step directions for each are included, so proceed and use the information wisely.


Guide List
Part 1. Check the Trash Bin
The fastest method to recover a deleted file on Mac is simply checking the Trash Bin. When you delete an item using the Move to Trash shortcut key or by choosing the Move to Trash option, macOS does not immediately erase the file. Instead, it moves the file to this specific section, where it remains intact and easily accessible.
After all, the Trash Bin’s primary advantage is its convenience. It is incredibly simple and requires no special tools, settings, or technical experience. You can restore your deleted files within only a few seconds. However, this technique has one major disadvantage. It only works if you have not yet emptied the Trash. If you already have, Restore will no longer be available.
Follow the trouble-free task below to recover deleted files from Mac by checking the Trash Bin:
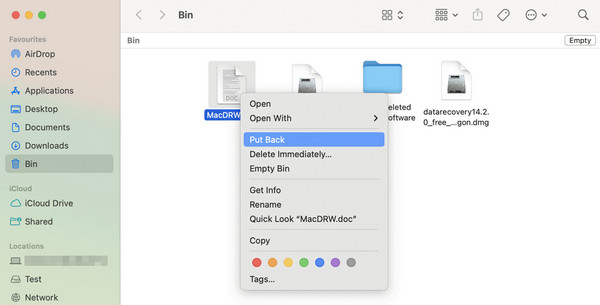
Step 1Tick the Trash icon located at the end of your Mac computer’s Dock to open it. Once opened, look through the list of deleted files and locate the specific item you want to recover.
Step 2After finding, right-click or Control-click the file and select Put Back from the pop-up menu. The file will then instantly return to its original location on the Mac.
Part 2. Use Time Machine Backup
If you have connected an external drive to your Mac and set it up as a backup disk, Time Machine would also be an effective tool to recover your deleted files on Mac. It is Apple’s backup feature that automatically saves hourly, daily, and weekly copies of your files, allowing you to go back in time to retrieve deleted or older versions of your data.
Thus, you will be delighted to know that Time Machine doesn’t require any other software, and you can access it directly on your Mac, provided that you have the external drive you used to save the backup. Another good thing is that the deleted files are still available, even after you have emptied the Trash. But as mentioned, you must have set up the backup drive beforehand.
Follow the user-friendly instructions below to recover deleted Mac files using Time Machine backup:
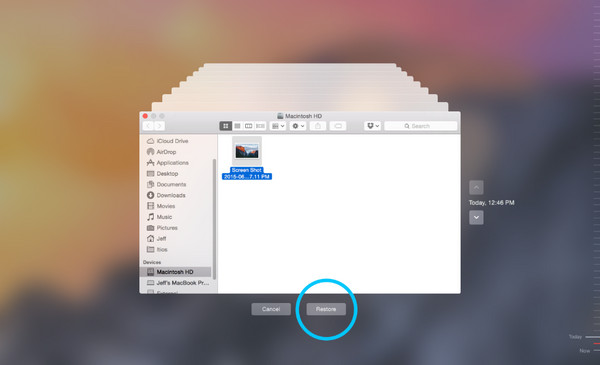
Step 1Link the external drive with your backup to the Mac, then choose the Time Machine symbol from the menu. After that, click Enter Time Machine to display its interface.
Step 2Once displayed, find your desired file by scrolling through the timelines, and when found, select it and opt for the Restore symbol for recovery.
Part 3. Recover from iCloud Drive
Meanwhile, if you sync or store your documents and files in iCloud Drive, you have a second chance to recover deleted items, even without an external drive. To put it simply, Mac moves your files to the Trash after deletion, while iCloud Drive has the Recently Deleted folder. So, if your synced files were erased from your Mac, they will also be deleted from the iCloud Drive, but since the Recently Deleted section is available, you can still be able to restore them from there. Besides, the recovery works on any browser, letting you restore from Mac, iPhone, etc.
Follow the simplified directions below to grasp how to recover deleted files on Mac from iCloud Drive:
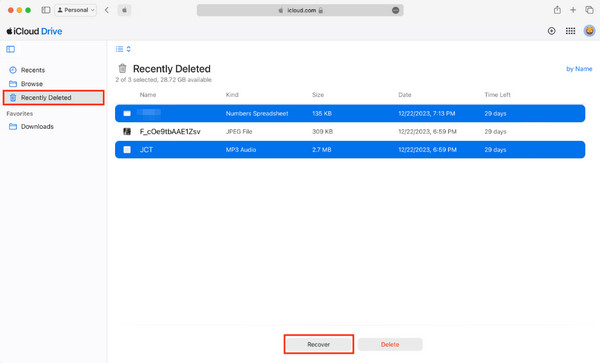
Step 1Open iCloud’s site on your Mac’s trusted browsing program, then log in using your Apple credentials. Once you reach the homepage, select iCloud Drive > Recently Deleted.
Step 2Simply browse through your deleted files within the last 30 days, then select the ones you want to recover. Finally, hit Recover to bring them back to their original iCloud Drive folder.
Sadly, unlike other recovery strategies, it’s not always rainbows and butterflies with iCloud Drive. It has its fair share of drawbacks, and among them is the limited number of days the files remain in Recently Deleted, which is only 30 days. Another thing is that it only works for files that were saved inside iCloud Drive. Other data stored on your Mac’s local storage won’t be protected.
Part 4. Open Disk Utility
Another built-in tool you can consider is Disk Utility, which is designed to manage, repair, and diagnose storage drives connected to your Mac. While it is not a traditional file recovery tool, it can help recover data by fixing the corrupted or damaged drive containing your lost or deleted files. Disk Utility's First Aid feature can repair errors that may be hiding your files from macOS.
Hence, it is particularly useful when your files have disappeared due to a drive becoming corrupted, improperly ejected, or suffering from minor damage. However, it is not designed to recover permanently deleted files that have already been overwritten. If you accidentally emptied the Trash or formatted a drive, Mac data recovery won’t be possible.
Follow the unchallenging navigation below to restore deleted files on Mac by opening Disk Utility:
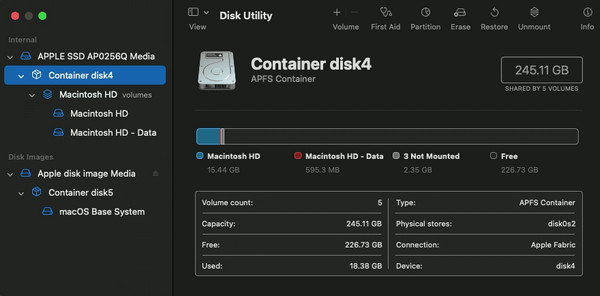
Step 1On your Finder, go to Applications, then Utilities. From the appearing options, select Disk Utility, and once it runs, select the drive that originally contained your files before deletion.
Step 2A First Aid button will be available at the top of the window; hence, click it and pick Run to let Disk Utility scan and repair errors that may be hiding your files from macOS.
Part 5. Try FoneLab Mac Data Retriever
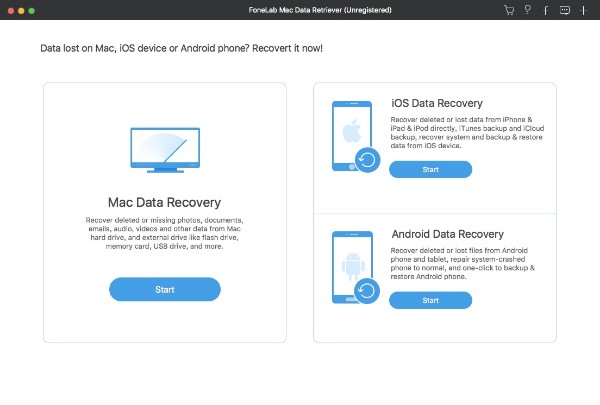
Sometimes, even with the help of Apple’s built-in tools or features, data recovery remains challenging because of unmet requirements. Fortunately for many users, that doesn’t end the hope for recovering deleted files on Mac. Dedicated programs like FoneLab Mac Data Retriever are also effective and very accessible, allowing you to restore files, even without an existing backup, a pre-enabled feature, etc. It can help you detect lost or deleted files with its Scan option.
Meanwhile, FoneLab Mac Data Retriever can scan and recover different data types on your Mac, including documents, images, emails, videos, and more in numerous formats. It also supports various recoverable scenarios, like unintentional deletion, unexpected power, unwanted format, etc. So, feel free to restore your Mac data regardless of your file type and situation. Besides, it doesn’t involve technical procedures, making it perfect for beginners.
FoneLab Data Retriever - recover the lost/deleted data from computer, hard drive, flash drive, memory card, digital camera and more.
- Recover photos, videos, documents and more data with ease.
- Preview data before recovery.
Understand the stress-free steps below to recover deleted files from Mac with FoneLab Mac Data Retriever:
Step 1First, use the Free Download button to acquire FoneLab Mac Data Retriever’s installer and set up the program. Shortly, it will be ready, so run it on your Mac, then go for the Mac Data Recovery box on the left portion of the key interface.
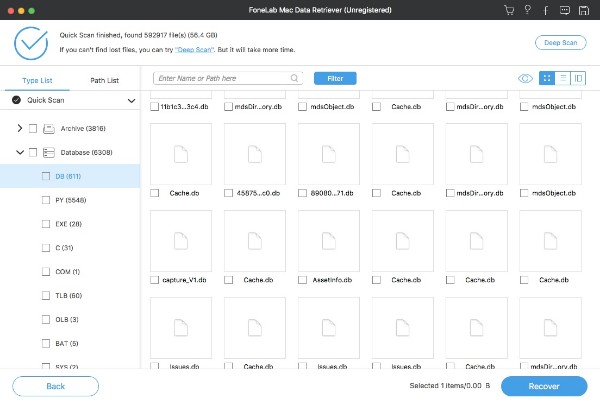
Step 2Next, choose the data types of your files and their drive location accordingly before ticking the Scan tab. This action will show you the deleted content’s folders, so explore them to locate and select the items you will retrieve. Then, select Recover at the bottom right.
Part 6. Comparison of Ways to Recover Deleted Files on Mac
| Methods | Trash Bin | Time Machine | iCloud Drive | Disk Utility | FoneLab Mac Data Retriever |
| Ease of Use | Very Easy | Easy | Very Easy | Moderate | Easy |
| Requires Backup? | No | Yes | No | No | No |
| Maximum Recovery Window | Until Trash is emptied | As far back as your oldest backup | 30 days | N/A | Can recover files from far back |
| Best For | Recently deleted files before emptying Trash | Files backed up regularly to an external drive | Files stored in iCloud Drive and deleted within the last 30 days | Drives with corruption or mounting issues | Permanently deleted, formatted, or lost files with no backup |
Part 7. FAQs about Recovering Deleted Files on Mac
Will recovering files damage my Mac?
No, it won’t. None of these methods will damage your Mac. However, avoid running Disk Utility repeatedly on a failing drive, as it could worsen physical damage.
Does putting files in the Trash still take up storage space?
Yes, it does. Files in the Trash still occupy the same amount of space on your hard drive as they did before deletion.
Whether you use the Trash Bin, Time Machine, iCloud Drive, Disk Utility, or the most recommended tool, FoneLab Mac Data Retriever, acting quickly and stopping drive usage immediately after data loss gives you the best chance of getting your deleted Mac files back.