- Convert AVCHD to MP4
- Convert MP4 to WAV
- Convert MP4 to WebM
- Convert MPG to MP4
- Convert SWF to MP4
- Convert MP4 to OGG
- Convert VOB to MP4
- Convert M3U8 to MP4
- Convert MP4 to MPEG
- Embed Subtitles into MP4
- MP4 Splitters
- Remove Audio from MP4
- Convert 3GP Videos to MP4
- Edit MP4 Files
- Convert AVI to MP4
- Convert MOD to MP4
- Convert MP4 to MKV
- Convert WMA to MP4
- Convert MP4 to WMV
- Empty Trash
- Delete Mail App
- Clear Cache on Mac
- Get More Storage on Mac
- Make Chrome Use Less RAM
- Where is Disk Utility on Mac
- Check History on Mac
- Control + Alt + Delete on Mac
- Check Memory on Mac
- Check History on Mac
- Delete An App on Mac
- Clear Cache Chrome on Mac
- Check Storage on Mac
- Clear Browser Cache on Mac
- Delete Favorite on Mac
- Check RAM on Mac
- Delete Browsing History on Mac
How to Compress A Video on Mac - 3 Easy Methods with Detailed Guides
 Updated by Lisa Ou / Oct 13, 2023 09:15
If you do not want to delete the videos on your Mac but need to free up space, compress them. Compressing files will make the video file size smaller. However, there's a possibility that you lose their quality, depending on the tool that you will use.
In fact, Mac has a built-in compressor. But the built-in tool will only zip your video. Upon unarchiving it, it will bring back its original file size. There are other methods that we will introduce to you for compressing videos without zipping them.
Learn more about how to compress video files on a Mac below. Move on.


Guide List
Part 1. How to Compress A Video on Mac through QuickTime
The first tool that you should consider for compressing videos is QuickTime. It can compress video files on Mac via exporting. You only need to upload the file on QuickTime and choose the lowest resolution you prefer.
Furthermore, there are other things QuickTime can do. This built-in media player can also play a wide range of multimedia files. Some of them are videos, audio, and images. Additionally, you can edit your videos using it. You can cut them, copy them, and paste them. In addition, QuickTime can also record the screen of your Mac.
Anyway, see below on how to compress video files on Mac. Proceed.
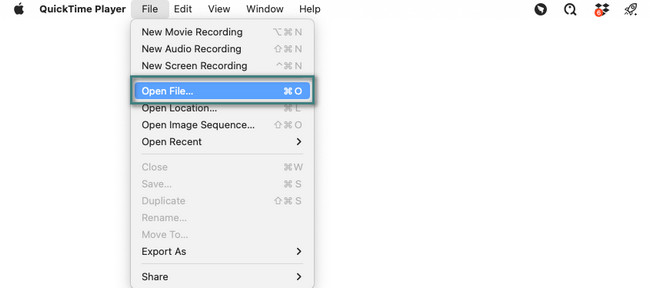
Step 1Launch QuickTime. To do that, you only need to locate it from the Launchpad tool or the Spotlight feature of Mac. Search for the tool's name to make it appear on the screen. Later, choose the File button afterward on the Menu Bar. From the options, click the Open File button. Choose the video to compress.
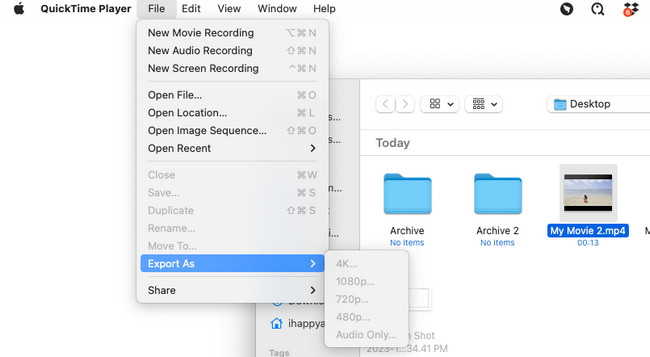
Step 2Click the File button again at the top. Later, put the cursor on the Export As section to see more options. Please choose the resolution that you want on the options. You can select the 4K, 1080p, 720p, 480, and Audio Only resolutions. Select the destination of your video and click the Save button afterward.
Part 2. How to Compress A Video on Mac Utilizing FoneLab Mac Video Converter Ultimate
We have mentioned that compressing videos can lessen the quality of your videos. Why not compress a video on a Mac using FoneLab Video Converter Ultimate? It will not lose the quality of your videos after the compression! It supports famous audio and video formats. It includes MP4, MOV, MKV, MP3, AAC, AC3, and more.
Video Converter Ultimate is the best video and audio converting software which can convert MPG/MPEG to MP4 with fast speed and high output image/sound quality.
- Convert any video/audio like MPG, MP4, MOV, AVI, FLV, MP3, etc.
- Support 1080p/720p HD and 4K UHD video converting.
- Powerful editing features like Trim, Crop, Rotate, Effects, Enhance, 3D and more.
Also, this tool allows you to edit your videos before or after compression. You can collage your videos, add text, effects, and more. In addition, the software can also convert your videos. The good thing about it is that it supports batch conversion. There’s more to discover about FoneLab Video Converter Ultimate. But let’s focus on learning how to compress videos on a Mac using it. See how below.
Step 1Please download Mac FoneLab Video Converter Ultimate first. Go to its official webpage and choose the Free Download button for Mac. You must see the Apple logo. After that, set it up on the Mac by clicking and dragging it to the application folder. Double-click the icon to launch it on your Mac afterward.

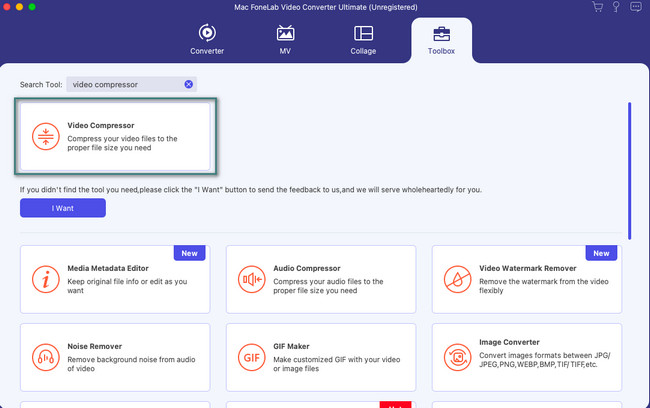
Step 2The software will show you a brief tutorial on how to use it. Also, you will see 4 tabs at the top of the main interface. Please select the Toolbox icon at the top right. Later, you will see 10+ features this software contains, including a compressor.

Step 3Please search for the Video Compressor tool. You can use the Search Tool at the top left corner. Later, click the only result. Upload the video that you want to compress on your Mac afterward.
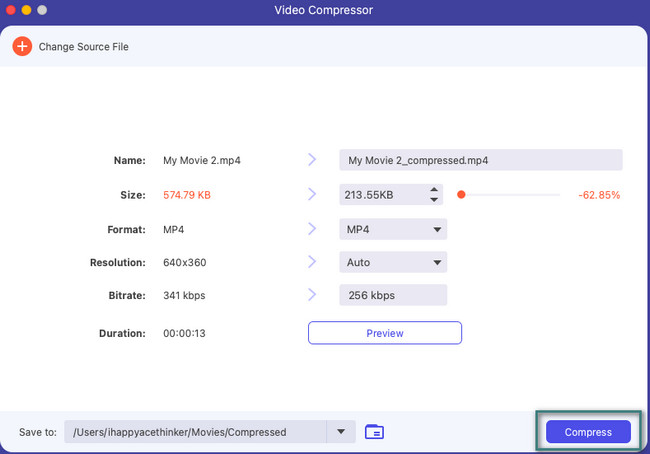
Step 4Choose the customization and settings that you want for your video. After that, click the Compress button to start the process.
Video Converter Ultimate is the best video and audio converting software which can convert MPG/MPEG to MP4 with fast speed and high output image/sound quality.
- Convert any video/audio like MPG, MP4, MOV, AVI, FLV, MP3, etc.
- Support 1080p/720p HD and 4K UHD video converting.
- Powerful editing features like Trim, Crop, Rotate, Effects, Enhance, 3D and more.
Part 3. How to Compress A Video on Mac Online
There are many online tools that you can find on the internet to learn how to compress a video on a Mac. But the most visited and effective one is the FreeConvert Video Compressor. However, the online tool will require you to sign up on their website before accessing its features. Also, the maximum file size you can compress using is 1GB. If your video exceeds that file size, you cannot use the online tool to compress it.
Furthermore, the online tool requires a fast internet connection. If not, the process will last for more than 5 minutes, depending on the size of your video to be compressed. Anyway, see below how to compress files using the online tool. Move on.
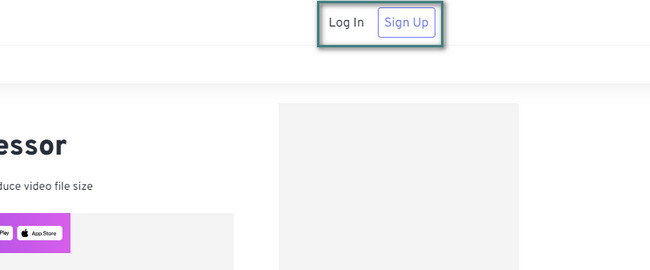
Step 1Please open your web browser and search for the https://www.freeconvert.com/video-compressor website. After that, you will see the main interface of the online tool. Tick the Log In button if you already have an account. If you do not have one, choose the Sign Up button. Follow the onscreen instructions afterward to create or log in to the account.
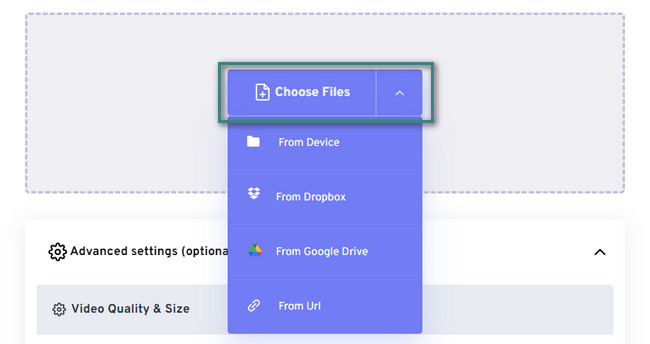
Step 2Put the Cursor on the Choose Files button to see options for video upload. You can choose the From Device, From Dropbox, From Google Drive, or From URL buttons. Later, select the video that you want from the album.
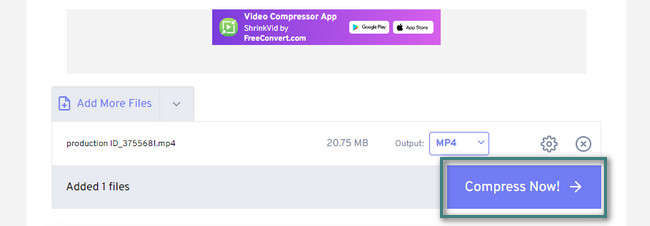
Step 3Choose the output format that you prefer for the video. You can choose the MP4, FLV, MKV, AVI, MOV, and 3GP formats. After that, you can change the settings of the video by clicking the Settings icon. Please click the Compress Now! button to start the compression process. It will last for a few minutes. Please do not interrupt the process for the best results.
Part 4. How to Decompress Videos on Mac via FoneLab Mac Sweep
After compressing your videos, you will surely need a decompressor tool for them. If so, we recommend you our tool, FoneLab Mac Sweep. It can decompress your compressed video files by only using its Unarchiver tool. Also, this tool can free up space on your Mac and more.

With FoneLab Mac Sweep, you will Clear system, email, photo, iTunes junk files to free up space on Mac.
- Manage similar photos and dulplicate files.
- Show you the detailed status of Mac with ease.
- Empty trash bin to get more storage.
Please follow the detailed steps below for decompressing your compressed videos. Move on.
Step 1Download the FoneLab Mac Sweep by clicking the Free Download button. Launch it immediately afterward.

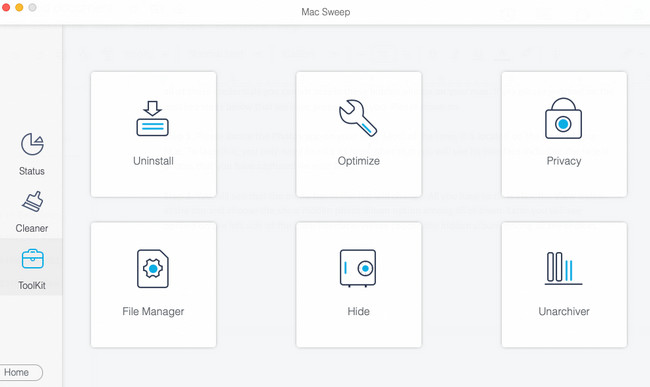
Step 2Choose the Toolkit icon on the third option to see the Unarchiver tool. Please click it to proceed.
Later, drag and drag the compressed videos on the box on the left. Click the Decompress button to start decompressing your videos.
Part 5. FAQs about How to Compress Videos on Mac
1. Why am I unable to compress a folder?
It may be because of the folder permissions on your Mac if you cannot compress a folder. If so, turn off the permissions and lock this folder to be able to compress them. So, locate the folder that you cannot compress. After that, control-click it and choose the Get Info button. On the vertical window, tick the Locked icon at the top, including the Read and Write permission at the bottom.
2. Why is my compressed file the same size on Mac?
This care is a rare incident. This issue is because the file you want to compress has already reached its limit. It means that the file is already highly compressed.
Have you already compressed your files safely? That's good if yes! We are glad that the methods are effective. If you want to know more about this issue, please comment below. We will answer them as soon as we can. Thank you!
With FoneLab Mac Sweep, you will Clear system, email, photo, iTunes junk files to free up space on Mac.
- Manage similar photos and dulplicate files.
- Show you the detailed status of Mac with ease.
- Empty trash bin to get more storage.