iPhone Data Recovery
 iOS System Recovery
 iOS Data Backup & Restore
 iOS Unlocker
 iPhone Password Manager
 Location Changer
 Android Data Recovery
 Broken Android Data Extraction
 Android Data Backup & Restore
 Android Unlocker
 FoneTrans for iOS
 iPhone Data Eraser
 iPhone Cleaner
 HEIC Converter
 HyperTrans
 WhatsApp Transfer for iOS
 Mac Sweep
 Data Retriever
 Mac Data Retriever
 Video Converter Ultimate
 Screen Recorder
 Phone Mirror
- Part 1. Understand the Risk: Backup Before Formatting
- Part 2. File System Options on MacOS (ExFAT vs FAT32 vs APFS)
- Part 3. Format an SD Card Through Disk Utility
- Part 4. Format an SD Card Through Terminal
- Part 5. Recover Data After Formatting SD Card on Mac
- Part 6. FAQs about How to Format SD Card on Mac
 Get Mac Data Recovery Now
Recover the lost/deleted data from computer, hard drive, flash drive, memory card, digital camera and more.
Professional Guide on How to Format SD Card on Mac
 Updated by
 Good day! May I ask how to format SD card on Mac? I found mine on my older phone, which I haven't used in the last few months. I want to format it to start fresh and use it later, but I have no idea how to perform the process on my Mac. Do I need to use a connector or install something? Please let me know the proper methods to ensure my SD card is formatted safely. Thanks!
Formatting an SD card on a Mac is a straightforward task, yet it also comes with important considerations. Many users, like the one above, find themselves with an SD card that needs formatting to start fresh, fix an issue, or free space, etc. Whether you use the card for a phone, camera, or another device, formatting on a Mac is advantageous, as it offers a couple of built-in tools to get the job done. That said, explore the provided format methods below to wipe your SD card safely, and check out the recovery tool if needed.

Guide List
- Part 1. Understand the Risk: Backup Before Formatting
- Part 2. File System Options on MacOS (ExFAT vs FAT32 vs APFS)
- Part 3. Format an SD Card Through Disk Utility
- Part 4. Format an SD Card Through Terminal
- Part 5. Recover Data After Formatting SD Card on Mac
- Part 6. FAQs about How to Format SD Card on Mac
Part 1. Understand the Risk: Backup Before Formatting
Learning how to format SD card on Mac and performing it is a powerful action, but it comes with a significant catch: as you probably already know, it erases all data stored on the card. So, you must expect that your photos, videos, documents, and everything else will be gone for good once the process is completed.
Now, many users make the mistake of skipping the backup step, thinking their files are safe elsewhere, only to realize later that they lost something important. Do not let this happen to you. Before you even open any formatting tool, take a moment to check and back up the important files on your SD card. Formatting is not a reversible action in most cases, so ensure your precious files—especially those on an older SD card—are secured before relying on any formatting method.
Part 2. File System Options on MacOS (ExFAT vs FAT32 vs APFS)
Once you’re ready to format your SD card, it’s also important to understand the file system options on macOS. Choosing the right one is key, as it determines how your data will be stored and which devices will be able to read the card. Otherwise, it may not work as expected.
macOS provides 3 main options, which are:
- • FAT32 – Works with almost every device, from old cameras to game consoles. However, it cannot save files larger than 4GB.
- • ExFAT - A modern upgrade. It has no file size limit and works on both Mac and Windows. It is the best all-around choice for most SD cards, especially those over 32GB.
- • APFS - Apple's own system, offering features like encryption, but it only works well with Apple devices. Thus, it's not ideal if you plan to use the card with other devices.
Part 3. Format an SD Card Through Disk Utility
Disk Utility is Mac’s built-in tool for managing drives and storage devices. It is the most user-friendly way to format your SD card, as it doesn't require advanced steps like typing commands and handling other technicalities. It allows you to erase your SD card and choose a new file system with just a few clicks. It also gives you a clear view of your connected drives, so you can see exactly what you are working with.
Follow the operation below to learn how to format SD card on Mac through Disk Utility:
Step 1First, open Disk Utility from the Applications > Utilities section. In the window that appears, select your SD card from the sidebar and click the Erase option at the top.
Step 2Next, choose a name for your card and pick your desired file system, whether ExFAT, FAT32, or APFS. Finally, proceed with the Erase option to format the card.
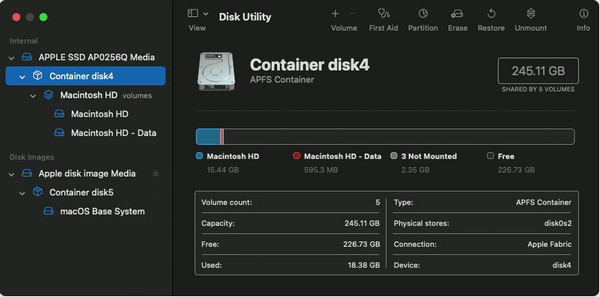
However, because it is so easy to use, you must be careful not to select the wrong drive. Disk Utility shows all connected storage devices, including your Mac's internal hard drive. Double-checking is critical since getting it wrong could cost you your Mac’s data.
Part 4. Format an SD Card Through Terminal
Terminal is a powerful command-line tool built into Mac computers. If you have advanced knowledge and prefer typing commands, it is a suitable way to format your SD card. It is especially useful when Disk Utility fails or when you need to perform a more specific type of format, since Terminal gives you more control if you are well-versed with the right commands. However, it also requires extra caution. One wrong command can erase the wrong drive.
Follow the directions below to understand how to format an SD card on Mac using Terminal:
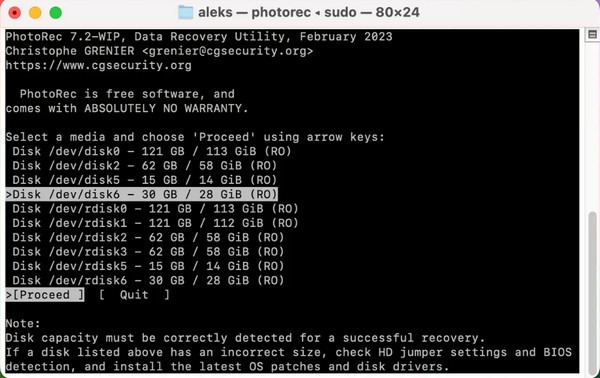
Step 1Open Terminal through Applications > Utilities, then enter diskutil list on the command-line interface. After that, select your SD card from the drives list.
Step 2Following that, type sudo diskutil eraseDisk FAT32 CARDNAME /dev/diskX first, then replace FAT32 with your preferred format, CARDNAME with your desired name, and diskX with your SD card. When ready, hit Enter, then your password to format it.
Part 5. Recover Data After Formatting SD Card on Mac
What if you proceeded with formatting and only then realized you had lost an important file? Sometimes, data loss is inevitable, no matter how prepared you are to format the SD card. Luckily, data recovery is possible, especially with a competent tool like FoneLab Mac Data Retriever. It lets you restore deleted files from formatting, accidental deletion, etc.
Don’t worry if your lost files are from an SD card or other internal or external drives. This program is designed to support various recoverable drives. You only need to connect them to your computer to use FoneLab Mac Data Retriever for recovery. It only requires basic knowledge since its intuitive features and design are enough to help you navigate the program with ease.
FoneLab Data Retriever - recover the lost/deleted data from computer, hard drive, flash drive, memory card, digital camera and more.
- Recover photos, videos, documents and more data with ease.
- Preview data before recovery.
Follow the easy guide below to recover SD card data on Mac with FoneLab Mac Data Retriever:
Step 1Download FoneLab Mac Data Retriever using the Free Download tab. When the file is ready, let it proceed to your Applications folder and be installed. Then, you can launch the Mac recovery tool on the computer and ensure your SD card is attached to select it on the interface.
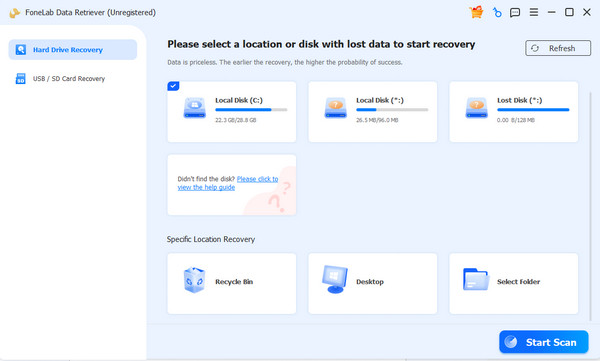
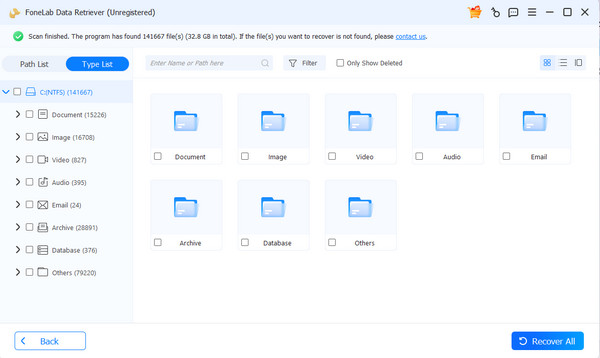
Step 2Once selected, move on by clicking Start Scan, and let the program scan your formatted SD card for a few minutes. Afterward, data type folders will appear.. Explore them to find your desired files, then mark the items. Finally, hit Recover All to restore them.
Part 6. FAQs about How to Format SD Card on Mac
Can I format an SD card on my Mac without losing data?
No, you can’t. Unfortunately, formatting always deletes data. So, if you only plan to format your SD card to fix a problem, make sure to save a backup instead.
Why is my SD card not showing up on my Mac?
Your card may not be properly inserted, or the reader may be faulty. Try reinserting it or use a different card reader.
Whichever formatting method you use, formatting an SD card on a Mac is simple. However, understanding your file system options and backing up your data beforehand are the keys to a safe and successful experience. Don’t worry, though. FoneLab Mac Data Retriever is still there if anything goes wrong.