
 iPhone Data Recovery
 iOS System Recovery
 iOS Data Backup & Restore
 iOS Unlocker
 iPhone Password Manager
 Location Changer
 Android Data Recovery
 Broken Android Data Extraction
 Android Data Backup & Restore
 Android Unlocker
 FoneTrans for iOS
 iPhone Data Eraser
 iPhone Cleaner
 HEIC Converter
 HyperTrans
 WhatsApp Transfer for iOS
 Mac Sweep
 Data Retriever
 Mac Data Retriever
 Video Converter Ultimate
 Screen Recorder
 Phone Mirror
 Recover PC Data Now
Recover the lost/deleted data from computer, hard drive, flash drive, memory card, digital camera and more.
Renowned Guide on How to Fix a Slow Computer Correctly
 Updated by
Why is my computer so slow? I have been using it for a few years now, and lately, everything takes a long time to open. Even simple tasks like browsing or checking my email take too much time. I use my computer for work, and this problem is already affecting my productivity. For anyone knowledgeable can help, please assist me with this slow performance issue.
A slow computer is a common problem that many users face over time. It can be caused by several factors, such as too many startup programs, a full hard drive, outdated software, or even malware. Thankfully, you don’t need to buy a new PC, since these issues can be resolved with the right approach. This article will list the renowned fixes, so kindly continue reading.

Guide List
Part 1. How to Fix a Slow Windows PC
Fixing a slow computer starts with identifying the root cause to find the most suitable fix. Then you can address it using the appropriate procedures, which are discussed below for a Windows PC. The four steps cover the most common issues; follow them accordingly.
Step 1: Uncover Resource Hogs via Task Manager
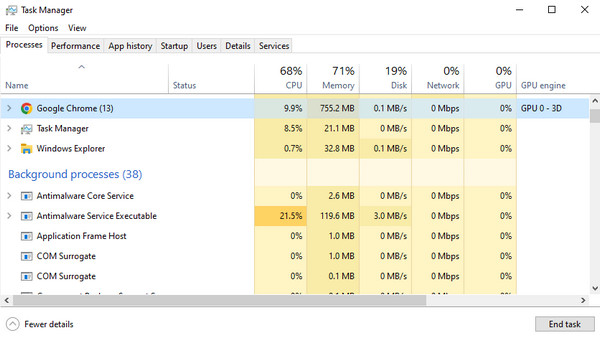
The first step is to find out what is actually slowing down your PC, and Task Manager can help you do exactly that. Simply open it by pressing Ctrl + Shift + Esc, then ensure you are in the Processes section. It will let you see which programs are using the most CPU, memory, or disk. Examine them to see if there are programs you don’t use or are unnecessary. If so, click the specific process and select End task to free up resources and speed up the computer.
Step 2: Tame Startup Apps & Background Services
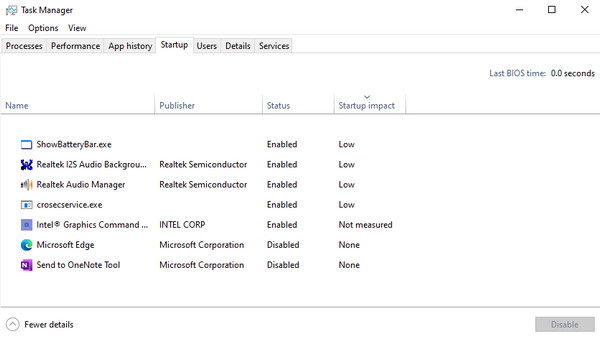
If your computer immediately slows down, even after you just turned it on, the culprits behind the PC’s poor performance could be startup apps and background services. These processes run automatically, slowing down boot time and overall performance. The good news is that this can also be handled in Task Manager. Go to the Startup tab at the top. When the list of programs appears, select the unnecessary or unused one, then click Disable. This way, they will stop launching at startup. Just be careful not to disable important system apps.
Step 3: Reclaim Disk Space & Run Storage Sense
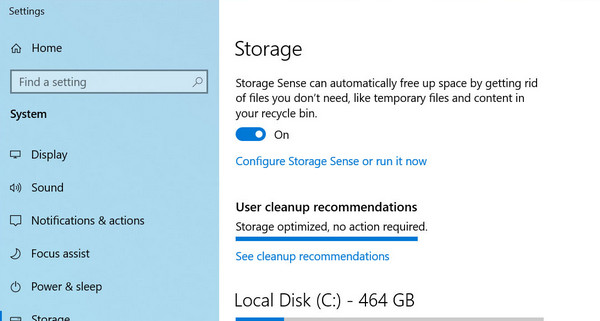
Too much data is also a leading cause of a slow Windows PC. So, freeing up space is important to speed up computer. You just have to open Settings > System. From the left column, select Storage and turn on the Storage Sense feature. It will automatically free up space, erasing data you don’t need, such as temp files and your Recycle Bin contents. Also, you can click Cleanup recommendations to see large or unused files that can be safely erased.
Step 4: Scan for Malware & Bloatware
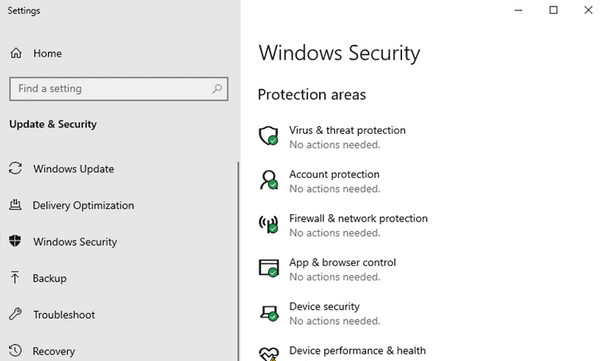
Aside from processes, startups, and data, your PC can also run slowly due to malware and bloatware. In this case, head to Settings and choose Privacy & security > Windows Security. Then click Virus & threat protection to run a full scan and fix malware. Meanwhile, to remove bloatware, tap Apps on the Settings home screen and uninstall any programs you don’t need.
Part 2. How to Fix a Slow Mac
If you use a Mac computer, the steps below are suitable approaches to follow. They use macOS-specific tools, but the approach is similar to that on Windows.
Step 1: Monitor System Resources via Activity Monitor
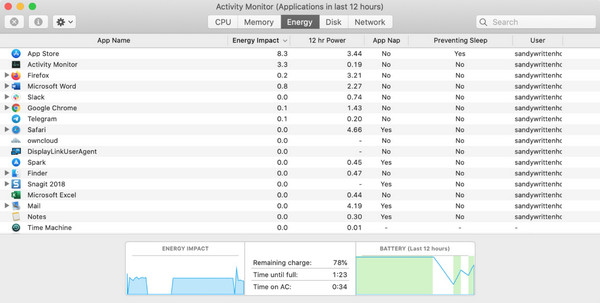
First, check what is using your Mac's resources, like the Windows Task Manager, but this time, the program is Activity Monitor. Just go to your Applications > Utilities, then select Activity Monitor. Click the CPU, Memory, or Energy tabs to see which apps are using the most resources, and when you spot something you don’t use, select it and click the X button.
Step 2: Manage Login Items & Background Extensions
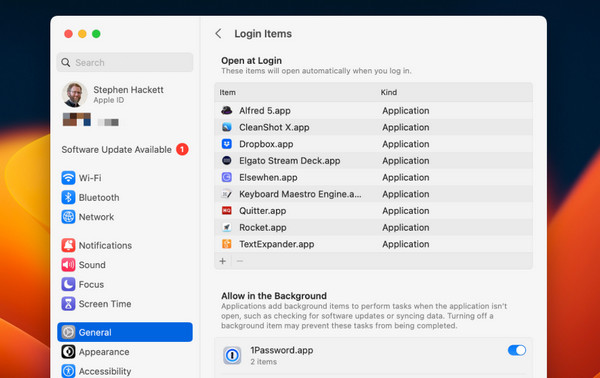
As mentioned, startup programs—also known as login items and background extensions on Mac—can slow down the computer's performance. You can handle this by opening System Settings, then choosing General > Login Items. From there, feel free to remove any apps you don’t need at startup by selecting them and clicking the minus (-) button.
Step 3: Optimize Storage & Clear System Caches
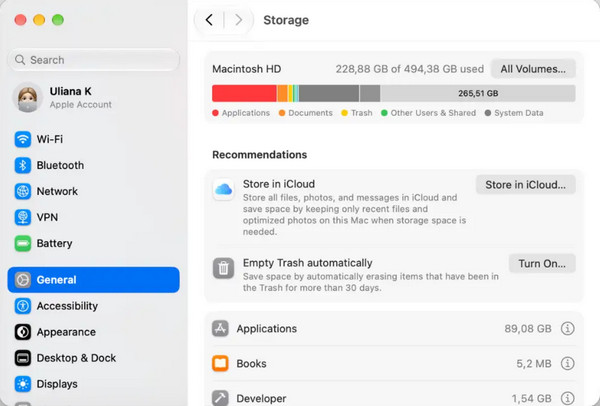
For freeing up space, head to the System Settings window and click General > Storage. Review the recommendations, such as emptying the trash or removing large files, and free up space accordingly. Meanwhile, open Finder, then press Shift + Command + G to enter the ~/Library/Caches directory through the Go to folder menu. Then, clear the caches from there.
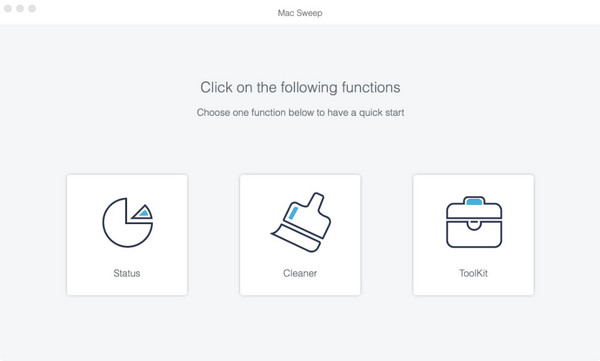
You can also optimize your storage with FoneLab Mac Sweep. It can scan your system for hidden junk files like caches, logs, etc., and let you remove them to free up space and improve performance. Beyond that, it will also help you detect and delete duplicate photos or large old files, uninstall stubborn applications, and even monitor your Mac's CPU and memory usage. All you must do is click Free Download and install the program with the downloaded file. Afterward, choose a cleaning mode, run a scan, then erase all unnecessary data.
Step 4: Reset SMC and NVRAM/PRAM (Intel Macs) / Restart Management (Apple Silicon)
On the other hand, sometimes, hardware settings can cause slowdowns on a macOS computer, but no worries. The solution is to reset or restart, depending on whether you use Intel Macs or Apple Silicon Macs—both are easy to manage.
For Intel Macs: Reset the SMC and NVRAM/PRAM using specific key combinations at startup. You can hold the Option + Command + P + R keys for about 20 seconds to reset NVRAM, or use the SMC reset keys specific to your model.
For Apple Silicon Macs: Simply shutting down and restarting is enough, as the system manages these settings automatically.
Part 3. Universal Hardware Upgrades for Both Windows & Mac
If software solutions are not enough, it may be time for a hardware upgrade to fix a slow computer, whether you use Windows or Mac. For instance, you can switch to an SSD to improve boot times and responsiveness. Or you may add more RAM, which helps when running multiple programs. Apart from that, cleaning dust from fans and vents prevents overheating, which may have also caused your computer’s slow performance.
Part 4. How to Recover Data After Fixing Your Computer with FoneLab Data Retriever
After fixing your computer, you might discover that some important files were lost due to the issue or during the resolution process. This is the common risk when facing issues on a computer. Fortunately, FoneLab Data Retriever exists to recover data on Windows and Mac.
FoneLab Data Retriever - recover the lost/deleted data from computer, hard drive, flash drive, memory card, digital camera and more.
- Recover photos, videos, documents and more data with ease.
- Preview data before recovery.
This tool is the best recommendation for deleted computer data recovery because it offers an efficient yet user-friendly way to recover various files, such as images, videos, and documents. It can also be used in various scenarios, such as corruption, accidental deletion, or formatting.
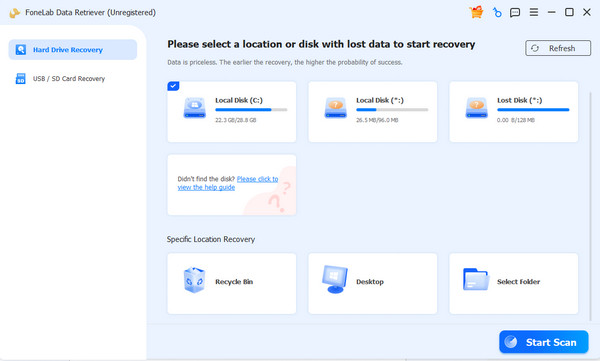
Step 1Save the installer file with the Free Download tab to install FoneLab Data Retriever on your Windows or macOS. When the program is ready, launch it and click the drive containing your important data from the available options. Then, let it scan the files by selecting Start Scan.
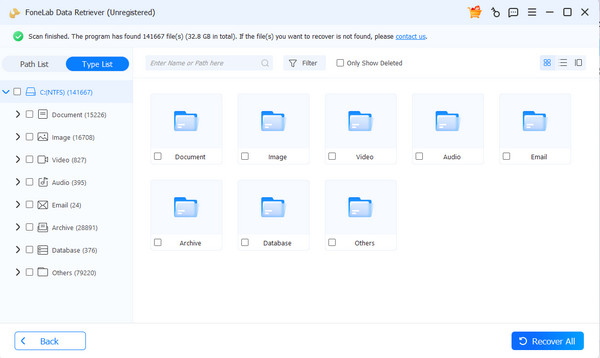
Step 2Once the program detects your lost or deleted data, open the folders and explore them to locate the items you need. Afterward, check their small boxes, then click Recover All.
Part 5. FAQs about How to Fix a Slow Computer
Should I clean up my computer often?
It is a good idea to do a basic cleanup every few months. This includes removing unused files, checking startup apps, and running a virus scan to keep your computer running smoothly.
How do I know if malware is slowing down my PC?
Signs include sudden slowdowns, pop-up ads, and unknown programs appearing on your system. Running a full scan with Windows Security will help.
A slow computer does not always mean it is time for a new one, as simple fixes can often bring it back to its normal speed. Besides, data loss is no longer a concern with FoneLab Data Retriever.


