
 iPhone Data Recovery
 iOS System Recovery
 iOS Data Backup & Restore
 iOS Unlocker
 iPhone Password Manager
 Location Changer
 Android Data Recovery
 Broken Android Data Extraction
 Android Data Backup & Restore
 Android Unlocker
 FoneTrans for iOS
 iPhone Data Eraser
 iPhone Cleaner
 HEIC Converter
 HyperTrans
 WhatsApp Transfer for iOS
 Mac Sweep
 Data Retriever
 Mac Data Retriever
 Video Converter Ultimate
 Screen Recorder
 Phone Mirror
 Get Mac Data Recovery Now
Recover the lost/deleted data from computer, hard drive, flash drive, memory card, digital camera and more.
Top 3 Antivirus for Mac: Learn with a Detailed Guide
 Updated by
Looking for the premier antivirus for Mac? With so many options available, it can be hard to know which one best protects the computer. Some users want robust antivirus and malware protection, while others prefer a lightweight option that won't affect their Mac's performance. Regardless, the right choice depends on what best fits your needs or situation.
That’s why, in this article, we’ve prepared the 3 leading antivirus options for Mac. Dive in for a deeper understanding of what this type of protection actually means for your computer, and the top recommendations you can choose from. Each has its key features, strengths, and more. Further information will also be revealed, letting you protect your Mac and even important files if something unfortunate happens. Continue below to keep learning.

Guide List
Part 1. The Truth About Mac Security
Before anything else, you must be wondering: why do you need antivirus software for Mac? To start, some people believe that Macs don't need antivirus software, but don’t be complacent, as that’s not entirely true. Although macOS has some built-in protections, it is not immune to malware, phishing, or other online threats. Adware, ransomware, and malicious links can still find their way onto your computer, especially if you download files from unfamiliar sources or click on suspicious links, even occasionally. So, adding an extra layer of protection, such as antivirus software, will help keep your Mac safe.
Part 2. Top Recommendations for Antivirus for Mac
After understanding the truth about Mac’s security, let’s look at the top 3 antivirus programs below. Get to know what they are all about and choose which fits your macOS best.
Top 1. Norton 360
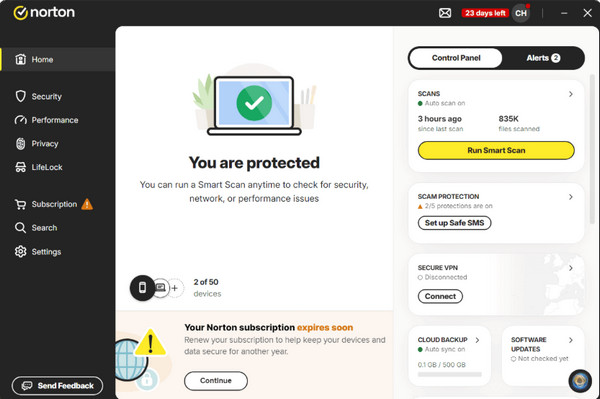
At the top of our list is Norton 360. It is a well-known, useful security solution for macOS that goes beyond basic antivirus. It offers fast scanning speeds and strong malware blocking, and it includes extra features such as a VPN, password manager, file cleanup, and more, making its wealth of features its biggest advantage. This tool suits users who want to address multiple concerns, all in a single subscription. However, some reviews note that it occasionally misses certain malware and can’t scan files within .zip archives.
Follow the steps below to learn about the best Mac antivirus, Norton 360:
Step 1Visit Norton's official website, sign in to a Norton account, then download the installation file for Mac. Afterward, open the file to launch and complete the installation.
Step 2Open the program when done and click Security in the left pane. Next, select Open in the “Scans” box, then in the Preset scans tab, click Start, depending on your preferred scanning type, whether Quick Scan or Full Scan. The software will then detect and handle the virus issue.
Top 2. Avast One
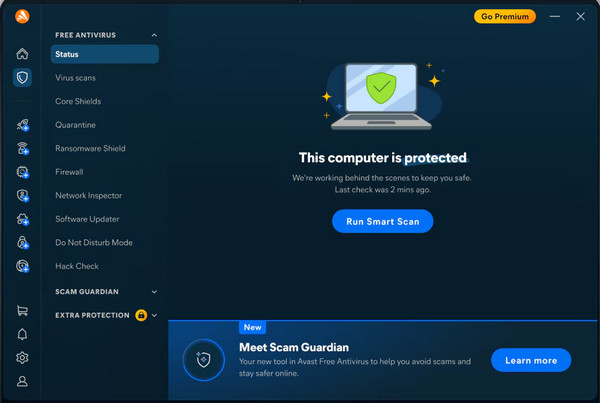
Avast One is highly praised for its phishing and email protection. Its Email Guard, Web Guard, and Real Site features work together to identify most phishing emails and fraud websites, helping you avoid those that may contain viruses. It also includes a basic VPN and performs well in malware detection. Just note that the interface often prompts users to upgrade, pushing subscription options that aren't easy to navigate, which can be a bother.
Follow the steps below to learn about the reliable Mac antivirus software, Avast One:
Step 1Head to Avast One’s website to download its setup file for Mac. After that, open the downloaded file to install the software, then allow the permissions until it opens.
Step 2On the interface, select Free Antivirus in the left menu, and select the scan type you want to run, whether Smart Scan or Deep Scan. Finally, click Scan to scan your Mac for threats.
Top 3. Bitdefender
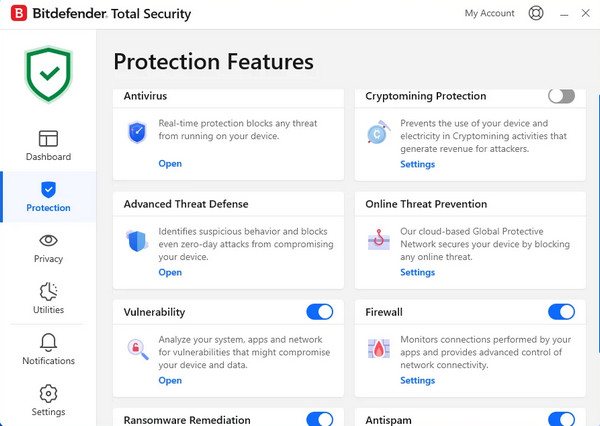
Bitdefender is also one of the most effective antivirus programs you can trust, excelling at malware detection with fast scanning speeds and low system resource usage. Its Safe Files feature provides ransomware protection by default for important folders such as your Desktop, Documents, and Downloads, preventing unauthorized programs from modifying files. However, its main drawback is inconsistent web protection performance, with unreliable blocking across browsers, and it lacks scheduled scanning.
Follow the instructions below to discover one of the best antivirus programs for Mac, Bitdefender:
Step 1Download the Bitdefender installation file from its website, then double-click it to start installing the tool on your Mac. Follow the prompts and permissions, then open it when done.
Step 2In the left panel of the interface, choose Protection, followed by Open in the Antivirus tab. Then, on the next interface, pick Quick Scan or System Scan to detect threats.
Part 3. Comparative Performance Table
| Software | Norton 360 | Avast One | Bitdefender |
| Best For | Users who want an all-in-one antivirus | Users who prioritize phishing and email protection | Users who want lightweight, strong malware detection |
| Ease of Use | Easy | Moderate (frequent upgrade prompts) | Easy |
| Malware Detection | Strong | Strong | Excellent |
| VPN Included | Yes | Yes (minimal) | No |
| Email / Web Guard | Basic | Yes (Email Guard, Web Guard, Real Site) | No |
| File Cleanup | Yes | No | No |
Part 4. How to Recover Lost Files with FoneLab Data Retriever
Have you recently faced issues on your macOS due to viruses or malware? If so, it may have caused you problems, such as data loss, but don’t worry. Mac data recovery is possible with FoneLab Mac Data Retriever. No matter what crisis led you to lose your important files, whether it was malware, a virus attack, corruption, accidental deletion, formatting, a failed update, disk damage, CPU failure, or an emptied Trash bin, this program will help you bring them back with ease.
FoneLab Data Retriever - recover the lost/deleted data from computer, hard drive, flash drive, memory card, digital camera and more.
- Recover photos, videos, documents and more data with ease.
- Preview data before recovery.
FoneLab Mac Data Retriever is an acclaimed data recovery tool that supports numerous formats and data types. So, don’t hesitate to bring back your documents, images, audio files, videos, and more with the help of its user-friendly interface and features. It offers useful functions, such as Advanced Search & Filter, which lets you find data quickly, and Secure Preview, which ensures you click the right items. All of these help you recover deleted Mac files with ease.
Follow the steps below to recover your lost files after encountering issues, like viruses, using FoneLab Mac Data Retriever:
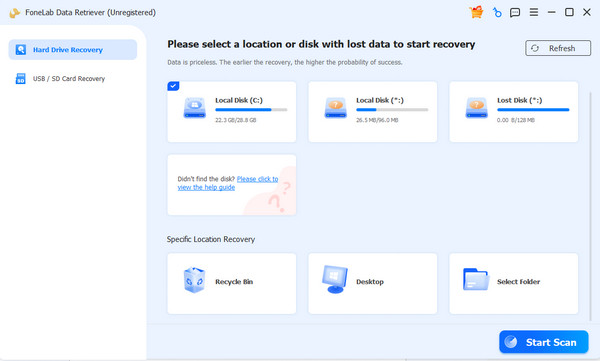
Step 1Get FoneLab Mac Data Retriever’s setup file through the Free Download button, then use it for installation. The process won’t take long, allowing you to start it shortly afterward. Once you’re on the interface, choose your Mac drive, then click the Start Scan tab below.
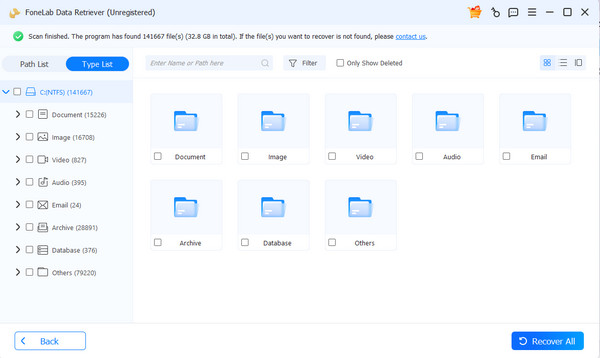
Step 2When the tool finishes scanning your Mac’s deleted data, it’s time to explore the results by opening the folders on the following screen. Simply find the items you wish to recover, select their checkboxes, and then click Recover All.
Part 5. FAQs about Best Antivirus for Mac
Do Macs really need antivirus software?
Yes, they do. Macs can still get malware, adware, and phishing attacks, so adding an antivirus will help provide extra protection.
Can antivirus software recover files lost due to malware?
Unfortunately, it can’t. Antivirus removes threats but doesn't recover lost files. Instead, use data recovery software such as FoneLab Mac Data Retriever for that concern.
Choose the right virus protection for Mac with the leading recommendations and guidelines in this post. Even if you lose files, it’s not a problem because FoneLab Mac Data Retriever is also available.


