
 iPhone Data Recovery
 iOS System Recovery
 iOS Data Backup & Restore
 iOS Unlocker
 iPhone Password Manager
 Location Changer
 Android Data Recovery
 Broken Android Data Extraction
 Android Data Backup & Restore
 Android Unlocker
 FoneTrans for iOS
 iPhone Data Eraser
 iPhone Cleaner
 HEIC Converter
 HyperTrans
 WhatsApp Transfer for iOS
 Mac Sweep
 Data Retriever
 Mac Data Retriever
 Video Converter Ultimate
 Screen Recorder
 Phone Mirror
 Recover PC Data Now
Recover the lost/deleted data from computer, hard drive, flash drive, memory card, digital camera and more.
[4 Ways] How to Recover Deleted WAV Files on Windows and Mac
 Updated by Valyn Hua / October 10, 2026 10:00
A deleted WAV file is a painful thing to lose — a recording session, a voice memo, a sound effect library, or an interview you can never re-record. The reassuring part is that WAV is an uncompressed standard audio format, which makes it one of the easier audio types for recovery tools to find and rebuild.
One honest caveat before we start: this recovers exported WAV and MP3 audio files. If your "recording" is still a project inside an editor like Audacity, the raw audio may be split into the app's own data folder or a proprietary session file rather than a standalone WAV — that kind of project file is not always something a recovery scan can rebuild. Exported WAVs, though, are usually fine.
Stop writing to the drive now. Every new save can overwrite the sectors holding your deleted audio. Then work through the four methods below, from the free built-in checks to the disk scan.

Guide List
Part 1. Check the Recycle Bin / Trash
Most "missing" WAV files are sitting in the bin. A drag-and-drop delete or an accidental tap leaves them recoverable in one click, on both Windows and Mac.
Restore from the bin
Step 1Open the Recycle Bin on Windows or Trash on Mac.
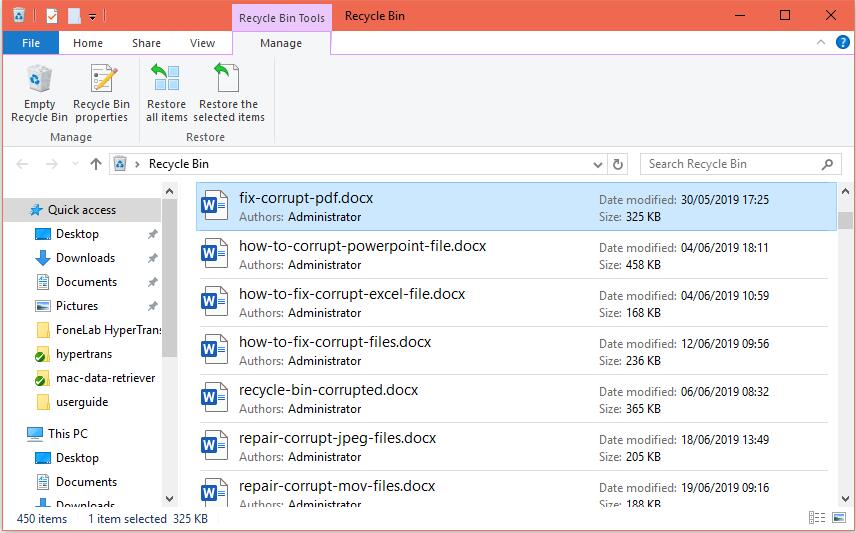
Step 2Sort by Date deleted or search for .wav. Right-click the file and choose Restore.
Step 3If you already emptied the bin, the file table has forgotten the path — move to the next methods.
Audio files often have cryptic names like "Recording 2026.wav", so sort by deletion time and file size rather than hunting by name. On Mac, Trash keeps the original filename, which makes a quick search enough.
Part 2. Restore with File History or Time Machine
If the bin was emptied, your system's version history is the next free safety net. This works best if you had backup turned on.
Roll back to an older audio copy
Step 1On Windows, right-click the folder that held the WAVs and choose Restore previous versions, or open Control Panel > File History.
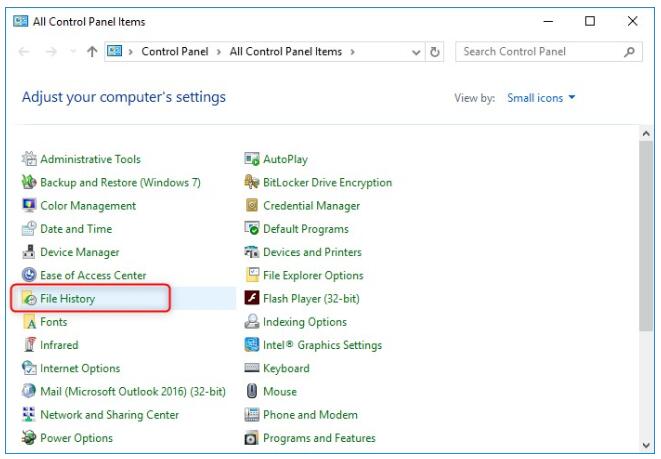
Step 2Browse to a version dated before the deletion and restore the audio folder.
Step 3On Mac, enter Time Machine from the menu bar and restore the audio folder from an earlier snapshot.
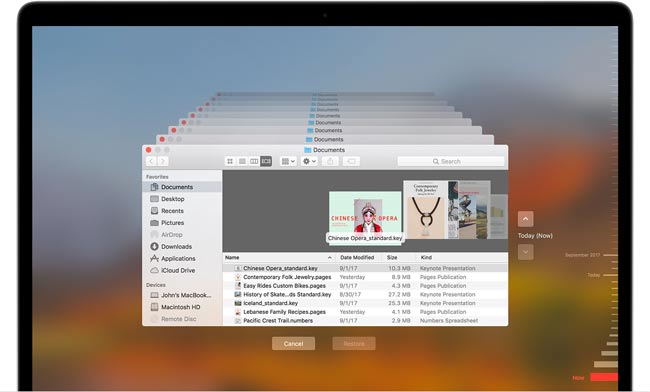
If File History or Time Machine was off, there is no system copy to restore. That is when the disk scan earns its place.
Part 3. Recover Deleted WAV Files with FoneLab Data Retriever
With no bin and no backup, the last option is to scan the disk for the audio file itself. FoneLab Data Retriever runs on Windows and Mac and looks for deleted audio files including WAV and MP3. After you choose the drive and start, it runs an automatic deep scan — there is no separate Deep Scan button. Remember the caveat: it recovers exported audio files, not proprietary editing-project sessions.
FoneLab Data Retriever - recover the lost/deleted data from computer, hard drive, flash drive, memory card, digital camera and more.
- Recover photos, videos, documents and more data with ease.
- Preview data before recovery.
Select Audio and run the scan
Step 1Launch FoneLab Data Retriever, tick Audio, and pick the drive where the WAVs were stored.
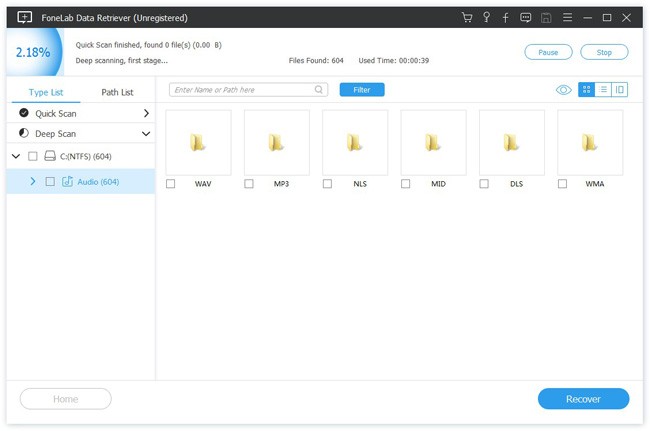
Step 2Click Start Scan. It runs an automatic deep scan and groups the recoverable audio files.

Step 3Open the Audio category, look for .wav, and preview to confirm the recording before recovering. Use Filter by date or size.
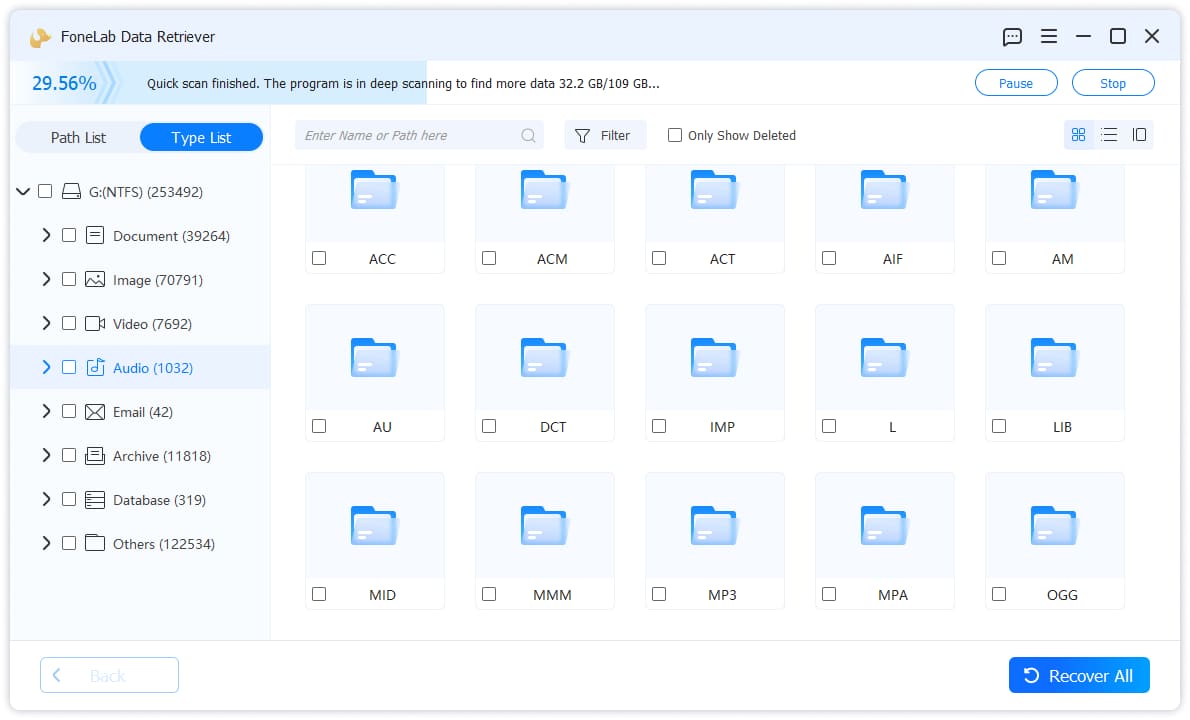
Step 4Tick the WAVs you want and click Recover, saving to a different drive.
Because WAV filenames are usually lost after deletion, identify files by the preview and the recording date rather than the name. If the scan finds nothing, the sectors were likely overwritten, or the audio was never exported as a WAV in the first place. The same tool helps with recovering audio files from a hard drive.
FoneLab Data Retriever - recover the lost/deleted data from computer, hard drive, flash drive, memory card, digital camera and more.
- Recover photos, videos, documents and more data with ease.
- Preview data before recovery.
Part 4. Quick Comparison of the Methods
| Method | Free? | Works after Empty Bin | Automatic Deep Scan | Best For |
|---|---|---|---|---|
| Recycle Bin / Trash | Yes | No | No | Recently deleted WAV |
| File History / Time Machine | Yes | If backup was on | No | Backed-up audio folder |
| FoneLab Data Retriever | Free to preview | Yes | Yes (automatic deep scan) | Exported WAV with no backup |
Part 5. Tips to Protect Your Audio
- Export a WAV bounce at the end of every session so your masters are always plain files.
- Keep File History (Windows) or Time Machine (Mac) running to a separate drive.
- After recovery, open the WAV to confirm it plays before trusting it with a project.
- Never recover audio back onto the same drive you scanned.
- Save finished recordings to both an internal and an external drive.
- Avoid recording new audio to the same disk while you attempt a recovery.
Part 6. Frequently Asked Questions
Can it recover WAV project files from an audio editor?
It recovers exported WAV and MP3 audio files. Proprietary project or session files may not appear in the scan, so export a WAV copy when you finish a recording.
Is there a separate Deep Scan button?
No. Clicking Start Scan already runs the automatic deep scan in FoneLab Data Retriever; there is no extra Deep Scan control.
Does it work on Mac?
Yes. There is a Mac build that scans internal and external drives and recovers audio files with an automatic deep scan and a preview before recovery.
Why is the recovered WAV noisy or truncated?
If the sectors were partly overwritten, the file can be damaged. Recover what opens cleanly, and lean on backups for the rest, since audio cannot be rebuilt from fragments.
To wrap up: check the Recycle Bin or Trash first, restore a previous version with File History or Time Machine, and if the WAV is truly gone, FoneLab Data Retriever scans the drive automatically and previews your audio before recovery. Just remember it brings back exported WAV and MP3 files, not proprietary editing-project sessions.
The habit that matters: export a WAV bounce at the end of every session. That single step keeps your masters as plain, recoverable files instead of locked inside an app's database, so the next accidental delete ends in a restore rather than a rescue.
Check your recording app's own folder first
Before you scan the whole disk, remember that recording and editing apps keep drafts in their own hidden folders. A voice memo editor, a DAW, or an online recorder often stores an automatic copy where you never look. On Windows, paste %appdata% into the Explorer address bar and browse the app's folder; on Mac, open ~/Library/Containers. An autosaved draft there opens perfectly, and it beats a long disk scan.
If the WAV was never exported but the app still launches, open it and look for a recent-sessions list or a backup directory. Many editors snapshot work every few minutes, and that snapshot is exactly the raw audio you think you lost. Recover it from the app's own UI first.
Why some WAVs will not reappear
A scan finds what was written as a standalone file. If your audio only existed inside a project file, the individual WAVs may never have been created, and no recovery tool can assemble them. That is the honest limit: this method rescues exported recordings, not unsaved work locked inside an editor's database. Exporting a WAV bounce is the habit that closes this gap for next time.
When a recovered WAV opens but sounds wrong, check whether the sample rate or bit depth got mismatched on recovery. Re-import it into your editor and let the app convert the rate rather than playing it raw. If the file is genuinely truncated at the start or end, the sectors were overwritten, and the missing audio cannot be reconstructed.
FoneLab Data Retriever - recover the lost/deleted data from computer, hard drive, flash drive, memory card, digital camera and more.
- Recover photos, videos, documents and more data with ease.
- Preview data before recovery.
Audio that vanished but was not deleted
Before a full scan, rule out the simple causes. The WAV may be on a disconnected external drive, moved into a folder you forgot, or imported into an editor's library without being saved as a standalone file. Open the recording or editing app's recent-files list first; most "missing" recordings are one menu away from being reopened.
If you synced the recording to a phone or cloud note app, check there. Voice memos in particular often live in two places, and the copy on your phone may be intact even when the computer file is gone.
After you recover
Play each recovered WAV all the way through before relying on it, because a file that starts fine can still cut off partway. Once confirmed, export a fresh copy to a separate folder and back it up. Treat a recovered recording as fragile until you have it safely stored in two places.
The lasting habit is simple: export a WAV bounce whenever you finish a recording. Keeping the master as a plain file, in two places, means a future accident ends in a restore from the Recycle Bin or Time Machine rather than a rescue scan. Audio cannot be re-recorded once it is gone, so treat every finished session like something you would hate to lose. The scan above is the fallback, but your backup routine is what actually protects the recordings.
Finally, remember that audio is the hardest kind of file to rebuild once damaged, because there is no visual hint of what is missing. That makes the export-and-backup habit more important for WAV than for photos or documents. If the scan found nothing, the sectors were overwritten — stop using the drive and consider a professional service before the last trace disappears.
Also remember to scan the whole drive rather than a single folder: once a WAV is deleted, its path is forgotten, so the original folder looks empty even when the audio is still recoverable elsewhere on the disk. Let the automatic deep scan finish rather than interrupting it, and use the date filter to narrow thousands of results to the recording window you remember. If the file never appears, it was likely overwritten, and further saving to that drive will only make the situation worse.
When you are done, keep the recovered WAVs in two places: the restored folder plus an external drive, and export a fresh WAV bounce at the end of every future recording so the next accident is a restore, not a rescue.