
 iPhone Data Recovery
 iOS System Recovery
 iOS Data Backup & Restore
 iOS Unlocker
 iPhone Password Manager
 Location Changer
 Android Data Recovery
 Broken Android Data Extraction
 Android Data Backup & Restore
 Android Unlocker
 FoneTrans for iOS
 iPhone Data Eraser
 iPhone Cleaner
 HEIC Converter
 HyperTrans
 WhatsApp Transfer for iOS
 Mac Sweep
 Data Retriever
 Mac Data Retriever
 Video Converter Ultimate
 Screen Recorder
 Phone Mirror
- Part 1: Before You Start Recording
- Part 2: Method 1 — Built-in Screen Recorder on iPhone
- Part 3: Method 2 — Record on Mac with QuickTime
- Part 4: Method 3 — Record iPhone on a Computer with FoneLab Screen Recorder
- Part 5: Which Recording Method Should You Use?
- Part 6: FAQs about Screen Recording on iPhone
 Record Screen Now
Capture video, audio, online tutorial, etc on Windows/Mac, and you can easily customize size, edit the video or audio, and more.
[3 Ways] How to Screen Record on iPhone with Sound (No App)
 Posted by Lisa Ou / November 4, 2026 09:00
Every now and then you want to save what is on your iPhone screen: a glitch you want to show support, a walkthrough for a parent, a clip of a high score, or a video call you would rather not forget. Years ago that meant plugging into a Mac or installing a sketchy third-party app. These days the iPhone does it natively, and there are still good reasons to record on a computer instead.
In this guide I walk through the three realistic ways to capture your iPhone screen with sound: the built-in recorder on the phone, QuickTime on a Mac, and a dedicated desktop recorder on Windows or Mac. None of it requires jailbreaking, and the built-in route needs no app at all.

Guide List
- Part 1: Before You Start Recording
- Part 2: Method 1 — Built-in Screen Recorder on iPhone
- Part 3: Method 2 — Record on Mac with QuickTime
- Part 4: Method 3 — Record iPhone on a Computer with FoneLab Screen Recorder
- Part 5: Which Recording Method Should You Use?
- Part 6: FAQs about Screen Recording on iPhone
Part 1: Before You Start Recording
Screen recording has been built into iOS since iOS 11, so it works on any iPhone that can run a modern system version — that covers iOS 12 through iOS 27 and later. If your iPhone is older and stuck on an early iOS release, the built-in recorder may not be there, and the computer methods in Part 3 and Part 4 are your fallback.
A few things worth knowing before you hit record:
- Clips save to Photos. The built-in recorder writes your video straight to the Photos app, just like a clip you shot with the camera.
- Storage matters. A long recording is a large file. If your iPhone is almost full, the recording can stop early.
- System sound vs your voice. The built-in recorder captures screen activity; to also record your microphone you have to turn it on in the recording controls.
- Copy protection. Some streaming apps intentionally block screen recording and produce a black screen. That is a rights restriction, not something you can switch off.
If the recorder is not in your Control Center at all, the first thing to check is your iOS version. Open Settings > General > Software Update and install any pending update. Screen recording has been part of iOS for many versions now, so a modern system (up to iOS 27 and later) will have it. Once the update is installed, the Screen Recording toggle appears in the list of controls you can add.
Part 2: Method 1 — Built-in Screen Recorder on iPhone
This is the method I use for quick clips, and it needs no app at all. The recorder lives in Control Center; you just have to add it there first, then it is one tap away.
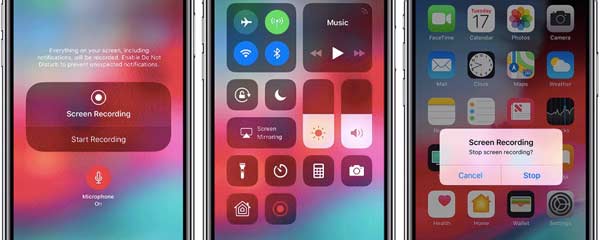
Step 1Open Settings > Control Center and tap the plus next to Screen Recording to add it to Control Center.
Step 2Open the app or screen you want to capture, then open Control Center and tap the record button (a solid circle). Long-press it first to bring up the microphone toggle if you want your voice recorded too.
Step 3Record whatever you need. When you are done, tap the red status bar at the top of the screen (or the floating record button) and choose Stop. The clip saves to Photos.
It is fast, free, and built right in. The trade-offs are the usual ones: no pausing mid-take, basic trimming only, and the file lives on your phone. For a ten-second clip that is perfect; for a longer tutorial or something you want to edit, a computer route gives you more control.
Once the clip is in Photos, you can trim it right on the phone. Open the video in Photos, tap Edit, and drag the ends of the timeline to cut out the awkward opening and closing. That is enough for most shares. If the recording came out silent, it almost always means the microphone was off when you started — long-press the record button and confirm the microphone icon is highlighted before you begin next time.
Part 3: Method 2 — Record on Mac with QuickTime
If you have a Mac, there is a free cable-based way to pull the iPhone screen onto the computer. QuickTime Player can read the screen feed over a USB connection and record it straight to your Mac, with no extra software.

Step 1Plug your iPhone into the Mac with a cable and tap Trust on the phone if it asks.
Step 2Open QuickTime Player and choose File > New Movie Recording from the menu bar.
Step 3Click the small dropdown next to the record button and select your iPhone as the camera. Choose your microphone from the same menu if you want voice.
Step 4Click record, use your iPhone, then click stop and save the file wherever you like.
This is rock solid because the cable keeps the feed smooth. Its limits: it is Mac-only, it offers no editing tools, and it cannot capture the iPhone's internal app audio on its own. If you are on Windows, or you want pausing and annotation, Part 4 is the route.
The "Trust" prompt is the one thing that trips people up. When you first plug the phone into the Mac, a dialog asks whether you trust this computer; tap Trust and enter your passcode on the phone, or QuickTime will not see the screen feed. If the iPhone does not appear in the camera dropdown, unplug it, unlock the phone, and plug it back in — that almost always fixes it.
Part 4: Method 3 — Record iPhone on a Computer with FoneLab Screen Recorder
For anything longer than a quick clip — a tutorial, a demo, a walkthrough — I record to a computer. You mirror the iPhone screen to the computer, then capture that window. I use FoneLab Screen Recorder, which runs on both Windows and Mac and mixes the screen, system audio, and your microphone.
FoneLab Screen Recorder allows you to capture video, audio, online tutorial, etc on Windows/Mac, and you can easily customize size, edit the video or audio, and more.
- Record video, audio, webcam and take screenshots on Windows/Mac.
- Preview data before saving.
- It is safe and easy to use.
The honest note: this is a desktop recorder, so it captures the computer screen. Mirror your iPhone to the computer first (over AirPlay on the same Wi-Fi, or a cable), then point the recorder at the mirrored window. It cannot record the phone while the phone is disconnected from the computer.
Step 1Install and open FoneLab Screen Recorder. The main window shows Video Recorder, Audio Recorder, and More.
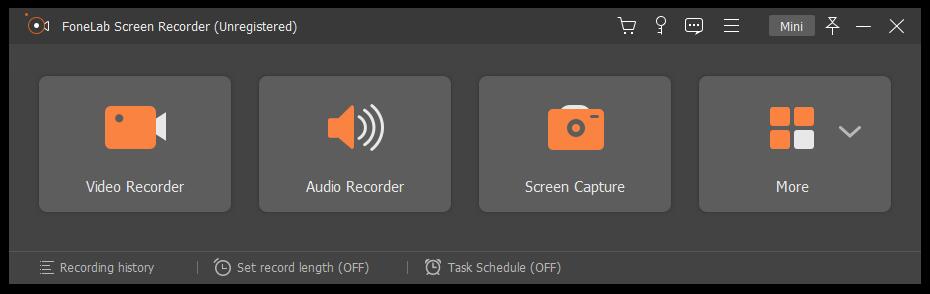
Step 2Choose Video Recorder, then drag the frame to fit the mirrored iPhone window. Turn on Microphone if you want narration.
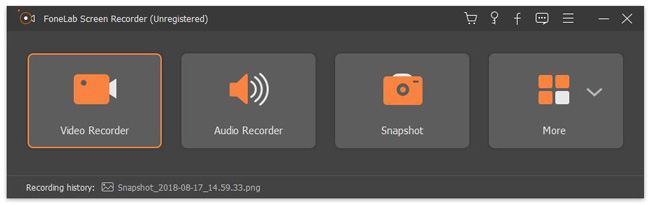
Step 3Click REC and use your iPhone. You can pause, draw on screen, and jump to settings without stopping the recording.
Step 4Stop the recording, trim the clip in the preview, then choose where to save it on your computer.
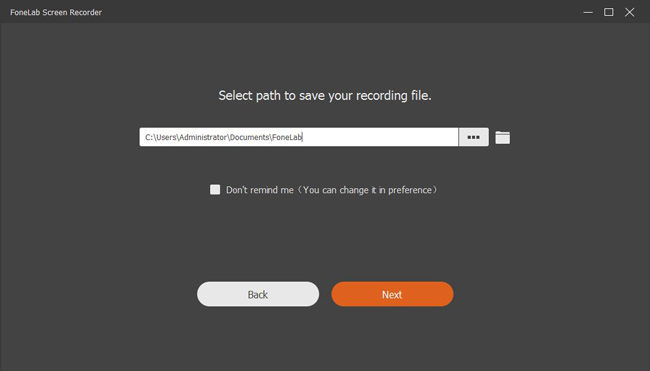
Because the file lands straight on your computer in a standard format, you can upload it or edit it right away. If you also want to capture just the audio, here is how to record sound on iPhone.
One practical tip while you mirror: put the iPhone and the computer on the same Wi-Fi network, and keep the mirrored phone window away from the edges of the screen so your desktop icons do not sneak into the clip. I also turn off desktop notifications before I hit REC, so a message banner does not land in the middle of a walkthrough. If the mirror looks choppy, a cable connection is smoother than wireless for fast-moving screens.
FoneLab Screen Recorder allows you to capture video, audio, online tutorial, etc on Windows/Mac, and you can easily customize size, edit the video or audio, and more.
- Record video, audio, webcam and take screenshots on Windows/Mac.
- Preview data before saving.
- It is safe and easy to use.
Part 5: Which Recording Method Should You Use?
Here is the side-by-side so you can pick fast.
| Built-in recorder | QuickTime (Mac) | FoneLab Screen Recorder | |
|---|---|---|---|
| Cost | Free | Free | Free trial |
| Runs on | iPhone | Mac only | Windows and Mac |
| Pause / annotate | No | No | Yes |
| Save location | Photos app | Mac file | Computer file |
| Mic + system audio | Mic only | Mic only | Mixed |
| Best for | Quick on-phone clips | Cable-based Mac capture | Tutorials and longer clips |
My take: Use the built-in recorder for a quick clip with no computer nearby. Mac owners with a cable can use QuickTime. For anything you plan to edit, narrate, or upload, set up the computer route with FoneLab Screen Recorder.
A quick way to decide: if the clip is under a minute and you just want to share it, the built-in recorder is enough. Once you want to pause, narrate over it, draw attention to something on screen, or save the file straight to your computer, the extra setup of the computer route pays for itself within the first take.
Part 6: FAQs about Screen Recording on iPhone
Why does my screen recording have no sound?
Because the microphone is off by default. Long-press the record button in Control Center and tap the microphone icon to turn it on before you start. Some apps also block internal audio on purpose for copyright reasons.
Where do my iPhone screen recordings save?
The built-in recorder saves them to the Photos app, in your camera roll. Computer methods (QuickTime or FoneLab) save an MP4 or MOV file to the folder you choose on the Mac or PC.
Can I screen record a FaceTime call?
Yes, with the built-in recorder or a computer recorder. The other person is not automatically notified, but recording a call without telling them can be illegal depending on where you live, so always ask first.
How long can I record my iPhone screen?
There is no fixed time limit, but long recordings fill storage and heat the phone. For very long sessions, record to a computer so the phone is not doing the encoding, and stop and restart if the device gets warm.
That is all you need. Start with the built-in recorder, and move to a computer when you want a cleaner result. For more, see how to screen record on iPhone in more depth, or how to record your iPhone screen on Windows and Mac.
FoneLab Screen Recorder allows you to capture video, audio, online tutorial, etc on Windows/Mac, and you can easily customize size, edit the video or audio, and more.
- Record video, audio, webcam and take screenshots on Windows/Mac.
- Preview data before saving.
- It is safe and easy to use.