- Part 1. How to Take A Snapshot on Windows with FoneLab Snapshot Tool
- Part 2. How to Take A Snapshot on Windows Using Snipping Tool
- Part 3. How to Take A Snapshot on Windows via Keyboard
- Part 4. How to Take A Snapshot on Windows with Snip & Sketch
- Part 5. How to Take A Snapshot on Windows with Game Bar
- Part 6. FAQs How to Screenshot on Windows
Capture video, audio, online tutorial, etc on Windows/Mac, and you can easily customize size, edit the video or audio, and more.
- Screenshot Alcaltel
- Screenshot FaceTime
- Screenshot Full Page
- Screenshot Specific Area
- Screenshot Google Maps
- Screenshot Instagram
- Screenshot Lenovo
- Screenshot DELL
- Screenshot HP
- Screenshot Toshiba
- Screenshot Surface Pro
- Screenshot Mac
- Screenshot Macbook
- Screenshot Windows
- Screenshot Windows Laptop
- Screenshot Facebook
- Screenshot Snapchat
- Screenshot Samsung
- Screenshot HTC
- Screenshot iPhone
- Screenshot iPad Pro
- Scroll Screenshot
5 Excellent Procedures to Screenshot Windows Devices
 Updated by Lisa Ou / Nov 29, 2022 12:40
Learning how to screenshot on Windows 8, 10, 11 and other models can be beneficial for you. There are instances you cannot save the images on the internet or social media platforms. For example, you need to remember your old account on that particular social media platform. And there are no other ways or chances to save those images because you no longer have access. You must choose the screenshot method to keep and preserve your pictures. If you are using your Windows computer, there are many ways to do that using its built-in tools and trustworthy software.
Are you worried because this process can cause you to lose the quality of your pictures? Discover how to take a partial screenshot on Windows without losing its quality using FoneLab Snapshot Tool. Soon, you will know its other features. Feel free to use these methods to screenshot your photos in one snap. Move on to perform them on your computer.

Guide List
- Part 1. How to Take A Snapshot on Windows with FoneLab Snapshot Tool
- Part 2. How to Take A Snapshot on Windows Using Snipping Tool
- Part 3. How to Take A Snapshot on Windows via Keyboard
- Part 4. How to Take A Snapshot on Windows with Snip & Sketch
- Part 5. How to Take A Snapshot on Windows with Game Bar
- Part 6. FAQs How to Screenshot on Windows
Part 1. How to Take A Snapshot on Windows with FoneLab Snapshot Tool
Using the FoneLab Snapshot Tool, you can screenshot your screen without losing its quality. Not only for images but also when you record a video and audio. When you capture your screen, you can edit it without downloading any editing software. This software has editing tools once you finish the screenshot process. It sounds interesting because this software is about more than just how to take a screenshot on Windows 8 and other devices. It can also perform screen recording and editing. Aside from that, this software also supports Mac devices with unique features.
FoneLab Screen Recorder allows you to capture video, audio, online tutorial, etc on Windows/Mac, and you can easily customize size, edit the video or audio, and more.
- Record video, audio, webcam and take screenshots on Windows/Mac.
- Preview data before saving.
- It is safe and easy to use.
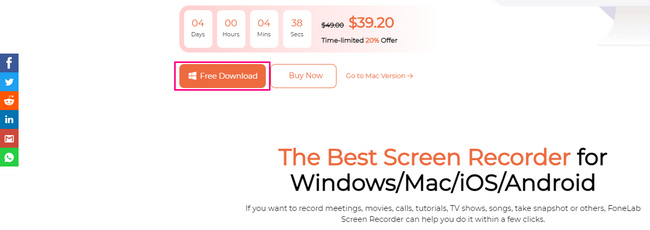
Step 1Using your computer, download FoneLab Screen Recorder. Click the Free Download button on the left side. You need to set up the tool, install and launch it afterward before you can use it.
Step 2The Snapshot Tool will appear later. You must choose one of the recorders that this software offers. There is nothing to worry about because you select one of these, the Snapshot Tool will appear after selecting one of these.

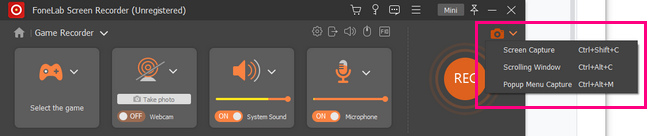
Step 3Now, you can locate the snapshot tool in the top right corner of the software. Click the Arrow Down button, and then you will see its features for taking snapshots. You can click among the two snapshot options, such as the Screen Capture button to capture the screen and the Scrolling Window button to capture the screen while you are scrolling the screen.
Step 4The software will let you use its Adjustable Frame to locate the screen you want to record. You can identify it using the mouse of your computer. Before saving it, you can edit the photo using the software's Editing Tools.
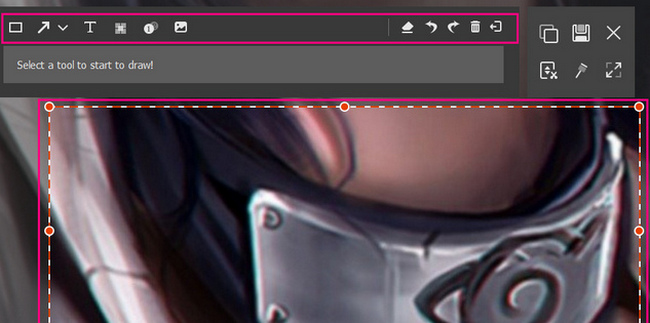
Step 5To save the photo on your computer, click the Save icon on the software's main interface. You can choose what folder you want to keep it in.
FoneLab Screen Recorder allows you to capture video, audio, online tutorial, etc on Windows/Mac, and you can easily customize size, edit the video or audio, and more.
- Record video, audio, webcam and take screenshots on Windows/Mac.
- Preview data before saving.
- It is safe and easy to use.
Part 2. How to Take A Snapshot on Windows Using Snipping Tool
Some people prefer to use built-in tools than downloading software. They say that it will only waste their time. Windows supports many built-in screenshot tools, and you must only choose the device tool that is efficient for you. The Snipping Tool may be the software that you like. It has features you can use, which include a delay feature for taking a screenshot. It means before capturing the screen, and it will give you seconds before it takes a snapshot of the computer screen. This article will demonstrate how to take partial screenshots on Windows and more using the snipping tool. Keep on scrolling to familiarize yourself with this tool.
Step 1Look for the Snipping Tool on the Start button of your computer device. Click the tool and tick the Open button under it to launch it.
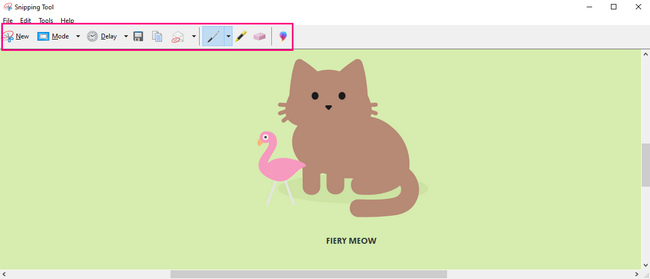
Step 2On the upper left side of the tool, click the New button. The device tool will let you choose the screen you want to screenshot by only clicking it using your mouse.
Step 3The image you choose to screenshot will appear on your screen using the tool. You can click the tools on top of it to edit your photo for better results.
Step 4Once ready to save the tool, tick the Save button on the top of the device tool. The device folder will pop up on the screen to save the image. You must select one of the folders to complete the screenshotting process.
Part 3. How to Take A Snapshot on Windows via Keyboard
Keyboard shortcut keys are another best alternative to avoid using any tool. By memorizing them, you can perform the different functions of your device using only keyboard keys. The disadvantage is that there are lots of shortcut keys using your keyboard. For this instance, there are tendencies that you will confuse with each one of them. In this case, you can perform the wrong shortcut keys. If you want to screenshot on Windows 8 and others, you can use this method below. It will lessen the time you are screenshotting the screen because it will capture the screen in seconds. It is way better than using a built-in tool that you need to learn how to use.
Step 1Look for the Ctrl and PS key on the keyboard. Afterward, press them simultaneously, and take a quick snapshot on the computer screen.
Note: The Printscreen key has many shortcut keys on the keyboard. It would be best to locate which of the keys above does not match the key on your keyboard.
Step 2The image will pop up using the screenshot tool that your device is using. Before saving the picture, you must ensure you capture the screen you prefer. Then you can keep the image on one of the device folders by clicking the Save button of the tool.
Note: You can copy the image you screenshot and paste it to other folders.
FoneLab Screen Recorder allows you to capture video, audio, online tutorial, etc on Windows/Mac, and you can easily customize size, edit the video or audio, and more.
- Record video, audio, webcam and take screenshots on Windows/Mac.
- Preview data before saving.
- It is safe and easy to use.
Part 4. How to Take A Snapshot on Windows with Snip & Sketch
This tool is slightly similar to the snipping tool. Snip & Sketch also has a timer before taking screenshots up to 10 seconds. One of their difference is that you can open a file in Snip & Sketch from your computer. You will no longer need to screenshot a document. Instead, you can upload it with this tool. Moreover, it has many editing tools, unlike other screenshot built-in tools that have limited features when it comes to editing. This tool will give a fantastic experience to take a snapshot on Windows 8 and more devices.
Step 1Go to the Windows Search Bar of the computer. Type in Snip & Sketch, then click the Open button to launch the tool.
Note: You can also press the Windows+Shift+S to launch the tool directly.
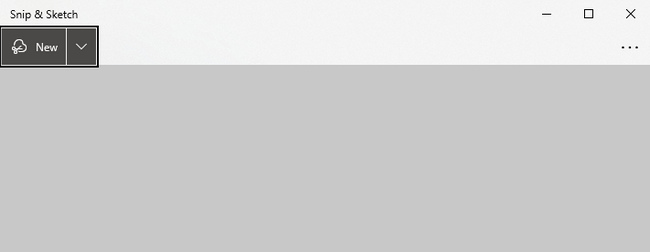
Step 2The tool will pop up on the screen. Click the New button to launch the features of the device tool for screenshotting.
Step 3You can choose Freeform Snip, Rectangular Snip, Window Snip, and Fullscreen Snip in taking your screenshot. You must select the one you prefer.
Step 4The image you take will pop up. You can edit it with the tool, depending on your preference. After that, you can save the image on your device by clicking the Save icon of the device tool.
FoneLab Screen Recorder allows you to capture video, audio, online tutorial, etc on Windows/Mac, and you can easily customize size, edit the video or audio, and more.
- Record video, audio, webcam and take screenshots on Windows/Mac.
- Preview data before saving.
- It is safe and easy to use.
Part 5. How to Take A Snapshot on Windows with Game Bar
The Game bar is well-known for screen recording your gameplay while playing without lag. Moreover, this tool is for more than just screen recording. You can also take a screenshot on Windows 8 and other devices that this tool supports. On the interface of the device tool, you will also see the performances of the CPU, GPU, VRAM, RAM, and FPS on your computer. While taking screenshots, you have the chance to check the condition of your computer. This feature is infrequent when it comes to taking screenshots. You are lucky because you will learn how to use it once you see its easy steps below.
Step 1Search for the Game Bar on the Windows Search Bar. Launch the tool and look for the Screenshot Tool of the software.
Note: There is an alternative way to launch the Game Bar on your computer by pressing the Windows+G shortcut keys.
Step 2On the left part of the software interface, click the Camera icon. Afterward, it will capture the entire screen, and the device will save the image automatically.
Note: Aside from clicking the Camera icon, you can press the Windows+Alt+PrntScrn shortcut key on your keyboard. These combination keys will take a quick snapshot of your device.
FoneLab Screen Recorder allows you to capture video, audio, online tutorial, etc on Windows/Mac, and you can easily customize size, edit the video or audio, and more.
- Record video, audio, webcam and take screenshots on Windows/Mac.
- Preview data before saving.
- It is safe and easy to use.
Part 6. FAQs How to Screenshot on Windows
1. Which is the Print Screen key?
The print screen key is one of the essential keys on your keyboard, and it can capture the entire screen of your computer. It will help you with your documents and many more.
2. Is a screenshot a picture?
Yes, the screenshot you take using any device is a picture by the computer. You can also use these images anywhere you want.
FoneLab Screen Recorder allows you to capture video, audio, online tutorial, etc on Windows/Mac, and you can easily customize size, edit the video or audio, and more.
- Record video, audio, webcam and take screenshots on Windows/Mac.
- Preview data before saving.
- It is safe and easy to use.
There are numerous ways of taking a snapshot on your Windows devices. You only need to consider the best for the device you are using. The above methods are best for Windows devices. If you are using other devices, such as Mac, there is one method above that you can use. You can utilize the FoneLab Snapshot Tool because it supports both Mac and Windows. Are you interested in these methods? Use them to have the best experience taking snapshots on your Windows devices.