Screen Record on iPhone Using Functional Strategies
 Posted by Valyn Hua / Dec 20, 2023 16:00
How do you screen record on iPhone? My favorite artist will be live on social media later, and I want to document it from start to finish. This way, I can replay the parts I like anytime and post some clips on my social media accounts. My only problem is that I don't know the appropriate recording methods on my iPhone. So, I'm hoping someone can help me.
There are several purposes for recording an iPhone screen. The above scenario is only one of them, and it's undeniable that learning the recording function is a great help. Aside from that, you can also use it to create a tutorial when someone close to you needs help with how a feature works on a device. Or record a video you desire to save on your iPhone offline.
Therefore, go over the details this article provides below. You will learn various screen recording techniques on iPhone, whether default or third-party apps and programs. Every part contains enough information to understand the methods better, and following that are the detailed guidelines to help you perform the screen recording process successfully.

Guide List
Part 1. How to Screen Record on iPhone via Built-in Recorder
Like other devices, Apple offers a built-in screen recorder on the iPhone. It is not in a hidden location, so you may have already seen it while using the basic features on the device. But it’s fine if you haven’t noticed it, especially if you don’t often wander through your iPhone. It’s very accessible and can be activated within a few seconds. The only drawback you may find is the poor quality some iPhone users complain about, but overall, it’s good for basic usage.
FoneLab Screen Recorder allows you to capture video, audio, online tutorial, etc on Windows/Mac, and you can easily customize size, edit the video or audio, and more.
- Record video, audio, webcam and take screenshots on Windows/Mac.
- Preview data before saving.
- It is safe and easy to use.
Have regard to the secure process below to screen record on iPhone via built-in recorder:
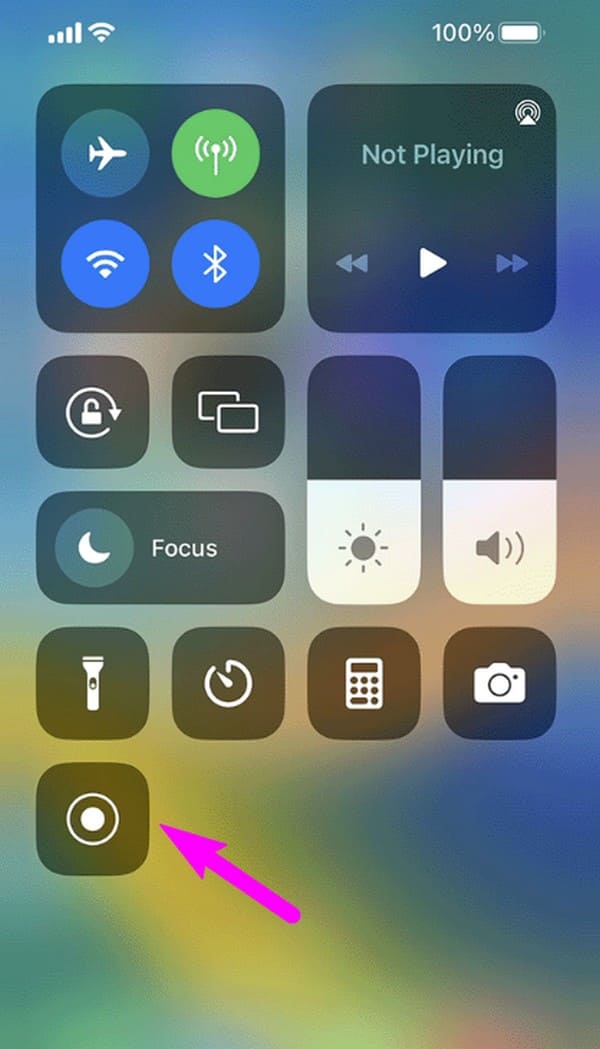
Step 1First, ensure the screen you desire to capture is prepared. Then, display the Control Center on your iPhone by swiping from top to bottom or vice versa on the screen. The screen recording icon will be on the lower part. If you don’t see it, proceed to Settings > Control Centre > Screen Recording to add the feature on the Control Center screen.
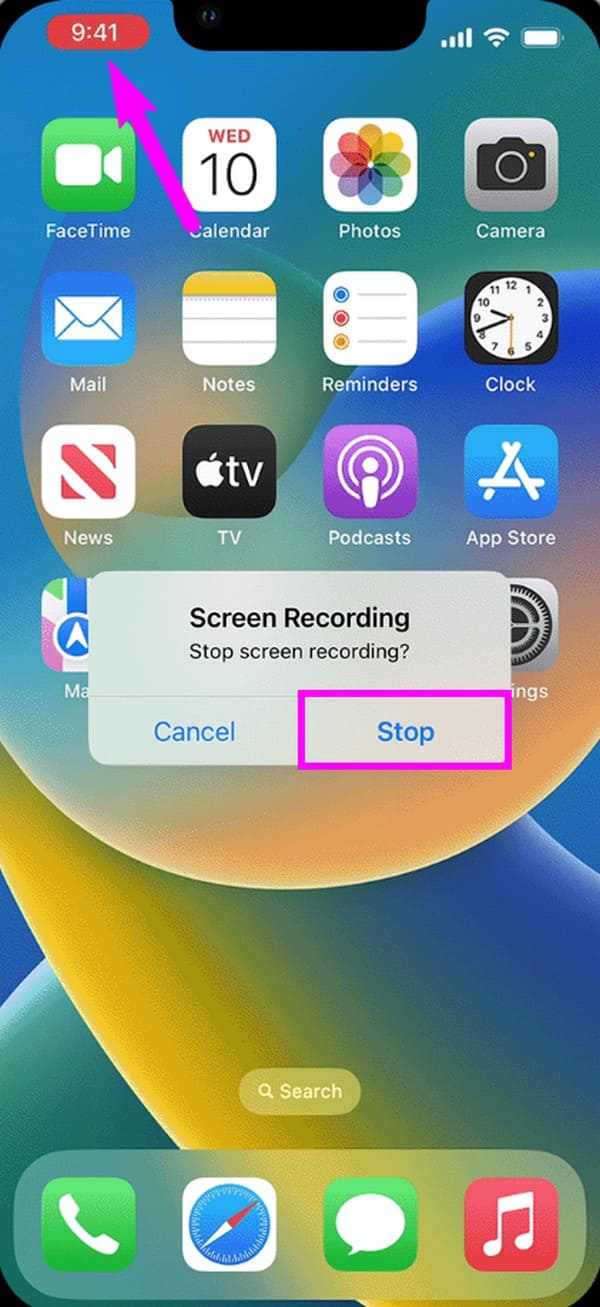
Step 2Tap the icon, and a three-second countdown will transpire before the screen recording officially starts. Capture everything you need on the screen, and when done, tap the red bar at the top and select Stop to finish recording.
The built-in screen recorder is good for basic recording but only offers simple features. Thus, if you’re searching for an iPhone screen recorder with advanced functions, see if the following parts could provide the functions required for your recording process.
Part 2. How to Screen Record on iPhone with FoneLab Screen Recorder
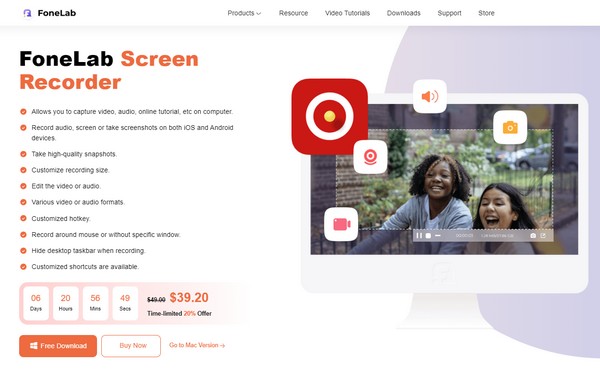
FoneLab Screen Recorder is a functional recorder used for diverse purposes. It includes recording the activities on your iPhone screen, so this program will be helpful with whatever you want to do. You may have noticed this program is primarily for recording a computer screen, but don’t worry. It offers a Phone recorder that allows you to display its screen on the computer, making the recording clearer and easier to navigate. It also supports system and microphone sounds, which you won’t see in some iPhone screen recorders.
Moreover, FoneLab Screen Recorder lets you take snapshots even if the scr
FoneLab Screen Recorder allows you to capture video, audio, online tutorial, etc on Windows/Mac, and you can easily customize size, edit the video or audio, and more.
- Record video, audio, webcam and take screenshots on Windows/Mac.
- Preview data before saving.
- It is safe and easy to use.
een recording is still in progress. You can guarantee they are of high quality, and you can take screenshots anytime. Meanwhile, the videos you record can be saved in various formats. Thus, you won’t have problems regarding compatibility when playing them on your devices. This tool has more to offer, and you are free to explore it once you have it installed on your computer.
Understand the effortless steps underneath as a model of how to record iPhone screen with FoneLab Screen Recorder:
Step 1Use your browser to get the FoneLab Screen Recorder installer through its Free Download tab on the official page. When saved, administer the installation until the essential components finish downloading. Then, launch the recording tool on your computer to view the key features on the initial interface. Also, install FoneLab Mirror on the iPhone.
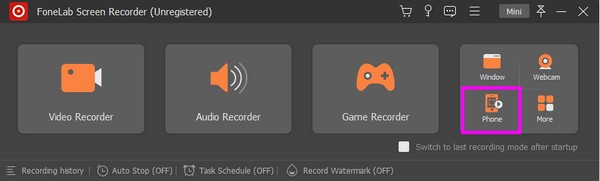
Step 2You will notice the Video Recorder, Audio Recorder, and Game Recorder on the first three big boxes. Ignore them and proceed to the small Phone Recorder box on the right. On the next interface, choose the iOS Recorder option as your device type to move to the screen, giving you instructions for connecting an iPhone to the computer.
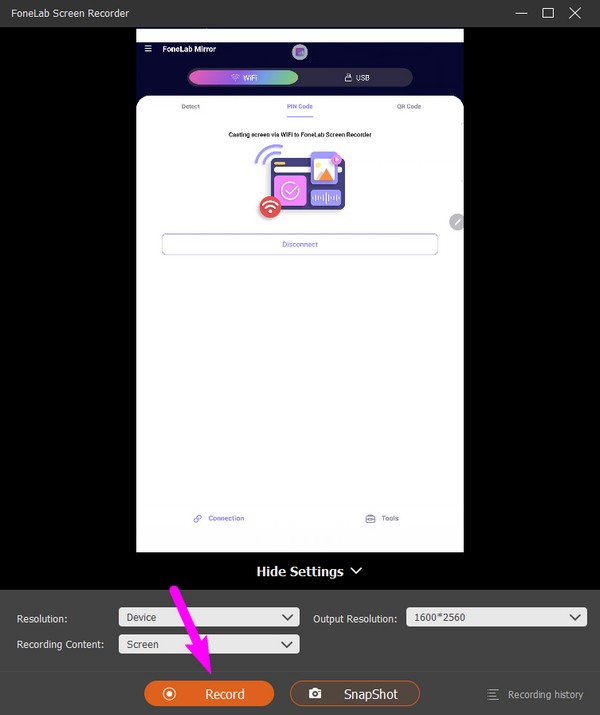
Step 3To connect, be sure your device is linked to the same WLAN as your computer. Then, select the Screen Mirroring tile on your iPhone Control Center. When the active devices are shown, choose FoneLab Screen Recorder to display your screen on the program interface. Finally, select the Record tab on the lowest area to record the iPhone.
FoneLab Screen Recorder allows you to capture video, audio, online tutorial, etc on Windows/Mac, and you can easily customize size, edit the video or audio, and more.
- Record video, audio, webcam and take screenshots on Windows/Mac.
- Preview data before saving.
- It is safe and easy to use.
Part 3. How to Screen Record on iPhone through A Third-party App
Using a third-party app is also effective for recording your screen on iPhone. You can install apps like Record it! :: Screen Recorder and navigate it on your device for free. This app is an effective recorder that allows you to document almost anything on the screen, such as videos, gameplays, tutorials, and more. You can also access it on the App Store, so you shouldn’t have difficulty installing it on your device, especially since it’s quick to set up.
Emulate the safe instructions below to record iPhone screen through the third-party app Record it! :: Screen Recorder:
Step 1Head to the App Store to search for the Record it! :: Screen Recorder app. Once it materializes on your screen, install it and set up the permissions on your iPhone.
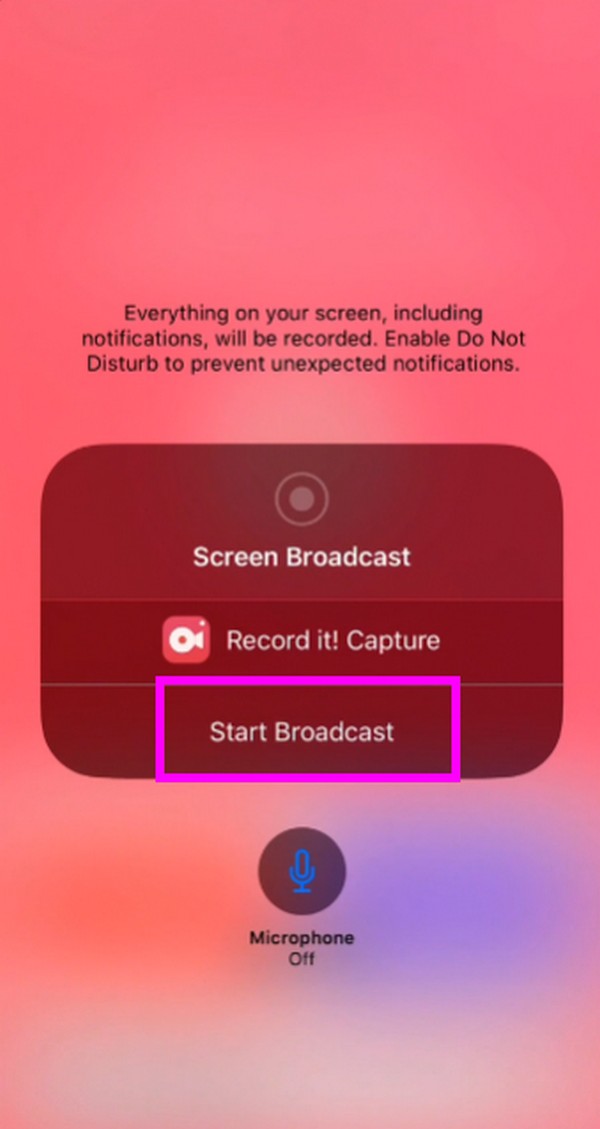
Step 2Afterward, hit the red and white Record button in the middle, then choose the Start Broadcast tab. Everything on your screen will then be recorded. You only have to tap the Stop button afterward when done.
As you may have seen, this recording app has beneficial features, but you may also find drawbacks. For instance, many popular streaming platforms easily detect screen recordings, preventing you from using the app. In this case, try the prior technique, as it functions on the computer, preventing some platforms from detecting it on the iPhone.
FoneLab Screen Recorder allows you to capture video, audio, online tutorial, etc on Windows/Mac, and you can easily customize size, edit the video or audio, and more.
- Record video, audio, webcam and take screenshots on Windows/Mac.
- Preview data before saving.
- It is safe and easy to use.
Part 4. FAQs about How to Screen Record on An iPhone
1. Why can't I see the screen recording button on my iPhone?
It may not be on the Control Center. You must add it to the Control Center by navigating the Settings app to make it visible. Find and select Control Centre on the Settings interface, then navigate to the Controls section. From there, tap the plus icon next to the Screen Recording option. Afterward, head to the Control Center again, and you'll see the tile for screen recording.
2. How to record internal audio on iPhone?
Use the program FoneLab Screen Recorder in Part 2 or the built-in feature in Part 1. Unfortunately, most recording apps only support the device mic but not internal audio when screen recording. But don't worry. You can navigate the instructions above to record internal or system audio with your iPhone screen recording.
It's a pleasure to help you discover the techniques for screen recording on an iPhone. You are always welcome to come back whenever you encounter device problems.
FoneLab Screen Recorder allows you to capture video, audio, online tutorial, etc on Windows/Mac, and you can easily customize size, edit the video or audio, and more.
- Record video, audio, webcam and take screenshots on Windows/Mac.
- Preview data before saving.
- It is safe and easy to use.