
 iPhone Data Recovery
 iOS System Recovery
 iOS Data Backup & Restore
 iOS Unlocker
 iPhone Password Manager
 Location Changer
 Android Data Recovery
 Broken Android Data Extraction
 Android Data Backup & Restore
 Android Unlocker
 FoneTrans for iOS
 iPhone Data Eraser
 iPhone Cleaner
 HEIC Converter
 HyperTrans
 WhatsApp Transfer for iOS
 Mac Sweep
 Data Retriever
 Mac Data Retriever
 Video Converter Ultimate
 Screen Recorder
 Phone Mirror
 Record Screen Now
Capture video, audio, online tutorial, etc on Windows/Mac, and you can easily customize size, edit the video or audio, and more.
[2 Ways] How to Screen Record on iPhone with Sound (iOS 12 through iOS 27)
 Updated by
I wanted to save a short clip of a glitchy app to send to support. I searched every Settings screen for ten minutes before a friend pointed out that the record button was sitting in the Control Center the whole time — and even when I found it, the first recording came out completely silent. If that sounds familiar, you are not alone.
Recording the screen on an iPhone is built right into iOS, and it has been since iOS 11. The two things that trip people up are finding the button in the first place, and turning the microphone on so your recording actually has sound. This guide walks through the free built-in method, the Mac route for longer clips, and a desktop tool that gives you far more control when you want a clean, shareable video.
I tested every method below on my own iPhone. Start at Part 1 if you cannot even find the record button; jump to Part 2 if you just need a quick clip; go to Part 4 if you want to record a longer session or add your own voice over it.

Guide List
Part 1: Before You Start: Where the Record Button Is
There is no camera icon hidden in your Settings. The screen recorder lives in the Control Center — the panel you open by swiping down from the top-right corner on modern iPhones, or up from the bottom on older ones. On a fresh setup, that record button may not be in there yet, which is exactly why so many people think their phone cannot record its own screen.
Adding it takes one trip through Settings. Open Settings, tap Control Center, then find Screen Recording in the list and tap the green plus next to it. It moves up into the Include section, and the record dot now sits in your Control Center for good. This works the same way from iOS 11 all the way through the current releases.
One more thing to know before you record: by default, iOS records the sound coming out of the phone but not your microphone. That is the reason your first silent clip happened. To narrate, you long-press the record button and turn the microphone on — I show you that in Part 2.
A quick reality check on what the built-in tool can and cannot do. It records in the screen's native resolution, it keeps going until you stop it, and it will even record while you switch between apps. But it cannot capture DRM-protected content from some streaming apps — the screen goes black in the recording, which is normal and not a bug. It also has no pause button, so if you need to stop and start again you end up with two separate clips.
Part 2: Built-in Screen Recording (Free Method)
This is the method you want for a quick clip — showing someone how to do something, saving a funny moment in an app, or capturing a glitch. It is free, it needs no computer, and the video saves straight to your Photos app.
Step 1Open the Control Center and tap the Record button (a solid circle). You get a three-second countdown before recording begins.
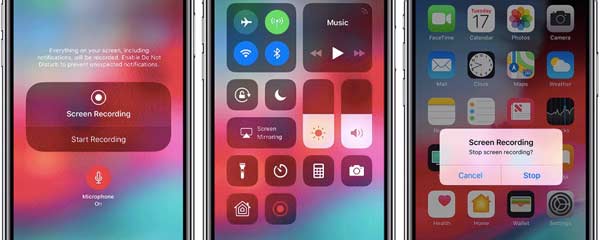
Step 2To record your voice over the screen, long-press the Record button instead of a quick tap, then tap the Microphone icon so it turns red. Tap Start Recording.
Step 3Use your phone normally while it records. When you are done, tap the red status bar at the top of the screen and choose Stop, or open Control Center and tap the record button again.
Step 4The finished video saves to your Photos app, where you can trim it or share it like any other clip.
The limitation of the built-in tool is control. You cannot pause mid-recording, you cannot choose the resolution, and recording long sessions eats into your storage and battery. For short clips it is perfect; for a longer tutorial or gameplay session, the methods in Part 3 and Part 4 are better.
Part 3: Record on a Mac with QuickTime
If you own a Mac, you can mirror your iPhone to the computer and record it through QuickTime Player. This gives you a cleaner, larger capture and saves the video straight to your Mac, so it does not fill up the phone.
Step 1Connect your iPhone to the Mac with a USB cable and tap Trust on the phone if prompted. Open QuickTime Player on the Mac.
Step 2Go to File > New Movie Recording in the menu bar.

Step 3Click the small arrow next to the record button in QuickTime and choose your iPhone as the camera source. Your screen mirrors on the Mac.
Step 4Click the red record button to start. When you finish, click stop and save the file where you like.
This is free and reliable, but it only works on a Mac, it needs a cable, and you get no editing tools. If you are on Windows, or you want to annotate and trim the recording as you go, the tool in Part 4 covers both.
The big plus of QuickTime is the picture quality. Because the video is pulled straight over the cable rather than mirrored over Wi-Fi, the capture stays smooth even on a busy screen, and the file lands on your Mac's drive instead of filling the iPhone. For short demos where you want the highest fidelity and you already own a Mac, it is hard to beat at zero cost.
Part 4: Record iPhone Screen on Computer with FoneLab Screen Recorder
When I record tutorials for work, I do not use the built-in recorder anymore. I mirror the iPhone to my computer and record with FoneLab Screen Recorder, because it lets me pause, pick a custom area, record my voice over the top, and trim the result without opening another app.
FoneLab Screen Recorder allows you to capture video, audio, online tutorial, etc on Windows/Mac, and you can easily customize size, edit the video or audio, and more.
- Record video, audio, webcam and take screenshots on Windows/Mac.
- Preview data before saving.
- It is safe and easy to use.
The honest note: this is a desktop program, so it records whatever is on your computer screen. To record an iPhone, you first mirror the iPhone display to the computer through AirPlay or a USB connection, then capture that window. It will not record the phone on its own while it sits in your pocket. For short on-phone clips, Part 2 is still the faster choice.
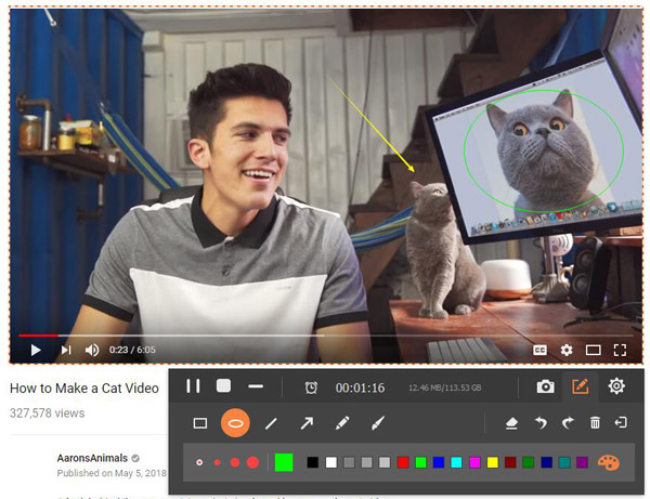
What makes it worth setting up for longer work is the editing toolkit. While the recording runs you can draw arrows and circles on screen to point things out, add a webcam bubble of yourself in the corner, and choose exactly which audio sources are mixed in — system sound, microphone, or both. Once you stop, the built-in trimmer lets you cut out the awkward first and last few seconds without exporting the whole file to another app. That combination is why it feels less like a screen grab and more like producing a short tutorial.
Step 1Install and launch FoneLab Screen Recorder on your Windows PC or Mac. The main window offers Video Recorder, Audio Recorder, and Snapshot.
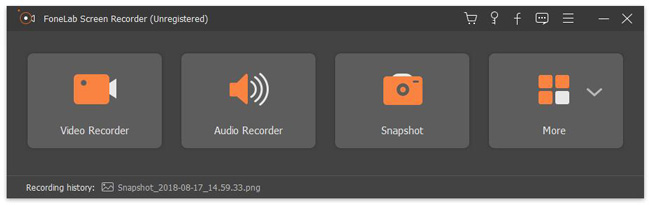
Step 2Choose Video Recorder to open the recording panel.
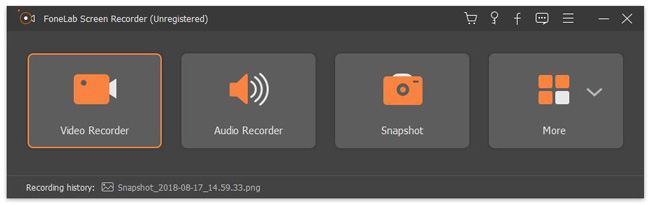
Step 3Mirror your iPhone screen to the computer, then select the capture area to fit the mirrored iPhone window. Turn the Microphone on if you want to narrate, then click the REC button and operate your phone. You can pause and draw on the screen while recording.
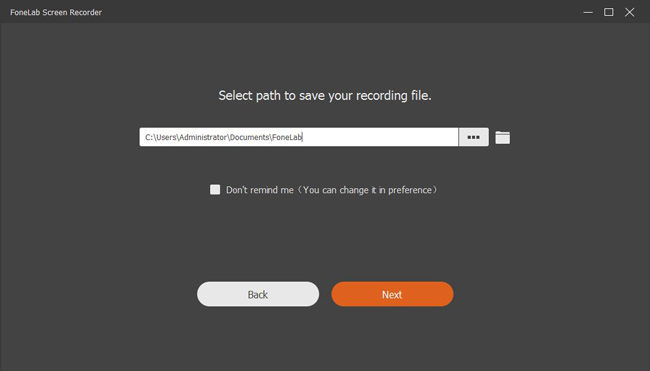
Step 4When you stop, a preview window opens. Trim the clip, then click the Save icon to write the video to your computer.
I use this for anything longer than a couple of minutes, because the pause button and on-screen drawing make the final video look far more polished than a raw screen recording. If you want to record audio-only on the phone instead, see how to record sound on iPhone.
FoneLab Screen Recorder allows you to capture video, audio, online tutorial, etc on Windows/Mac, and you can easily customize size, edit the video or audio, and more.
- Record video, audio, webcam and take screenshots on Windows/Mac.
- Preview data before saving.
- It is safe and easy to use.
Part 5: Compare the Methods
Here is how the three options stack up on the points that matter.
| Comparison | Built-in Recorder | QuickTime on Mac | FoneLab Screen Recorder |
|---|---|---|---|
| Cost | Free | Free | Free trial |
| Needs a computer | No | Yes, Mac only | Yes |
| Record your voice | Yes | Limited | Yes |
| Pause while recording | No | No | Yes |
| Trim after recording | Basic | No | Yes |
| Best for | Quick clips | Mac users | Tutorials, long sessions |
My recommendation: use the built-in recorder for quick clips (Part 2), QuickTime if you are already on a Mac (Part 3), and FoneLab Screen Recorder when you need a polished, longer video (Part 4).
Part 6: Frequently Asked Questions
Why is my iPhone screen recording silent?
Because the microphone is off by default. Long-press the record button in Control Center and tap the Microphone icon so it turns red before you start. Without that, iOS records the device audio but not your voice.
Where does an iPhone screen recording save to?
It saves straight to the Photos app in your camera roll, just like a video you shot. You can find it at the most-recent end of the gallery, then trim or share it from there.
Can I screen record without the red bar showing?
The red status bar is an iOS privacy feature and cannot be removed on the built-in recorder. If it would be awkward in a tutorial, mirror the phone to a computer and record the mirrored window with a tool like FoneLab Screen Recorder instead.
Why is the record button missing from my Control Center?
It has not been added yet. Open Settings > Control Center and tap the green plus next to Screen Recording to include it. It will then appear in the panel permanently.
Want a cleaner recording? Try FoneLab Screen Recorder for free and see how much easier longer, narrated sessions become.
FoneLab Screen Recorder allows you to capture video, audio, online tutorial, etc on Windows/Mac, and you can easily customize size, edit the video or audio, and more.
- Record video, audio, webcam and take screenshots on Windows/Mac.
- Preview data before saving.
- It is safe and easy to use.