Recover the lost/deleted data from computer, hard drive, flash drive, memory card, digital camera and more.
3 Excellent Procedures to Find Hidden Files on Mac
 Updated by Lisa Ou / Dec 01, 2022 09:00
If you can't find files on Mac, do not think you lost them. There is nothing to panic about if this. Mac hides some files on the device to avoid accidental damage. There are instances you delete files that are old or unimportant. In this case, you can accidentally delete the important one you don't want to happen. Do you know how to find documents on Mac? Hidden files are much better than losing your files. There is a possibility that you can not bring them back. Hidden files are still on the device. You only need to find or locate them using tools. If you cannot find the files, there is an alternative way to do that. You can use FoneLab Data Retriever for faster searching on your files. It has exceptional files that you can perform by reading this article.

Guide List
Part 1. How to Find Hidden Files on A Mac Device with FoneLab Data Retriever
Hidden files are hard to find, especially when unfamiliar with your Mac device. Using the Mac FoneLab Data Retriever tool is the best solution for that. This software is more than just a retrieving data tool. It can help Mac find large files hidden on the device only in minutes. This tool has qualities you will surely enjoy. It is because they are user-friendly and do not require professional skills. It supports many recoverable data. Examples are documents, images, videos, and more! You do not need to worry about the type of data of the hidden files. All you need to do is to locate all the hidden files you want to see.
FoneLab Data Retriever - recover the lost/deleted data from computer, hard drive, flash drive, memory card, digital camera and more.
- Recover photos, videos, documents and more data with ease.
- Preview data before recovery.
Step 1To download Mac Data Retriever, click the Free Download button on the main interface. Once the downloading process starts, please wait for it for seconds or minutes. The software will allow you to set it up after that. Next is the installation process, which will take only a few seconds, then launch the tool on your Mac device.

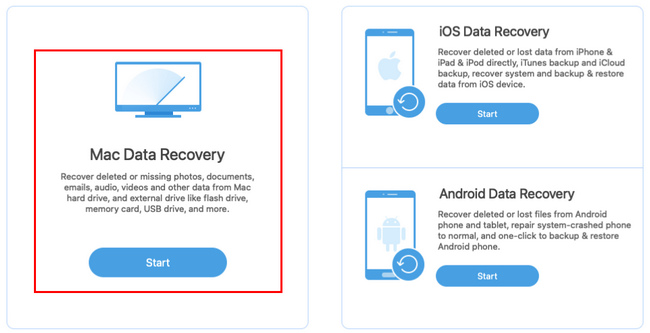
Step 2You will have three choices from the software's three features in data retrieving. Since you are using a Mac, click the Start button under the Mac Data Recovery.
Note: iOS and Android Data Recovery features are also available. If you want to retrieve files on these devices, it is also possible.
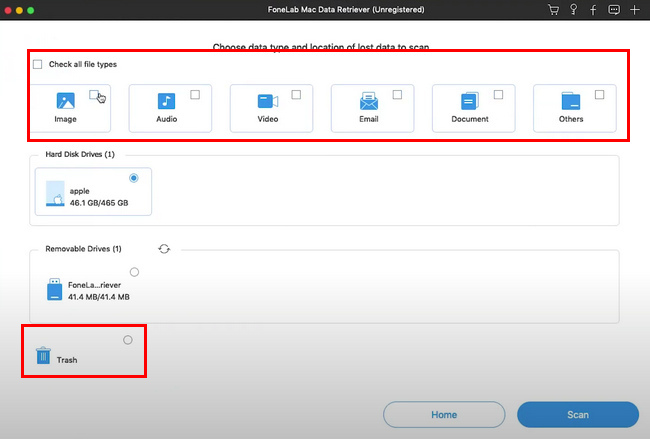
Step 3Check the boxes of the data you need to recover emails, images, and more. The software will let you see the data type and their locations for you to achieve better results.
Note: Recovering files on Trash Bin is one of the unique features of this software. If you want to retrieve files from your device without difficulty, check the Dot button.
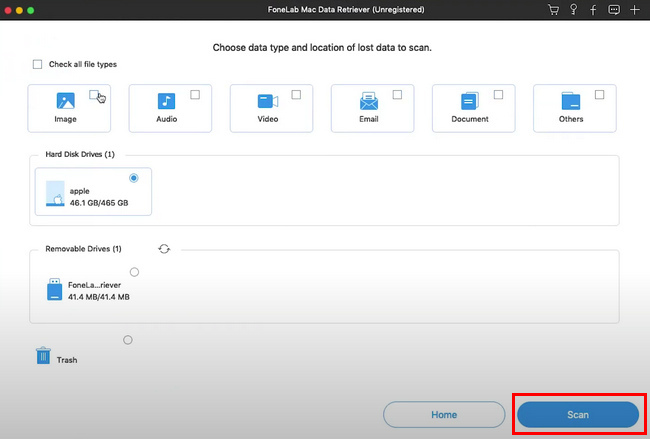
Step 4Tick the Scan button on the lower right side of the software. The scanning process will start automatically.
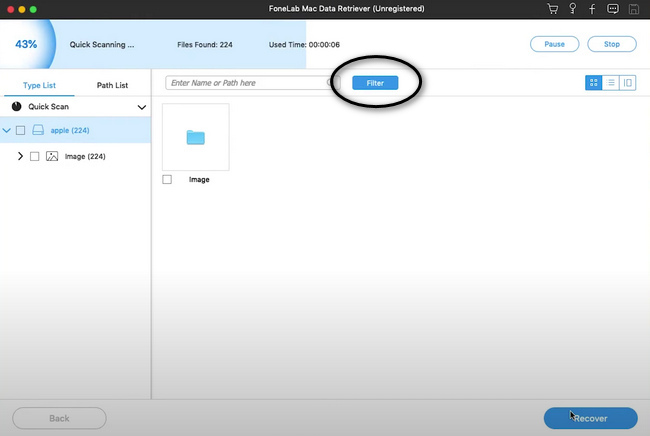
Step 5The lost files will now appear on the software after the scanning process. Click the Filter button once you know the exact date and time of the lost files you want to recover. This feature can help you find files faster. Once you find the files, click the Apply button.
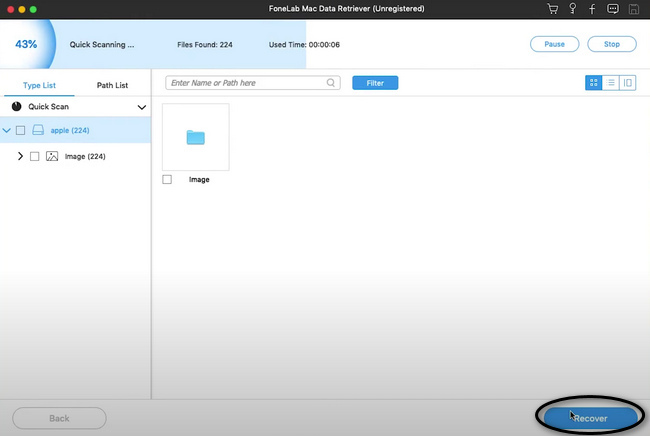
Step 6If the files are ready to retrieve, click the Recover button on the bottom part of the software. Wait for the recovery process before you check the files on your Mac device. After this process, the software will bring back your lost files.
FoneLab Data Retriever - recover the lost/deleted data from computer, hard drive, flash drive, memory card, digital camera and more.
- Recover photos, videos, documents and more data with ease.
- Preview data before recovery.
Part 2. How to View Hidden Files on Mac in Terminal
There are many methods to learn how to find hidden photos on Mac and other data types. This tool is quicker than using software on Mac. It is way faster than these methods. However, the disadvantage is that you need to know the proper codes. It will be hard for you if you don't have a background in using these codes. You can enter the wrong code, which may crash your system. Please memorize some of the essential device codes. You can refer to the steps below using this built-in tool. In this case, it can guide you to familiarize yourself with the correct code.
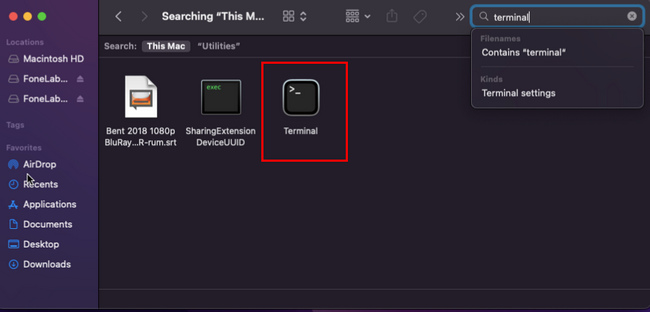
Step 1Launch the Finder of your Mac device and look for each search bar for a faster way to find the tool. Type in Terminal on the search bar. The tool will appear on your screen, and launch it.
Step 2There will be a small window pop-up on your screen. Type in 'defaults write com.apple.Finder AppleShowAllFiles true' on it, then press the Enter key on the keyboard.
Step 3You will need to enter another code, 'killall Finder' then press the Enter keyboard key again. The tool will process the code you enter to show the hidden files. It will also show the hidden files that you want to see.
Part 3. How to View Hidden Files on Mac in Finder
Unlike the previous tool, Finder is way quicker to find your hidden files. It is not hard to determine how to view hidden photos on Mac and other data. It is the best procedure for you if you are not knowledgeable enough about the codes. Finder is one of the most convenient tools. It organizes the files accordingly and can easily access the files you want to check. This tool has only one step to locate your files. By learning keyboard shortcuts, you can look for your hidden files ideally. Please perform the following steps to find your hidden files on your Mac quickly.
Step 1Look for the Finder app on your Mac device.
Step 2Look for the Command+Shift+Period(.) on the keyboard of Mac. Then press them simultaneously to show the files on your Mac device.
Step 3If you want to hide the files again, press the Command+Shift+Period(.) on the keyboard of Mac again.
FoneLab Data Retriever - recover the lost/deleted data from computer, hard drive, flash drive, memory card, digital camera and more.
- Recover photos, videos, documents and more data with ease.
- Preview data before recovery.
Part 4. FAQs How to Find Hidden Files on Mac
1. Why did my files disappear on Mac?
There are many reasons why your files disappear on your device. It may be because you accidentally delete your files and malware issues. It can also be because your device hides your files automatically, like how Mac automatically does.
2. Where do missing files go?
You can look for your files in the Trash bin using Mac. On the other hand, look for the missing files in recycle bin if you are using Windows. There are different ways aside from these two. You can learn them if you explore your device.
3. How to find hidden photos on MacBook Air?
Locate the Photos of the device, then click its Library. Afterward, choose View > Show Hidden Photo Album. You will see the hidden photos on the sidebar of the library. Choose the photos you want to unhide, then click the Unhide button.
Mac FoneLab Data Retriever is the best method among the above techniques. It has features that you will enjoy utilizing. If you want to experience its fantastic features in data retrieving, download it without any second thoughts. This article also contains the best alternative for this software. All you need to do is to read this article. Enjoy and be professional in retrieving your data!
FoneLab Data Retriever - recover the lost/deleted data from computer, hard drive, flash drive, memory card, digital camera and more.
- Recover photos, videos, documents and more data with ease.
- Preview data before recovery.