- Part 1. How to Recover Deleted Emails on Mac via Mail Trash Folder
- Part 2. How to Recover Deleted Emails on Mac via Trash Bin
- Part 3. How to Recover Deleted Emails on Mac via Time Machine
- Part 4. How to Recover Deleted Emails on Mac via FoneLab Mac Data Retriever
- Part 5. FAQs about How to Recover Deleted Emails on Mac
Recover the lost/deleted data from computer, hard drive, flash drive, memory card, digital camera and more.
How to Recover Deleted Emails on Mac in 4 Stress-Free Ways
 Updated by Lisa Ou / June 30, 2023 09:20
I do a lot of pieces of stuff on my Mac. That's why it became my hobby to delete emails from my Mac to free up space. However, I accidentally deleted some important emails from my current work. Where are messages stored on Mac if they are deleted? Can I bring them back on my Mac? Please help me retrieve them as quickly as possible. Thank you so much in advance!
You can see the deleted emails in the trash folder in the Mail app. If you cannot find them, you can locate them in the trash bin of your Mac. What if they don't exist in the said 2 locations? Well, this post will show you 4 easy methods to locate and recover them. Please view them upon scrolling down.


Guide List
- Part 1. How to Recover Deleted Emails on Mac via Mail Trash Folder
- Part 2. How to Recover Deleted Emails on Mac via Trash Bin
- Part 3. How to Recover Deleted Emails on Mac via Time Machine
- Part 4. How to Recover Deleted Emails on Mac via FoneLab Mac Data Retriever
- Part 5. FAQs about How to Recover Deleted Emails on Mac
Part 1. How to Recover Deleted Emails on Mac via Mail Trash Folder
When you delete an email on the Mac Mail, it will store them in its trash folder. You can use it to recover files you accidentally deleted. Do you know where to locate the folder? If not, please follow the tutorial below.
Launch the Mail app. After that, choose the Trash folder on the left. After that, choose the files you want to recover. Later, press right-click on your computer mouse and choose the Move button. Choose the destination of the files you want to recover.
FoneLab Data Retriever - recover the lost/deleted data from computer, hard drive, flash drive, memory card, digital camera and more.
- Recover photos, videos, documents and more data with ease.
- Preview data before recovery.
Part 2. How to Recover Deleted Emails on Mac via Trash Bin
Once you delete an email from the Mail app permanently, Mac will store them in its trash bin. To see on how this feature works, please follow the steps below.
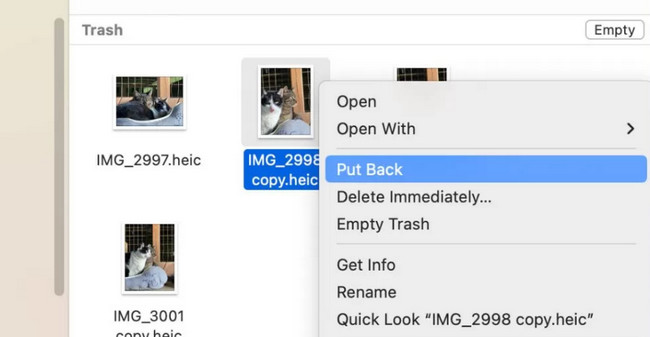
Launch the Trash Bin of your Mac. After that, locate the emails you want to recover and choose them. Right-click the emails and click the Put Back button afterward. Your Mac will retrieve your emails from their original locations or folders.
Part 3. How to Recover Deleted Emails on Mac via Time Machine
Have you heard about Time Machine on your Mac? If not, discover the tool in this section. Time Machine is a built-in backup feature on Mac. It backs up your data, including emails, each time. However, you must activate it before automatically backing up your files. In addition, Time Machine does not contain a lot of storage space. If its storage is full, it will delete and replace the old backup with the new one.
Furthermore, since it runs in the background every time you use your Mac, it can cause it to slow down. Anyway, below is the tutorial for this built-in tool to recover your emails.
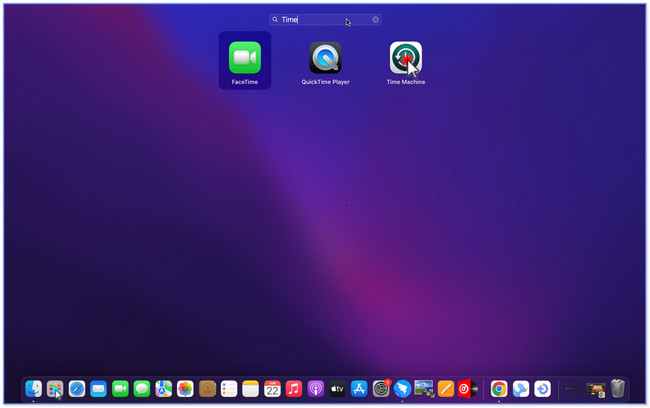
Step 1On the Dock of your Mac, please locate the Launchpad and click it to launch it. After that, click its search bar and type in Time Machine. The results will appear under it. Please click the Time Machine icon to launch it.
Note: You can also use the Spotlight of your Mac to launch Time Machine.
Step 2On the main interface, you will see the backup from your Mac using Time Machine. You will view them as windows at the center of the screen. Please locate the time when you think that you lost your emails. You can use the Arrow button on the right side of the built-in tool.
Step 3Once you find the emails you want to retrieve, please click the Restore button at the bottom. The built-in tool will load for a few seconds, and you only need to wait. Later, you will see the recovered emails in their original folder or location.

Part 4. How to Recover Deleted Emails on Mac via FoneLab Mac Data Retriever
FoneLab Mac Data Retriever is a tool that you can use to recover emails from your Mac. It supports various data types like photos, emails, documents, videos, etc. In addition, there’s nothing to worry about regarding how you lost your Mac emails. It can retrieve data from accidental deletion, unwanted formatted, computer viruses, etc.
FoneLab Data Retriever - recover the lost/deleted data from computer, hard drive, flash drive, memory card, digital camera and more.
- Recover photos, videos, documents and more data with ease.
- Preview data before recovery.
Furthermore, it supports a lot of different devices. It includes digital cameras, Apple devices, Android devices, memory cards, hard drives, and many more. Also, this tool will not modify your data before and after recovery. Please see the quick tutorial on the software below.
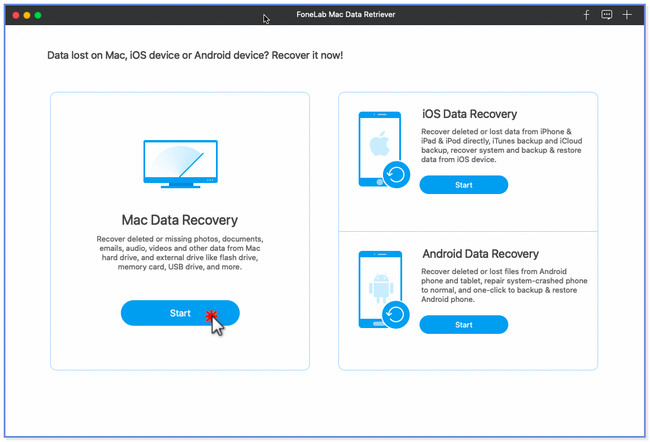
Step 1Click the Free Download button of FoneLab Mac Data Retriever to have it on your Mac. Wait for the downloading process to stop and end. Later, click the downloaded file at the top and drag it to the Application folder. Set it up afterward and launch it on your computer. Once the recovery tool pops up, you will see its 3 features. Please click the Start button under the Mac Data Recovery section.
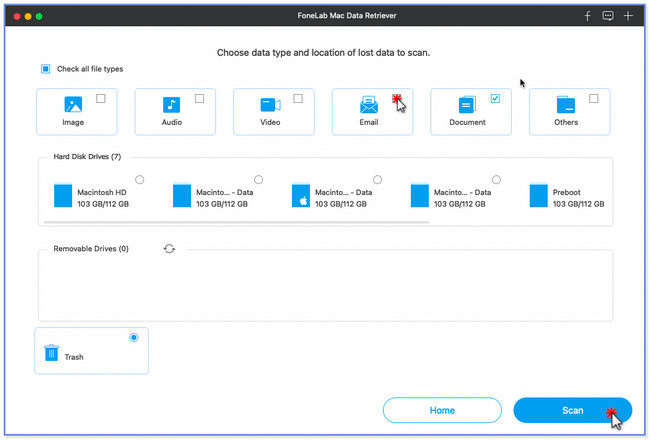
Step 2The tool will show you the data types it supports. Please click only the Email button at the top for faster scanning. Later, choose the location or path of the emails before you lose them on your Mac. After that, you only need to click the Scan button at the bottom. The software will show you the scanning process in percentage at the top. In addition, it will indicate at the top the number of files it found and their actual sizes.
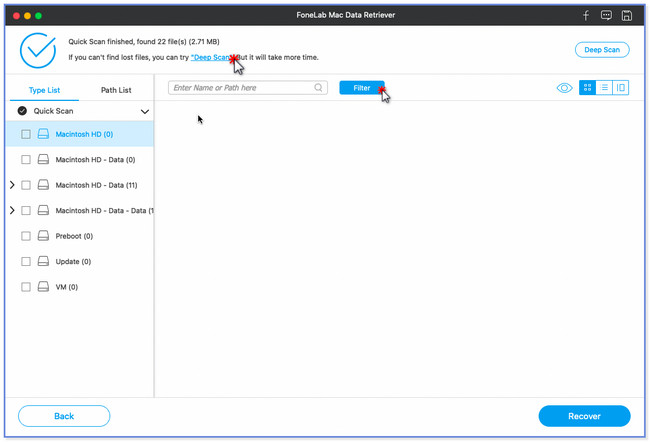
Step 3The type of list will appear on the left side of the tool. Please click the location where you lost your files, and their content will appear on the right. If you cannot locate the emails you want to retrieve, click the Deep Scan buttons at the top. The feature will give you more results compared to a quick scan.
Note: You can also use the Filter button at the top to locate a particular email. You only need to input its creation date and click the Apply button afterward.
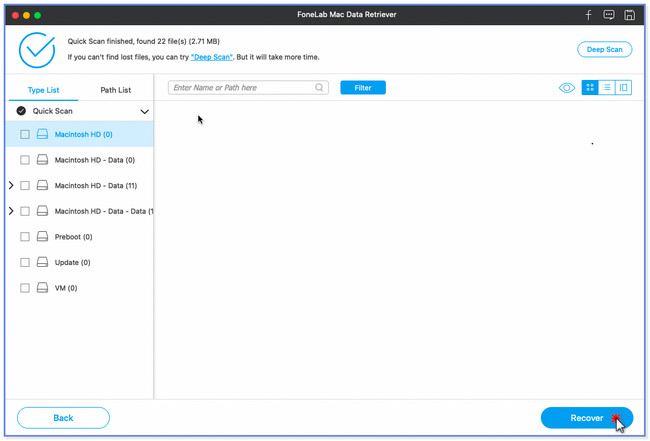
Step 4After deciding what to retrieve, please click the Recover button. The process will last, depending on the size of your data. Once finished, please locate the emails on your Mac.
Part 5. FAQs about How to Recover Deleted Emails on Mac
1. How to permanently delete emails from Mac Mail?
You should open the Mail app to delete emails from Mac Mail permanently. After that, your computer will show you the classification of the emails on its left side. You can click the Inbox, Drafts, Sent, and other more button, depending on your preference. Later, select the emails that you want to delete on your Mac. After that, please click the File button at the top. A new list of options will appear under it. Among all of them, please click the Delete button. The emails will be permanently deleted afterward.
2. Why is Mac Mail using so much storage?
The Mail app uses so much storage on your Mac because it does not only download email. It also downloads the attachments included in the email, like photos, videos, PDFs, and more. You only need to delete emails with large attachments to prevent your Mac from having full storage.
3. How to recover deleted drafts on Outlook?
Open the Outlook app on your computer. After that, please click the Draft button on the left side. Go to the Folder button at the top of the main interface. Click the Recover Deleted Items button afterward on the right. Choose the email you want to recover from the popped-up dialog box. Later, click the Restore Selected Items button at the bottom. Click the OK button. Later, you will see the recovered emails in the Drafts folder afterward.
That's the end of the discussion about how to recover deleted emails on Mac. We hope the 2 easy and proven methods in this post helped you.
FoneLab Data Retriever - recover the lost/deleted data from computer, hard drive, flash drive, memory card, digital camera and more.
- Recover photos, videos, documents and more data with ease.
- Preview data before recovery.