Recover the lost/deleted data from computer, hard drive, flash drive, memory card, digital camera and more.
Recover Data After Installing Mac OS on New SSD Using Easy Methods
 Updated by Lisa Ou / Dec 07, 2022 09:30
Are you planning to install macOS on a new SSD? Whether you update it to the latest or older version, the possibility of data loss won't ever go away. And just the thought of losing all your files must already feel disheartening. Aside from the important documents from work or study, you might also lose your treasured personal data. The files you keep that no one in the world can ever duplicate. This includes videos, photos, notes, and voice recordings you share with the valuable people in your life. You must be wondering why you would think about that when you're only going to install macOS, right?
Well, there are various reasons why you might suffer data loss. Sometimes, you even do it on purpose. Not because you want to but because you need a clean installation of macOS by deleting almost all your files. Naturally, you would create a backup to restore once the process is done. But some people rely too much on Mac's built-in backup feature, Time Machine. It automatically backs up files, so they think there is no problem if they delete files anytime. However, that is not the case. You will immediately lose data if an issue suddenly occurs.
Thankfully, you still have a chance to recover your files after that. If you do the right installation process, you don't have to face any of these problems. Hence, we decided to provide a hassle-free guide to help you in installing Mac OS on new SSD. And in case an unfortunate thing happens, we also included 2 reliable ways to retrieve your data. Kindly keep reading below to begin.

Guide List
Part 1. Installing Mac OS on New SSD Properly
Option 1. Installing Mac OS on New SSD Using Recovery Mode
One of the safe methods to install macOS on a new SSD is through Recovery Mode. You probably want to switch to SSD (Solid State Drive) from HDD (Hard Disk Drive) because of better performance. When it comes to pricing, HDD has a lower price, which makes it more accessible to many people. But with SDD, you can enjoy a faster performance. In addition, it is more durable, lighter, and absorbs less energy compared to the other one.
Act in accordance with the instructions below to learn installing Mac OS on new SSD using Recovery Mode:
Step 1The first thing that you need to do is to install the new SSD in your Mac’s drive bay. After that, it’s time to start or turn on your Mac computer.
Step 2Press and hold the Command + R keys on the keyboard once you hear the startup sound. Release them only after the Apple logo shows up.
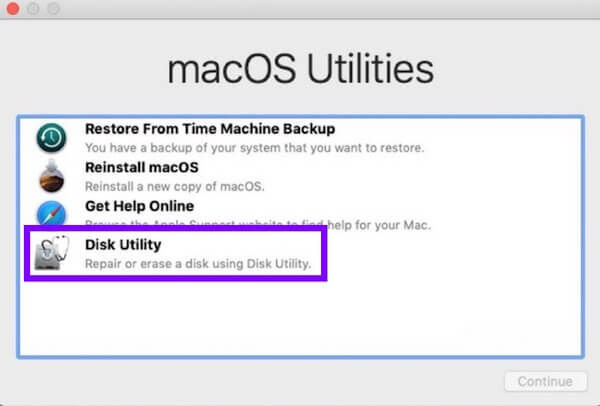
Step 3The Recovery menu will shortly appear, entitled macOS Utilities. Select Disk Utilities from the options. From there, click Continue and do the following instructions to install macOS after initializing the new SSD.
Option 2. Installing Mac OS on New SSD via Time Machine
If you are going to install your older version of macOS, Time Machine is the go-to method you can rely on. That is, if you happen to get lucky and any issue did not occur. This method has the same process as the one above in going into the Recovery mode. However, if you don’t see a backup on Time Machine, kindly proceed to the next method.
Act in accordance with the instructions below to learn installing Mac OS on new SSD via Time Machine:
Step 1Enter the Recovery mode by holding the Command + R keys upon hearing the startup sound. When you’re done initializing the new SSD, proceed to the Restore From Time Machine Backup option.
Step 2Select the disk where you backed up your files with Time Machine. Choose the one you want to restore on the list of your backups.
Step 3Lastly, select Continue and do the instructions that follow to reinstall your older version of macOS on the new SSD.
Part 2. Recover Data After Installing Mac OS on New SSD with FoneLab Mac Data Retriever
Now, something may have gone wrong with the process. Or perhaps you weren’t able to save a backup beforehand. If this is the case, the help of a trusted, reliable Mac data recovery tool is what you need. FoneLab Mac Data Retriever doesn’t require you to have a backup before restoring your files. You only need to initialize your new SSD, and this tool will take care of your files and other data afterward.
FoneLab Data Retriever - recover the lost/deleted data from computer, hard drive, flash drive, memory card, digital camera and more.
- Recover photos, videos, documents and more data with ease.
- Preview data before recovery.
Act in accordance with the instructions below to recover your files after installing Mac OS on new SSD with FoneLab Mac Data Retriever:
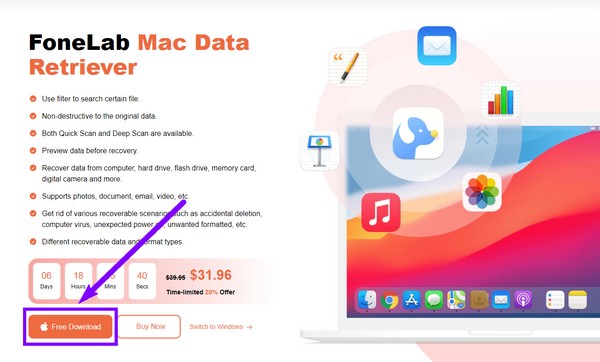
Step 1Visit FoneLab Mac Data Retriever’s website and download the installer file for free. The Free Download tab is located on the left-lower part of the page. Ensure you click the one with the Apple logo. Then move it to the Applications folder after downloading.
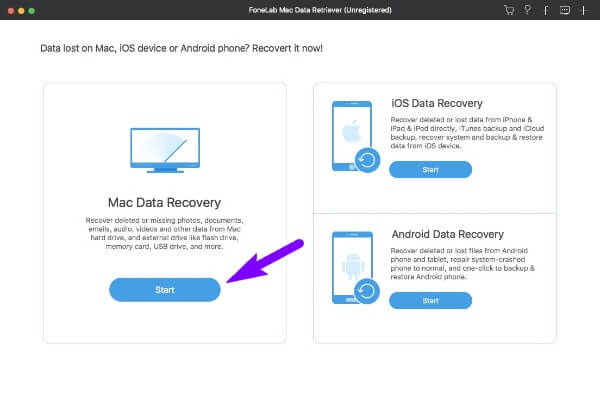
Step 2Click the Start tab below the Mac Data Recovery feature on the main interface. You may also use the other functions in the future in case you suddenly need them.
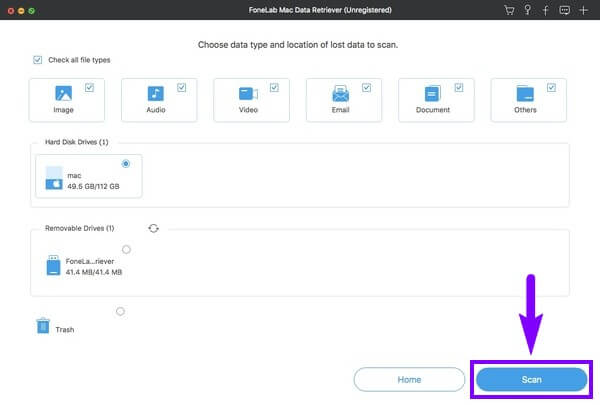
Step 3Choose the types you want to recover from the list of available data types. FoneLab Data Retriever supports photos, audio, videos, documents, emails, and others. Then below, select the data location where your wanted files are stored. After that, click Scan.
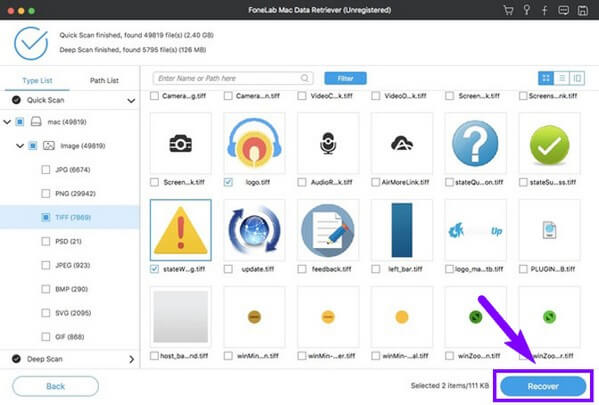
Step 4Select all the files you want to recover by ticking their checkboxes. If you don’t see your files, the Deep Scan is available to do more comprehensive browsing. You can also use the other additional features. After that, click Recover to restore your data finally.
FoneLab Data Retriever - recover the lost/deleted data from computer, hard drive, flash drive, memory card, digital camera and more.
- Recover photos, videos, documents and more data with ease.
- Preview data before recovery.
Part 3. FAQs about Recovering Data After Installing Mac OS on New SSD
1. Is installing Mac OS on new SSD safe?
Yes, it is. However, it is not advisable to do it immediately after a recent update. It is better if you wait for a while before installing again.
2. Can FoneLab Mac Data Retriever recover files from a flash drive?
Yes, it can. FoneLab Mac Data Retriever is capable of recovering files from various devices. With the use of your Mac or Windows computer, you only need to connect the drive you want to restore. The program will then scan it and recover the files that you choose.
3. I have too many files. Is there a way to find the files I need easily?
Yes, there is. Choosing the right tool is the best way to a convenient recovery process. If you want to find your files and other data quickly, use the FoneLab Mac Data Retriever. It has a search bar feature that lets you locate a particular file based on its name. Meanwhile, the Filter function allows you to set the filter info and view your files according to your chosen information.
FoneLab Data Retriever - recover the lost/deleted data from computer, hard drive, flash drive, memory card, digital camera and more.
- Recover photos, videos, documents and more data with ease.
- Preview data before recovery.
Thank you for reading this far. If you have any more concerns, don't hesitate to visit the FoneLab Mac Data Retriever website for more solutions.