iPhone Data Recovery
 iOS System Recovery
 iOS Data Backup & Restore
 iOS Unlocker
 iPhone Password Manager
 Location Changer
 Android Data Recovery
 Broken Android Data Extraction
 Android Data Backup & Restore
 Android Unlocker
 FoneTrans for iOS
 iPhone Data Eraser
 iPhone Cleaner
 HEIC Converter
 HyperTrans
 WhatsApp Transfer for iOS
 Mac Sweep
 Data Retriever
 Mac Data Retriever
 Video Converter Ultimate
 Screen Recorder
 Phone Mirror
 Recover PC Data Now
Recover the lost/deleted data from computer, hard drive, flash drive, memory card, digital camera and more.
Recover Laptop Hard Drive Using 3 Eminent Techniques
 Updated by
 Do you need to recover data from laptop hard drive? If so, don't worry too much about data loss, since accidental deletion, unexpected formatting, system crash, virus attack, and more also happen to many users, causing them to lose important files. As this has become a universal problem, multiple solutions have also been developed, increasing the chances of data recovery from a hard drive, whether in a laptop or a computer. The question is, which one will work on yours?
Whether you have lost an important document, email, your treasured media file, or other data types, the solutions provided below will help you retrieve them from your laptop's hard drive. You must simply diagnose your data loss situation, and recovering the files using the most suitable method will be hassle-free. Hence, browse the information in the following parts to learn the best recovery techniques and all essential details with step-by-step procedures.

Guide List
Part 1. Quick Diagnosis: Can Your Laptop Turn On?
Before attempting to recover laptop hard drive, you need to check the basic status of your laptop and hard drive. This first step is purely observational, but ensure not to skip it, as checking the situation is necessary to determine what type of technique you should use later.
The most important question is whether your laptop powers up normally. Press the power button and watch for any signs of life. Look for lights, fan noise, or the manufacturer's logo on the screen. If your laptop turns on and boots to the desktop, that is good news. It means your system is still functioning, and your hard drive is likely accessible.
However, if your screen stays black or your laptop beeps repeatedly, it could indicate a hardware failure or a corrupted operating system. Meanwhile, if the laptop does not turn on at all, check the battery and power adapter first. Sometimes, the issue is simply a dead power source, not a broken drive. Your next step will depend on the result of this diagnosis.
Part 2. Create a Live Bootable USB
The first technique uses dedicated tool, FoneLab Data Retriever. If your laptop turns on and allows you to navigate programs normally, this is the most effective option you can use. It can handle files lost due to accidental deletion, virus attacks, system crashes, or even formatting errors. Hence, many users have trusted and proven it with their hard drive data recovery. Besides, its interface is simple, allowing everyone—even beginners—to recover files conveniently.
Meanwhile, with FoneLab Data Retriever's user-friendly functions, recovering your cherished files has become much easier. It has a preview feature that lets you ensure the specific file you're selecting is correct before recovery. You may also use the search and filter features to find it more quickly. It even offers both quick and deep scans. Besides, a hard drive isn't the only storage device this tool can recover from. It can also recover data from flash drives, digital cameras, etc.
FoneLab Data Retriever - recover the lost/deleted data from computer, hard drive, flash drive, memory card, digital camera and more.
- Recover photos, videos, documents and more data with ease.
- Preview data before recovery.
View the trouble-free steps below as a pattern for a laptop hard drive recovery with FoneLab Data Retriever:
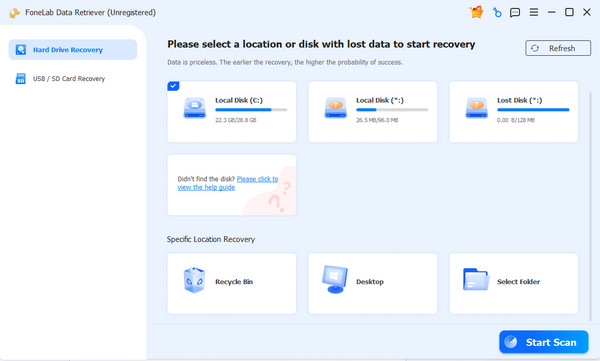
Step 1Using the Free Download button, acquire FoneLab Data Retriever's installer. It will appear in your Downloads shortly, so install it from there before launching the program with the Start tab. Once launched, select your laptop's hard drive from the options and tick Start Scan.
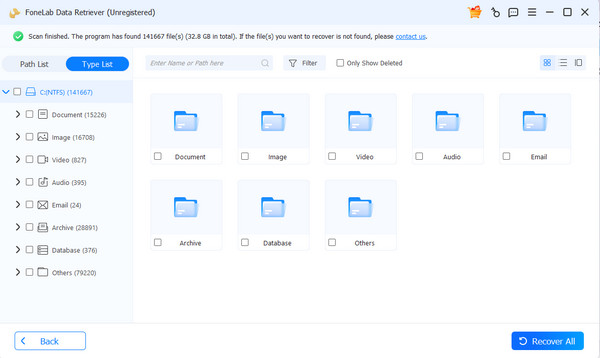
Step 2When done, explore the scanned data by opening each data type folder. You can then start finding and marking the files you intend to recover. Feel free to preview them to be sure. Once you check everything you want, pick the Recover All selection to retrieve your data.
Part 3. Extract the Drive and Use an External Enclosure
The second technique involves using a bootable USB drive to access your hard drive. This method is ideal when your laptop turns on but fails to load Windows or macOS properly. It allows you to bypass the broken operating system—a live USB contains a lightweight OS that runs directly from the flash drive. It does not require installation or make changes to your internal hard drive. Instead, it loads everything into your laptop's memory temporarily. So, use it if your laptop hardware is still functional. It will let you access your data again.
Follow the process below to recover laptop hard drive data by creating a live bootable USB:
Step 1Download a live operating system, like Ubuntu, on another working computer and use a free tool, such as Rufus to burn the ISO file onto a blank USB drive.
Step 2Next, insert the USB into your broken laptop, restart it, and press the boot key, usually F12, to boot from the USB drive instead of the internal hard drive, letting you browse your files.
Part 4. FoneLab Data Retriever
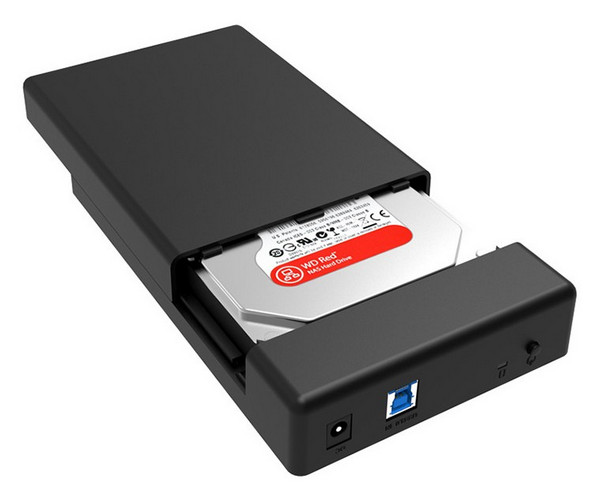
Meanwhile, if your laptop is completely dead and doesn't work at all, extracting the drive and using an external enclosure is the best data recovery solution. This approach turns your laptop's hard drive into a portable storage device. You can then connect it to another computer that is working, and recognize the hard drive just like a regular external drive. From there, you can browse, copy, and recover your files with ease. So, if your laptop is no longer responsive and you have another one or a spare computer, this is your best path to data recovery.
Follow the navigation below to recover dead hard drive by extracting the drive and using an external enclosure:
Step 1First, turn your laptop off and ensure it's unplugged. Then, remove the battery before opening the back panel to carefully take out the hard drive from the laptop.
Step 2Once the hard drive is out, insert it into a compatible external enclosure. Next, connect it to a working computer via a USB cable. You can then reaccess your files from there.
Part 5. Comparison of Techniques for Laptop Hard Drive Recovery
| Method | FoneLab Data Retriever | Create a Live Bootable USB | Extract the Drive and Use an External Enclosure |
| Laptop Condition Required | Turns on and boots normally | Turns on but fails to boot the OS | Will not turn on at all |
| Technical Skill Needed | Low – user-friendly program | Medium – requires creating a bootable USB | Medium – requires physical drive removal |
| Additional Equipment Needed | None – just the program | Another working computer and a blank USB drive | External enclosure and a working computer |
| Risk of Data Loss | Low – read-only scanning | Low – does not alter the drive | Low – physical handling requires care |
| Best For | Accidental deletion, virus attacks, formatted drives, etc. | Corrupted system files, failed OS updates | Dead laptop, broken screen, hardware failure |
Part 6. FAQs about Laptop Hard Drive Recovery
Can I recover data from my physically damaged hard drive?
Yes, it is possible, but the chances are lower, as it often requires professional help. The methods in this article work best for logical issues like deletion or corruption, so consulting a technician is more recommended for physically damaged drives.
Which method is the easiest for beginners?
The FoneLab Data Retriever is the easiest. It has a simple interface and does not require any technical skills or extra equipment.
Choosing the right recovery technique depends on your laptop's condition. Still, with these three techniques—especially the easiest method, FoneLab Data Retriever—you have a solid chance of getting your valuable data back safely.