Recover the lost/deleted data from computer, hard drive, flash drive, memory card, digital camera and more.
3 Excellent Ways to Undo Empty Trash Mac Painlessly
 Updated by
 Are you in a situation where you need to learn how to undo Empty Trash on Mac? Perhaps you were clearing space in a hurry and didn’t notice that an important file was included when you emptied the Trash. Whether you accidentally lost a precious document, photo, music file, or other data type, seeing it gone along with the other deleted files in this section can be depressing, especially if you lost not just one, but multiple important items.
The good news is that not all hope is lost. Many users believe that once the Trash is emptied, their files will no longer exist anywhere, but that’s not the case. Thankfully, depending on how quickly you act and what solution you use, you can often bring those files back. Hence, allow this article to introduce you to the most excellent methods for data recovery from an already emptied Trash folder on a Mac. Learn them with our guidelines below to restore your data.


Guide List
Part 1. How to Undo Empty Trash on Mac with Time Machine
Time Machine is Apple's built-in backup tool, and it is often the first place to look when you need to undo an empty Trash. If you have added a backup drive using this feature before losing the files, you will be able to recover them without a problem. Besides, various storage disks are supported, so whether you use a standard USB, a Thunderbolt external hard drive, a separate dedicated partition on your Mac's internal drive, etc., this backup feature will let you restore files.
Follow the stress-free instructions below to undo Empty Trash Mac with Time Machine:
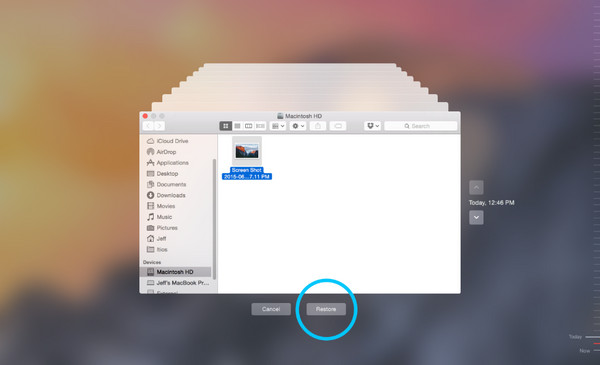
Step 1Open Time Machine by ticking its icon in the menu or searching for it in your Mac’s Launchpad. Once its interface appears, navigate to the folder where your deleted file was originally stored before you emptied the Trash.
Step 2Afterward, scroll back in time using the on-screen timeline or arrow buttons until you find the deleted file. Then, select it and tick Restore to bring your file back to its former location.
Although Time Machine is the first solution users turn to, note that this method has several clear disadvantages. First, it requires prior setup. As mentioned, if you never turned it on before losing your files, it will not work at all. Also, not all files are recoverable, as very large files or those saved from external drives may not appear in your backup history.
Part 2. How to Undo Empty Trash on Mac via Local Snapshots
Meanwhile, Local Snapshots is a hidden feature inside macOS that works automatically, even if you have never set up Time Machine with an external drive. Every hour, your Mac quietly saves a temporary backup of your files directly on your internal storage. Hence, after you empty the Trash, those deleted files may still be sitting in the Local Snapshots section, letting you recover your important data. Meanwhile, its biggest advantage is that it requires no preparation on your part. You don't need an external hard drive, to enable any settings, or to remember to run backups.
Follow the unexacting navigation below to grasp how to undo Empty Trash on Mac via Local Snapshots:
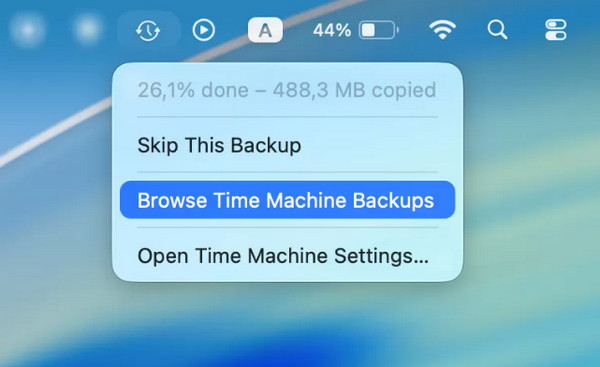
Step 1First, open the folder that originally contained your deleted file before it went to Trash. Next, pick the Time Machine icon in the menu bar and hit Browse Time Machine Backups to browse the snapshots using the timeline.
Step 2Once you scroll back to the time when your file still exists, select it and tick the Restore button in the lowermost section to bring the data back to your Mac.
However, this feature is only available on macOS Sierra or later. If yours doesn’t run the compatible version, the following recovery solution may be more helpful. Besides, the deleted files saved here are only temporary. Your Mac automatically deletes older snapshots when it needs more disk space, so if you don’t act quickly, you will miss the opportunity to recover your files.
Part 3. How to Undo Empty Trash on Mac with FoneLab Mac Data Retriever
Since data loss cases are usually sudden, we understand if you didn’t prepare a backup or missed the critical time to recover your files while it’s still possible. Lucky for you, FoneLab Mac Data Retriever, a well-known professional for deleted computer data recovery, is available to help. It doesn’t matter whether you lost your cherished data due to an emptied Trash, accidental deletion, unwanted format, etc. This tool is designed to restore your data in any situation.
It also works even when you have no backup at all. Yes, that’s right! Unlike other methods, it doesn’t have such requirements to restore data. Whether you’re trying to recover images, documents, audio, etc., FoneLab Mac Data Retriever supports nearly all data types. Additionally, among its best parts is that you don’t need advanced technical skills to use it. This program’s interface is beginner-friendly, and you can navigate it without confusion.
FoneLab Data Retriever - recover the lost/deleted data from computer, hard drive, flash drive, memory card, digital camera and more.
- Recover photos, videos, documents and more data with ease.
- Preview data before recovery.
Determine the painless operation below as a model to undo Empty Trash Mac with FoneLab Mac Data Retriever:
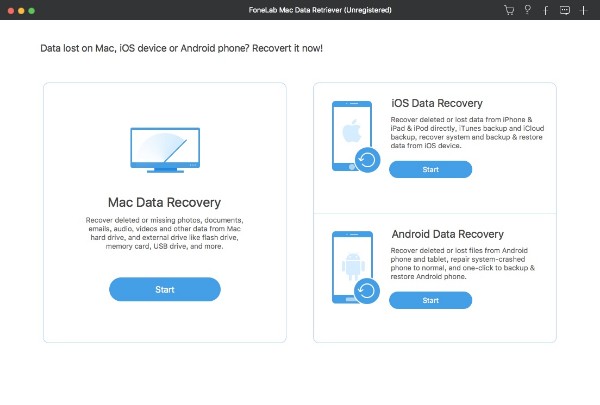
Step 1Get the FoneLab Data Retriever file by hitting Free Download, and it will quickly be presented in the Downloads section. From there, install, then run the program once the Start option appears. Then, on the key interface, select Mac Data Recovery.
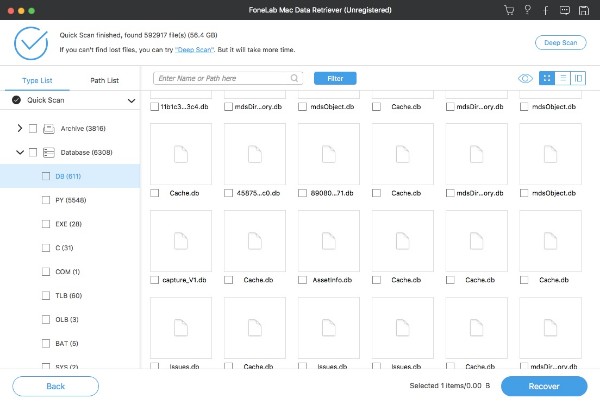
Step 2After that, mark the data type of your deleted file with its disk location and click the Trash option as well. Once ready, opt for the Scan button to detect the deleted data on your Mac. When the folders are shown, explore their content until you find and mark the checkboxes of the files you wish to delete. Finally, choose Recover to retrieve them safely.
Part 4. Comparison of Techniques to Undo Empty Trash on Mac
| Feature | Time Machine | Local Snapshots | FoneLab Mac Data Retriever |
| Requires prior setup | Yes (must turn on Time Machine and have an external drive) | No (works automatically on macOS Sierra or later) | No (just install the program) |
| Works without a backup drive | No | Yes | Yes |
| Time window to recover | Unlimited (as long as backup exists) | Very short (hours to days, depending on disk space) | Unlimited |
| Ease of use | Easy | Easy | Easy |
| Success rate | Very High | Moderate | High |
| Best for | Users who saved a backup | Users who acted quickly after emptying the Trash | Users with no backups or preparation |
Part 5. FAQs about Undoing Empty Trash on Mac
What should I do right after accidentally emptying the Trash?
Stop using your Mac right away. Any new files or activity can overwrite the deleted data.
Does Time Machine save everything in my Trash?
Yes, it does. If Time Machine was running before you emptied the Trash and deleted the data, those files are saved in your backups until the oldest backups are rotated out.
The best way to undo an empty Trash on Mac is to rely on Time Machine if you have it, or act fast with local snapshots. But if you don’t, no need to worry because FoneLab Mac Data Retriever is also accessible and can help you recover files without many requirements.