Recover the lost/deleted data from computer, hard drive, flash drive, memory card, digital camera and more.
Restoring iPhoto Library on Mac with The Leading Guide
 Updated by Lisa Ou / June 12, 2023 16:30
It is my sister's birthday this coming weekend, and I plan to gather her pictures in a photo album to give her as a gift. I want to include our older photos to be more sentimental, but the images are stored in my old iPhoto library, which is now removed from my Mac. Can someone please explain how I can restore my iPhoto library on Mac? Thanks a lot.
iPhoto is the older photo management app on Mac. However, it's no longer available since Apple has already replaced it with the Photos app. You can no longer purchase or update it since Apple is now focused on developing and improving its successor. If you upgraded your Mac photo management app to Photos, you might have also lost the pictures on the old iPhoto. If so, here is some good news!

This article will list effective strategies to restore the iPhoto library on your Mac. This way, you can recover your old photos with no sweat. We specifically picked the ones with simple processes so you won't need to experience difficulties during the photo recovery. Additionally, user-friendly guidelines are among each part for a smooth procedure.
FoneLab Data Retriever - recover the lost/deleted data from computer, hard drive, flash drive, memory card, digital camera and more.
- Recover photos, videos, documents and more data with ease.
- Preview data before recovery.

Guide List
Part 1. Restoring iPhoto Library on Mac from Time Machine
Regarding Mac restoration, Time Machine is one of the most reliable techniques. It is a backup feature on Mac that allows you to recover your deleted data, including apps, photos, videos, music, emails, documents, and more. This method requires a Time Machine backup disk to store the Mac data you wish to restore. So, automatically, you must have already prepared a backup to recover the iPhoto Library using the Time Machine.
Bear in mind the straightforward process below to restore Time Machine pictures from the iPhoto Library:
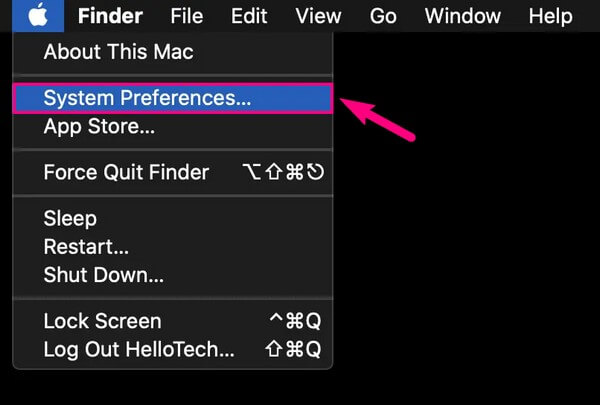
Step 1Get your Time Machine backup disk and link it properly to your Mac. On the top left portion of your desktop screen, hit the Apple logo to see the pulldown menu and click System Preferences.
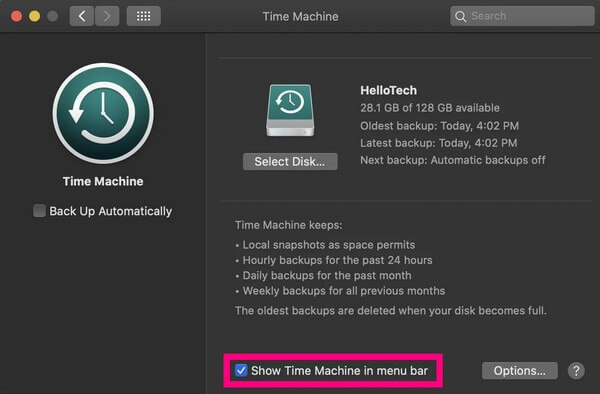
Step 2When the System Preferences screen displays, locate the icon that looks like a clock but has a curved arrow pointing downwards surrounding it. Once seen, click it to access the Time Machine preferences. After that, mark the checkbox beside the Show Time Machine in menu bar option on the following screen.
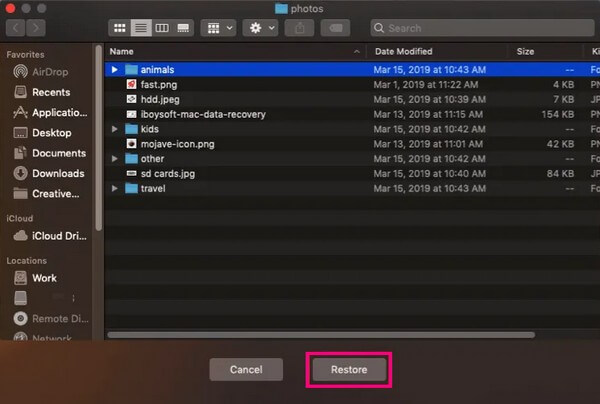
Step 3Once you see the Time Machine icon on the menu bar, click it, then pick Enter Time Machine from the drop-down list. The backups stored on your Time Machine backup disk will appear on the screen. From there, locate the data you desire to restore. They are typically sorted by date, with the oldest backups at the bottom. After selecting, hit the Restore tab below the backups to return your data to your Mac.
Please remember to be careful in using the Time Machine. It has a feature to restore your entire backup, not just the individual files, which may lead to deleting your Mac’s newer files. You have to backup files to prevent data loss on your Mac. If not, you may lose more files than you can recover.
Part 2. Restoring iPhoto Library on Mac with FoneLab Mac Data Retriever
iPhoto is an old app, so the chances that you have saved a backup way back are small, which is understandable. If this is the situation, you have no choice but to rely on a professional tool. As many people say, FoneLab Mac Data Retriever is a productive recovery tool with a high success rate. It can help you recover your old photos stored in the iPhoto Library when it was still installed on your Mac. Other than the iPhoto library pictures, you can also trust this program to retrieve your other data, regardless if they were old or recently deleted before overwritten. It supports various file types, including emails, documents, videos, music files, etc. Furthermore, it has additional features that let the photo recovery become easier.
FoneLab Data Retriever - recover the lost/deleted data from computer, hard drive, flash drive, memory card, digital camera and more.
- Recover photos, videos, documents and more data with ease.
- Preview data before recovery.
Refer to the effortless instructions underneath as an example to recover deleted photos on Mac with FoneLab Mac Data Retriever:
Step 1Get into the FoneLab Mac Data Retriever official site and explore it for the download button. The Free Download tab with the Windows logo will be viewed by default, but you can change it by hitting the Go to Mac Version option. The Apple logo will then replace the Windows. Through that, you can save the program on your Mac. Drag it to the Applications folder, then install and run the recovery program afterward.

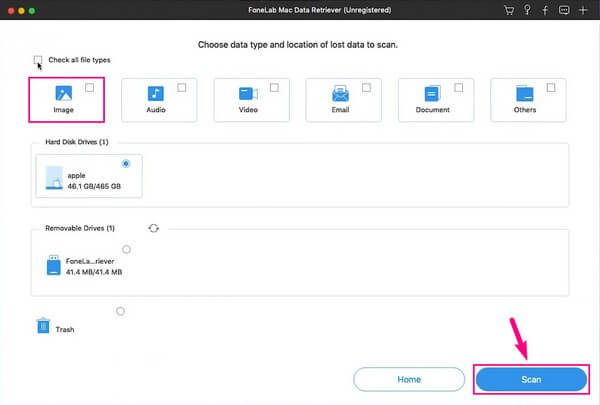
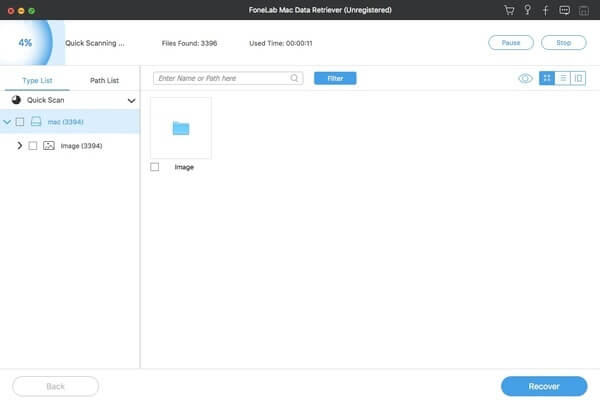
Step 2The retrieving tool’s primary interface consists of a Start button on each feature. Kindly choose the Mac Data Recovery box’s Start tab on the interface’s left section. Meanwhile, the supported file types will be on the following interface. Check the Image box on the top-left, then the hard disk drive where your old photos in the iPhoto app were stored. After that, click Scan at the bottom right for the program to run a quick scan of your data.
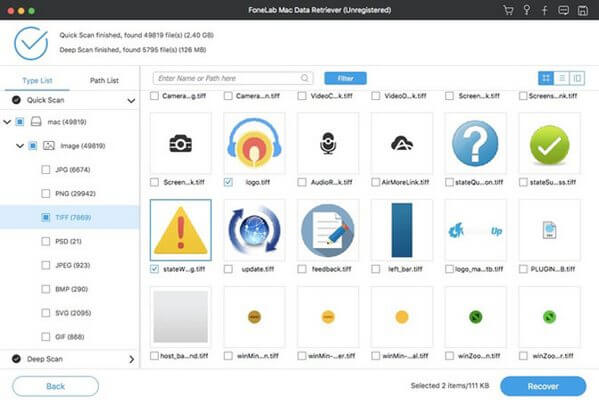
Step 3During the scanning process, an Image folder will display on the interface, containing the deleted photos from your Mac. If you open the folder, you’ll find another set of folders with image formats as their names. Open the folder according to the picture format you hope to recover. If you are unsatisfied with the image files or formats you see on the screen, you can run the Deep Scan on the interface’s top right to scan more extensively.
Step 4When you view the erased photos on the interface, you may find the ones you want manually by scrolling down. But if you remember their image names, the fastest way to locate them is by entering their names on the search bar. Or you may also try the Filter function, where you can set the date they were stored on your Mac. Thus, it will be quicker to locate them. After that, it’s time to choose the pictures you desire, then click Recover to restore them on your Mac.
Part 3. FAQs about Restoring iPhoto Library on Mac
1. Does Time Machine backup photos?
Yes, it does. Part 1 of this article mentions that Time Machine is a reliable function for restoring your Mac content, including photos and other data. Hence, it restores the backups you save on a Time Machine backup disk. To back up your Mac data, prepare a disk drive where you can save your backup data. Then enter Time Machine and choose whether to back up your data manually or automatically from the options.
2. What happens if I delete the iPhoto library on Mac?
Naturally, it will be removed from your Mac along with its data. Thus, it will free up storage space, especially if several data are stored in the iPhoto app. But before you do this, ensure the photos and videos you still want to keep are safely transferred to the Photos app. If not, they must be saved in safe storage where you can restore or revisit them anytime.
There you have the leading strategies to restore the iPhoto library on your Mac. Explore more helpful methods by visiting the FoneLab Mac Data Retriever website.
FoneLab Data Retriever - recover the lost/deleted data from computer, hard drive, flash drive, memory card, digital camera and more.
- Recover photos, videos, documents and more data with ease.
- Preview data before recovery.