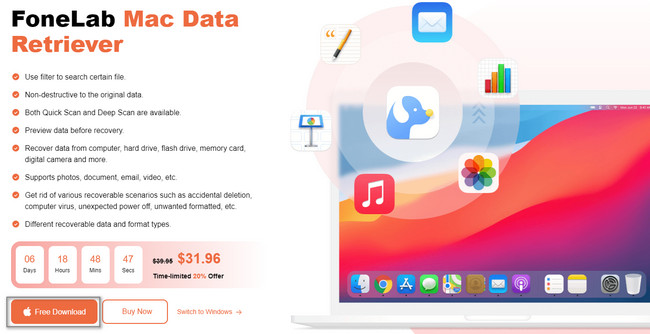
Recover the lost/deleted data from computer, hard drive, flash drive, memory card, digital camera and more.
3 Terrific Procedures to Recover Data on MacBook Perfectly
 Updated by Lisa Ou / Jan 03, 2023 09:00
Losing data on MacBook is not rare even this device is well known for its security for data and files. There are incidents that you cannot avoid happening. Examples include human errors and the device itself. For instance, you are filtering your data using your MacBook Pro. Unfortunately, you clicked the wrong option, which is the delete button. In this case, the device will delete the data instantly. If this happens, do not panic! You can use A MacBook Pro data recovery, and this software is not your only option. You can also use the other tools installed on your Mac. Read this article seriously for better results for your lost data.


Guide List
Part 1. How to Recover Data from MacBook via FoneLab Data Retriever
Once you do not know the data types you lost on your MacBook, Mac FoneLab Data Retriever is your best choice. In line with this, this software supports many recoverable data. It includes documents, images, videos, audio, emails, and more! Aside from that, it will help you retrieve files on any device, such as a hard drive, memory card, computer, and more. In this case, it will also help you learn the MacBook hard drive recovery. You do not need to worry if you are a beginner using third-party tools. The features of this tool are user-friendly. Are you willing to try this recovery tool? Its guide follows.
FoneLab Data Retriever - recover the lost/deleted data from computer, hard drive, flash drive, memory card, digital camera and more.
- Recover photos, videos, documents and more data with ease.
- Preview data before recovery.
Step 1To get FoneLab Mac Data Retriever, click the Free Download button with an Apple icon on the left. After that, you need to set up the tool on your Mac. Install > Launch > Run it to start recovering your data instantly.
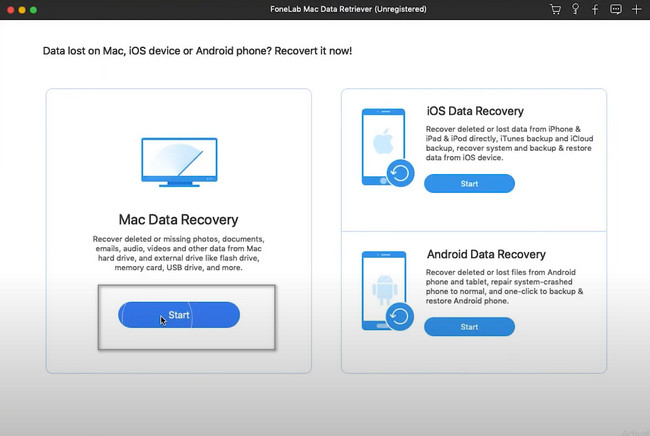
Step 2The device will immediately pop up the software on your screen. You must click the Start button under the Mac Data Recovery section. You will see a simple description on it so that you will have a brief background of the software.
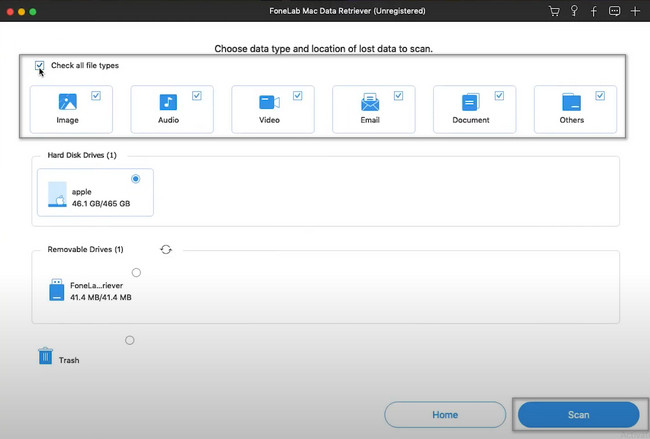
Step 3The recovery tool requires selecting the data types you want to recover. It is recommended that you will choose all of them. For this reason, you will have the chance to retrieve all the essential files you lost on your Mac. After making the selection, click the Scan button on the bottom right corner of the main interface.
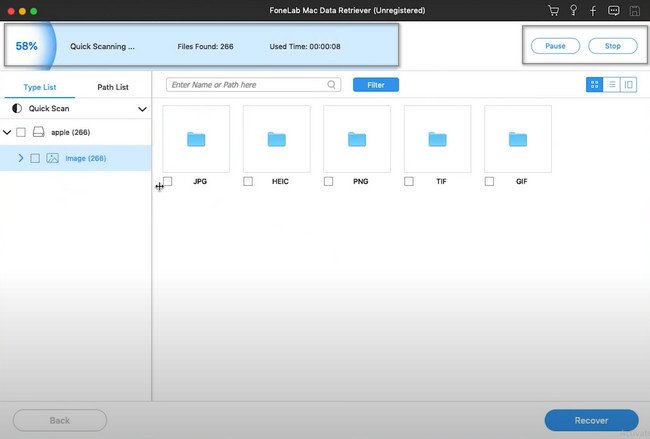
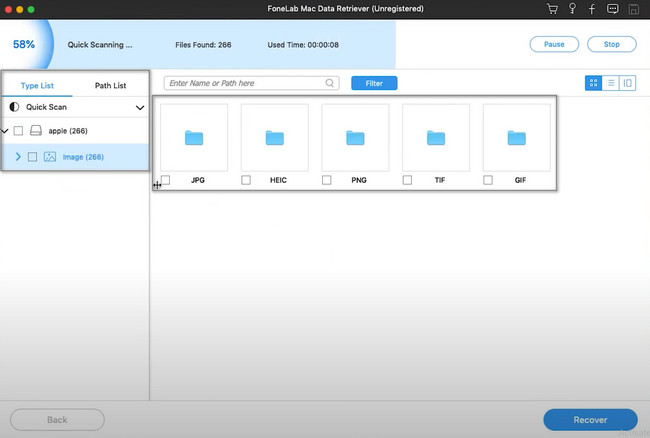
Step 4The tool will let you know if the scanning process is done. It will show you at the top of it the files it found. If the quick scanning did not locate all your files, click the Deep Scan button. You will spend more seconds, but it will give you the best results. You can Stop and Pause the process by clicking the buttons.
Step 5On the left side of the tool, you will see the numbers of files it found according to their data type. You must click all of them and filter the folders you want to retrieve, especially the essential ones. To do that, tick the boxes of each of them. If you have finished selecting the files you suppose to retrieve, click the Recover button. You must not interrupt the process to avoid mistakes and errors. After this step, you will instantly see the lost data on your MacBook.
Mac FoneLab Data Retriever is the leading software to recover data from MacBook Air and other models. If you wish to know the different ways to retrieve data, move on.
FoneLab Data Retriever - recover the lost/deleted data from computer, hard drive, flash drive, memory card, digital camera and more.
- Recover photos, videos, documents and more data with ease.
- Preview data before recovery.
Part 2. How to Recover Data from MacBook with iCloud Backup
MacBook has many backup tools or services that you can use. iCloud is one of them. For instance, you are saving pictures using your MacBook. iCloud will automatically back up those data and store them. In this case, if you accidentally delete or the data corrupts on your device, you have a copy of them. iCloud is not only about backing up your files and data. It will also let you share your photos, notes, and more with your friends and family. However, to perform the MacBook Air data recovery and other models, you must follow the steps below accordingly.
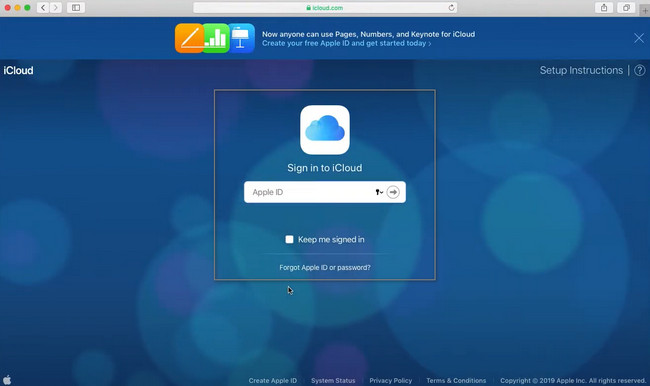
Step 1To use your iCloud, you need to go to its official website. On the main interface, you will notice that it will require you to sign in. It is important to memorize and know your account's Apple ID and Passcode. Without these, you will not be able to use iCloud to recover your missing data.
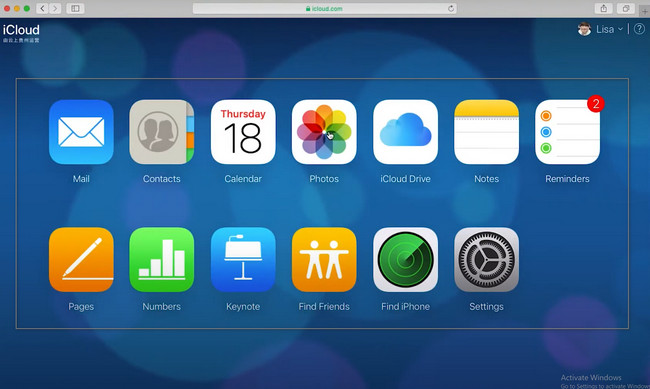
Step 2You will see many applications that are installed on your MacBook. You only need to choose the data you want to recover. In this case, it will be time-consuming because your need to select them individually. After you choose the data types you want, you only have to download them and save them to the folder you prefer on your device.
Part 3. How to Recover Data from MacBook Using Time Machine
Aside from iCloud, Time Machine can also serve as a backup mechanism on your MacBook. You will not have any difficulty using this built-in tool on your device. Its interface is manageable so that you can perform professional-like. This tool is not automatically set up on your device. You need to activate it to have a backup for your data. Another good thing about this tool, it is more than backing up your data. It can recover data on MacBook Air and other models. Do not hesitate to utilize this fantastic tool. To know the steps, you only need to proceed below.
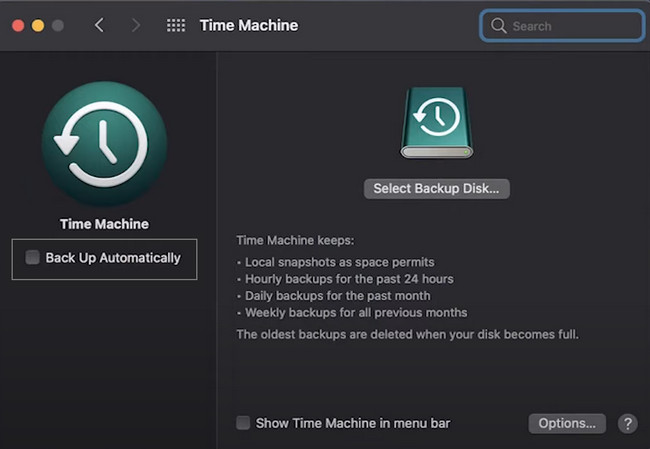
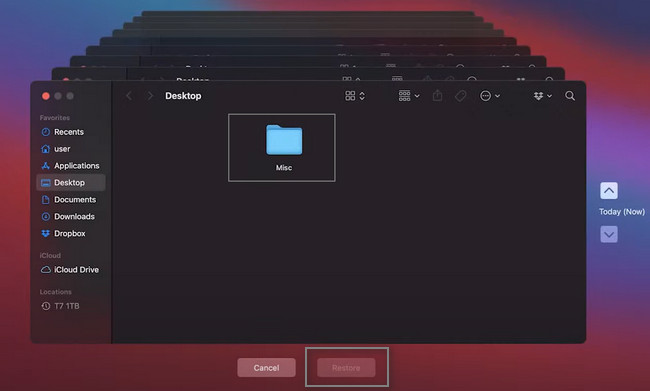
Step 1On the main interface, look for the Launchpad of the MacBook. On the search bar, you need to type in Time Machine. Once the tool appears on your screen, click it immediately to launch it.
Note: To back up your files instantly, click the Back Up Automatically section on the left side of the tool. You will see this once you search the Time Machine on the Finder.
Step 2Locate all the data types you want to recover. Afterward, click the Restore button on the bottom part of the tool. In this case, the device tool will return your files to their original locations.
Part 4. FAQs about Recovering Data on MacBook
1. How to retrieve data from MacBook Pro hard drive?
To recover files from MacBook Pro hard drive, launch the Disk Utility. You only need to click the First Aid section, then follow the Run button. In this case, the tool will check the volume of the hard drive. Wait for the procedure to finish. Lastly, click the Done button.
2. How to recover deleted partitions on MacBook?
It is advisable to use the Mac FoneLab Data Retriever. It supports the recovery of deleted partitions. You can use its features to perform that. If you want to know more about this tool, download it now!
Recovering data on MacBook is simple because this device has built-in recovery tools. However, Mac FoneLab Data Retriever is still the best Mac data recovery tool for your missing data. It has remarkable features that you will surely enjoy. To learn more, familiarize yourself with it by downloading it on your MacBook.
FoneLab Data Retriever - recover the lost/deleted data from computer, hard drive, flash drive, memory card, digital camera and more.
- Recover photos, videos, documents and more data with ease.
- Preview data before recovery.