Detailed Guide on How to Screenshot on Mac Comfortably
 Posted by Lisa Ou / Nov 03, 2023 16:00
The screenshot feature is necessary on several devices, including computers like Mac. It helps you in several situations, such as screenshotting a page to reference what you are saying. If you relay information to someone, you can easily capture and share the screen where you have seen it. This way, explaining and giving the details about the discussion will be easier. On the other hand, it is also helpful when you want to remember a fact about something since you only need to take a screenshot and view it once you need the info.
Hence, it's understandable if you're among those people who ask, "How do you screenshot on a Mac?" Well, here's a good news! Scanning the parts of this article will enlighten you regarding the different methods for taking a screenshot on a Mac. Built-in methods are included, but if you prefer a beneficial tool, we have also prepared one in the next parts so that you'll have more options and can avoid having difficulty taking screenshots on your Mac.
Warning: Recording calls is illegal once you use it for bad intentions. Most importantly, once there's no consent from the person.


Guide List
Part 1. How to Screenshot on Mac via Shortcuts
No matter what computer you have, you will encounter several keyboard shortcuts, each of which has a different use. Hence, expect to find a keyboard shortcut designated for taking a screenshot on Mac. It is a built-in function, so you don’t have to install or set up anything to utilize it. In addition, macOS allows you to change the default keyboard shortcuts on System Preferences to make you more comfortable taking screenshots.
Bear in mind the simplified instructions underneath to answer how do you take a screenshot on a Mac via shortcuts:
Step 1Power on or unlock your macOS, then proceed immediately to the screen you plan to capture. For instance, open a site on your browser if there’s any information you wish to take from the internet. Ensure all the details you need fit inside the computer display, or you can just take another shot of the other details later if they don’t.
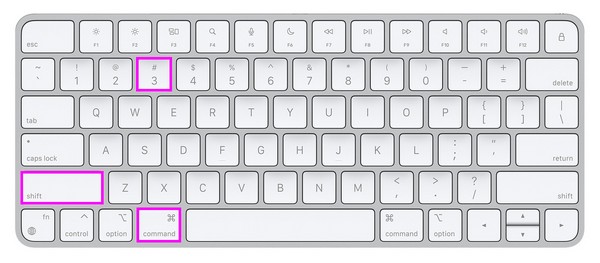
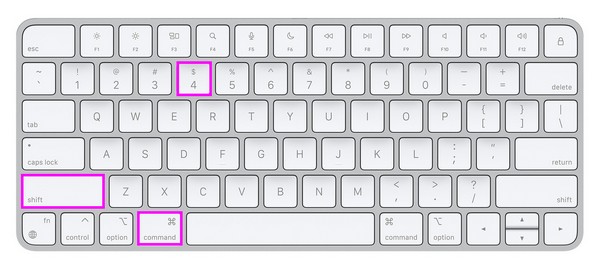
Step 2The default shortcut for taking a Mac screenshot is Cmd + Shift + 3. Thus, press these 3 keys together once you’re ready to capture the entire Mac screen. Alternatively, use the Cmd + Shift + 4 keys if you only want to capture a specific area by dragging the crosshair.
You may have noticed that this method is basic and quick to process. But at the same time, it also only offers nothing but a simple screenshot. Hence, if you’d like to try a screenshot method with advanced features that provide more functions, like an editor, kindly see the following part.
Part 2. How to Screenshot on Mac with Mac FoneLab Screen Recorder
As mentioned above, this next tool, Fonelab Screen Recorder, is a program that provides more advantages. It lets you capture high-quality snapshots you can edit afterward. It supports adding texts, drawings, and more, so enjoy exploring the editing features to make your screen captures finer. They automatically appear after taking the shots, so you won’t need to find them.
FoneLab Screen Recorder allows you to capture video, audio, online tutorial, etc on Windows/Mac, and you can easily customize size, edit the video or audio, and more.
- Record video, audio, webcam and take screenshots on Windows/Mac.
- Preview data before saving.
- It is safe and easy to use.
Once you’re finished, see its other key features, such as the video recorder, audio recorder, webcam recorder, etc. Mac FoneLab Screen Recorder doesn’t only offer to capture your screen but also record it, which is helpful when doing various activities. For instance, it is useful when creating a tutorial, recording gameplay, random videos, movies, episodes, and more.
Utilize the detailed procedure below as an example of how to screenshot on Mac with Fonelab Screen Recorder:
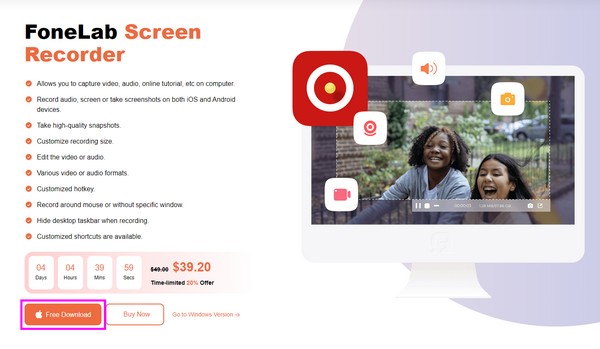
Step 1Display the Mac FoneLab Screen Recorder page on your Mac browser to see the download button. But before clicking it, select the Go to Mac Version option first for the Windows icon to switch to an Apple symbol. Then, hit Free Download to get the installer into your Downloads folder. From there, open the file and drag it to the Applications folder to launch afterward.
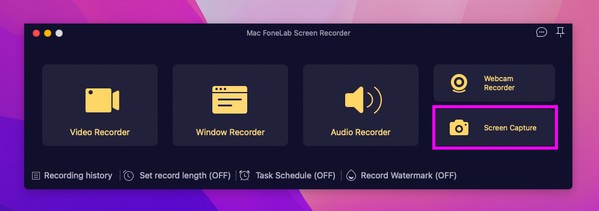
Step 2The Mac FoneLab Screen Recorder prime interface will greet you with its main functions, including the recorders and screenshot feature. Next, display the screen you will capture on your Mac desktop and ensure the information you need is also presented. Then, return to the interface and click one of the rightmost boxes, Screen Capture, with a camera icon to use it.
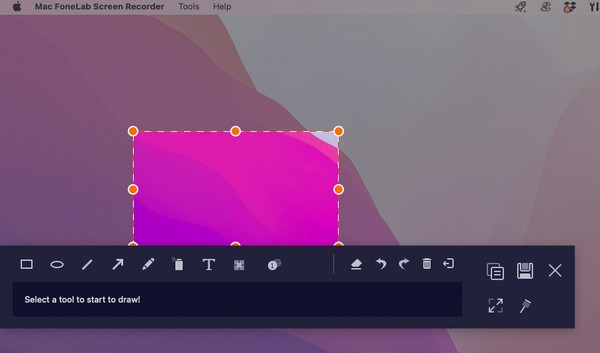
Step 3When the crosshair materializes on the screen, drag it into the portion of the screen you wish to capture to take a screenshot. Afterward, see the features on the editing toolbar and use them accordingly to improve your screenshot’s appearance.
FoneLab Screen Recorder allows you to capture video, audio, online tutorial, etc on Windows/Mac, and you can easily customize size, edit the video or audio, and more.
- Record video, audio, webcam and take screenshots on Windows/Mac.
- Preview data before saving.
- It is safe and easy to use.
Part 3. How to Screenshot on Mac through The Screenshot Toolbar
Another built-in feature on Mac is the Screenshot Toolbar. If you open it using the designated keyboard shortcut, it will show you a toolbar containing different features for taking screenshots and screen recording. You only need to choose the screenshot button from the bar to capture your screen in one click. However, there will be times when you might encounter a problem that causes the toolbar to malfunction. A professional tool like the previous method is highly suggested when this happens.
Mimic the stress-free directions underneath to use the screenshot selection on Mac through the Screenshot Toolbar:
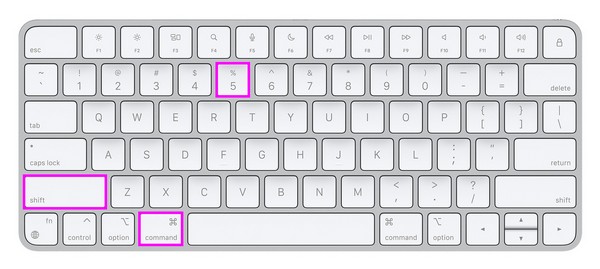
Step 1First, present the screen you hope to capture on the Mac to prepare it for the screenshot process. Like the previous methods, your needed information or details must be exhibited properly on the screen. This way, the following steps will be easier to navigate. When ready, hit the Cmd + Shift + 5 on your Mac keyboard to reveal the screenshot toolbar.
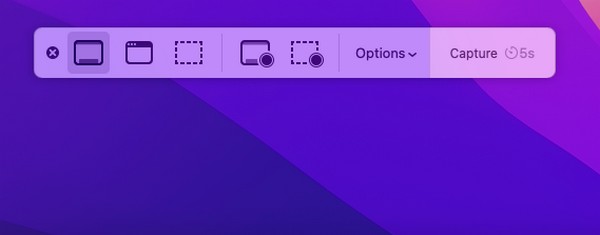
Step 2From there, choose the screenshot type you’d like to use for capturing the screen. The first button is for screenshotting the entire screen, the second is for a window, and the third is for a portion of the screen. Click one of them to achieve your desired screenshot result.
Part 4. FAQs about How to Screenshot on Mac
1. Where do Mac screenshots go after I take them?
When you take screenshots on a Mac, they automatically get saved on your desktop, as it's the most accessible and convenient location for many users. It is the default location, so once you access it, you will find the photos you have captured on your Mac screen. They are usually named Screen Shot [date] at [time].png. thus, you will be able to find them more easily. Alternatively, they can also be found in the Recents folder once you open Finder if the screenshots have only been captured recently.
2. How do you take a screenshot on a Mac without keys?
If your keyboard is unavailable, operating the built-in screenshot methods on your Mac may not be as easy. Fortunately, you can use the Fonelab Screen Recorder instead. Unlike the other techniques, it doesn't require a keyboard shortcut, and you only have to click some options to install the program and use its screen capture function smoothly.
Thanks for counting on the strategies in this article to take a screenshot of your macOS. Several solutions are also available on the FoneLab site if you experience more concerns in the future.
FoneLab Screen Recorder allows you to capture video, audio, online tutorial, etc on Windows/Mac, and you can easily customize size, edit the video or audio, and more.
- Record video, audio, webcam and take screenshots on Windows/Mac.
- Preview data before saving.
- It is safe and easy to use.