Painless Guide on How to Record A Google Meet Correctly
 Updated by
 Hi! I want to learn how to record in Google Meet so that I can rewatch our online discussion about a school project later. I am easily forgetful, especially about little details, which is why recording the meeting would be a helpful solution. My only problem is that I don’t know how. Would anyone be kind enough to walk me through the proper methods? Thank you!
Google Meet recording is something many people need for various objectives. You can do it for work, school, or even personal reasons. For instance, like the scenario above, it’s difficult for you to remember every little detail, especially if it’s a long discussion. Or you may only need it for documentation. Regardless, recording your meeting on this platform is helpful, but what is the proper way to do it? Wonder no more; we have already prepared easy guidelines below to assist you.

Guide List
Part 1. How to Record Google Meet with Built-in Feature
Before anything else, Google Meet’s built-in feature for screen recording on the computer is the initial solution you must learn. This way, you won’t have to rely on other platforms since you can do the recording on the same program. After all, the procedure is hassle-free and can be learned within minutes.
Abide by the easy navigation below to understand how to record meeting in Google Meet with its built-in feature:
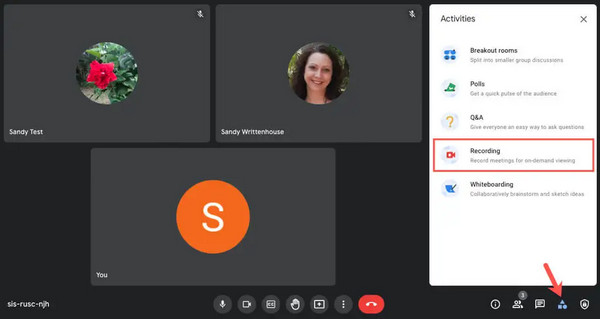
Step 1Initialize Google Meet, then click Start or Join to enter the online meeting. When ready, hit the Activities symbol at the bottom, then select Recording.
Step 2Next, opt for the Start recording option, followed by the Start button on the pop-up screen to record your Google Meet meeting. You can then hit Stop recording when finished.
Note: Only users with specific Google Workspace subscriptions will have the ability to record meetings. Also, you must be the meeting host, co-host, or anything eligible to use the platform’s built-in recording feature.
Part 2. How to Record A Google Meet on Phone
What if you plan to record the Google Meet on your mobile device? It’s not a problem because Android and iOS devices also offer their respective built-in recording features. You can use them for any activity you wish to capture on your device, provided that the app you want to record doesn’t have a built-in protection for screen recording.
Mimic the user-oriented steps below to grasp how to record Google Meet on phone:
On Android
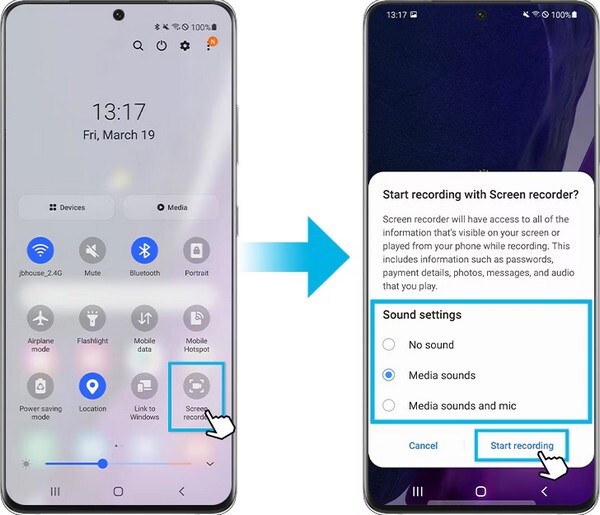
Step 1First, prepare the conference you wish to record on Google Meet by joining or starting the meeting. Once ready, view your Android’s Quick Settings panel by swiping from the top of the screen.
Step 2You will then immediately see the Screen recorder option, so tap it and choose if you want to record only the meeting or include the mic. Finally, choose Start recording.
On iOS
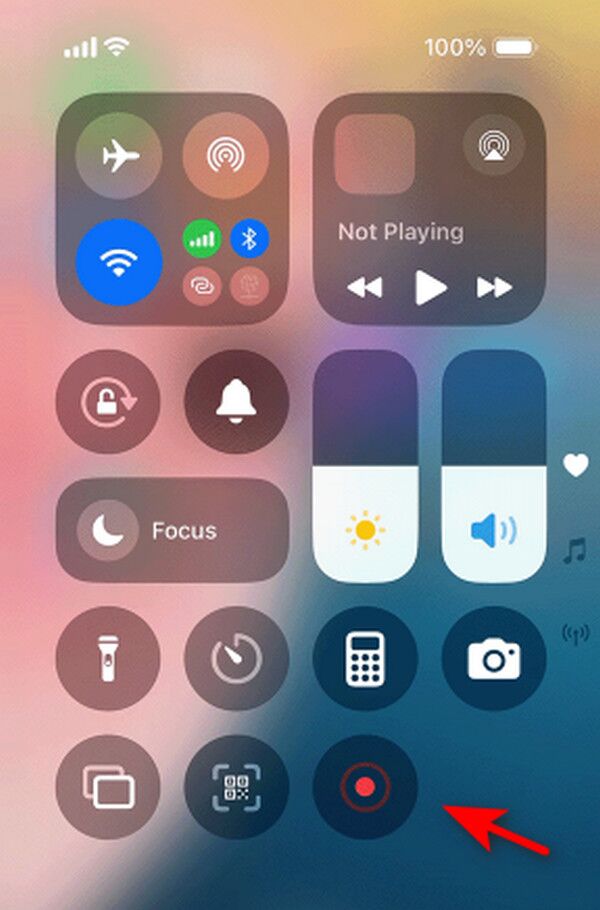
Step 1Like before, ensure your meeting is ready on the Google Meet app by starting or joining. After that, launch your iOS or iPhone screen recorder by viewing the Control Center.
Step 2Among the options will be the gray Record button, so tap it, and the three-second countdown will start. Then, exit the Control Center for the meeting to be presented and recorded.
Part 3. How to Record on Google Meet on Computer
Like mobile devices, computers also have built-in recording features to rely on for your meetings on the platform. Depending on the operating system, you can use either to record the computer screen and audio, like your Google Meet. Hence, no worries whether your computer runs Windows or macOS. Windows offers an Xbox Game Bar, while Mac computers have a Screenshot toolbar for recording.
Act under the simplified guide below to determine how to record Google Meet meeting on a computer:
On Windows
Step 1Activate the Xbox Game Bar first on your Windows by heading to Settings and typing the feature in the search bar. When it appears, click the toggle to enable the recorder.
Step 2Once set, prepare the meeting on the screen and press Windows + G. Various bars will then be presented; thus, click the third or Record button to document your Google Meet.

On Mac
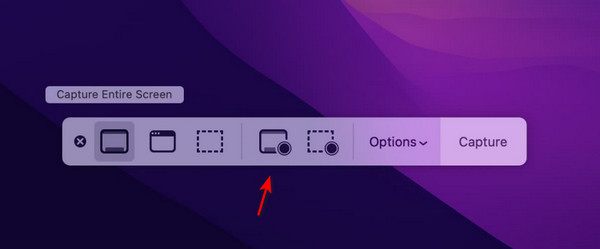
Step 1Launch your Mac’s Screenshot toolbar by simultaneously pressing the Shift + Command + 5 keys. The bar containing different capture options will then appear. Thus, ready your Google Meet meeting.
Step 2Then, simply choose one of the recording buttons for the entire screen, selected window, or selected portion to record the meeting on your Google Meet.
Use FoneLab Screen Recorder (Windows & Mac)
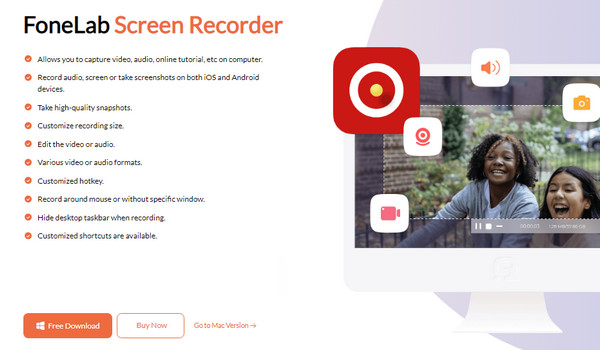
Meanwhile, FoneLab Screen Recorder is the ultimate solution for those who record on different devices. It’s a third-party program that can be installed on both Windows and Mac, but you can also use it on mobile devices, including your iOS and Android devices. Thus, it doesn’t matter which device you use for your Google Meet. This program can record it regardless, and it even offers additional functions, such as enabling a webcam microphone, etc., to make your recording better.
FoneLab Screen Recorder allows you to capture video, audio, online tutorial, etc on Windows/Mac, and you can easily customize size, edit the video or audio, and more.
- Record video, audio, webcam and take screenshots on Windows/Mac.
- Preview data before saving.
- It is safe and easy to use.
Aside from that, taking snapshots of your meeting is possible while recording with FoneLab Screen Recorder, further ensuring that you won’t miss any critical information. Meanwhile, you are also allowed to customize the recording size and enhance the output afterward, thanks to its bonus editing features.
Distinguish the stress-free process below as a model of how to record a meeting in Google Meet using FoneLab Screen Recorder:
Step 1Choose a trusted browser to launch on your desktop, then head to FoneLab Screen Recorder’s site. A Free Download tab will greet you on the left page, so opt for it and use the saved file for installation. The setup process won’t take long, quickly prompting you to hit Start.
Step 2Next, launch your Google Meet to prepare the meeting you wish to record. Once ready, customize the options on the recording program’s main interface based on your preferences. You can enable the webcam, microphone, adjust the aspect ratio, and more.
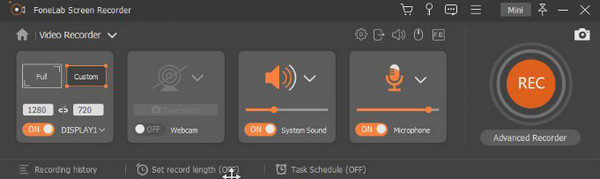
Step 3If the meeting is on your mobile device, attach it with a USB cable and click the down arrow on the interface to choose Phone Recorder. Once everything is set, hit the REC circle on the extreme right to record your desired Google Meet meeting.
Part 4. Google Meet Recorders Analysis
| Feature | Google Meet Built-in Recorder | Mobile Device Built-in Recorder | Computer Built-in Recorder | FoneLab Screen Recorder |
| Ease of Use | Moderate. Has a little learning curve. | Easy. Offers a direct recording process. | Moderate. Need to activate the feature first. | Easy. Interface is designed to be user-friendly. |
| Recording Quality | High. Automatically matches Google Meet’s output. | High. Device dependent. | Good to High. Device dependent. | High and has customizable resolution, bitrate, etc. |
| Editing Features | None. | Basic trim function. | None on Windows and a basic trim function on Mac. | Extensive built-in editor: trim, crop, etc. |
| Participant Notification | Yes. | No. | No. | No. |
Part 5. FAQs about How to Record Google Meet
Do Google Meet recordings save automatically?
Yes, they do. You can find them on the meeting organizer’s Google Drive in the Meet Recordings folder.
How to record Google Meet on laptop?
Use the suggested recording methods on the computer in Part 3. Laptops also support the mentioned built-in recorders and FoneLab Screen Recorder.
Don’t miss the chance to discover the best and most convenient Google Meet recorders above. This way, you can document your desired meetings anytime, especially with a tool like FoneLab Screen Recorder. Install it now!