Capture video, audio, online tutorial, etc on Windows/Mac, and you can easily customize size, edit the video or audio, and more.
Record Computer Screen and Audio on Windows or Mac
 Updated by Lisa Ou / January 25, 2021 14:20
In order to show more detailed information to people who know nothing about what’s happening on your computer screen, you can easily record your screen with voice-over then share the recorded video with them.
Furthermore, some people would also like to play a song as the background music of the video, so they will need to record screen with both system sound and microphone audio.

When you Google “how to record screen on computer with audio”, most answers reference a simple process. This operates convenient, but some of them might not meet your requests as they might record only one of internal and external audio sources.
In this tutorial, we will show you some proven methods to record screen with voice on computer.

Guide List
FoneLab Screen Recorder allows you to capture video, audio, online tutorial, etc on Windows/Mac, and you can easily customize size, edit the video or audio, and more.
- Record video, audio, webcam and take screenshots on Windows/Mac.
- Preview data before saving.
- It is safe and easy to use.
Part 1: How to Record Screen on Mac with Audio
As one of the most popular computers, Mac users need to record screen with voice to create online courses, record online meetings, capture Skype calls, etc. There are various solutions to help you capture screen with audio on Mac, including built-in features and third-party programs.
Option 1. QuickTime Screen Recording with Audio
QuickTime is a media player which you oftentimes use to play videos, listen to audio files, and many others. You should also know its other features, like recording screen, compress video file, convert video format, etc. You should pay attention that you are limited to choose what to be used as an audio source.
QuickTime records screen with audio from microphone instead of internal ones. So the music on the browser or other media player will not be captured in the recording.
Below is the process of QuickTime screen capture with audio.
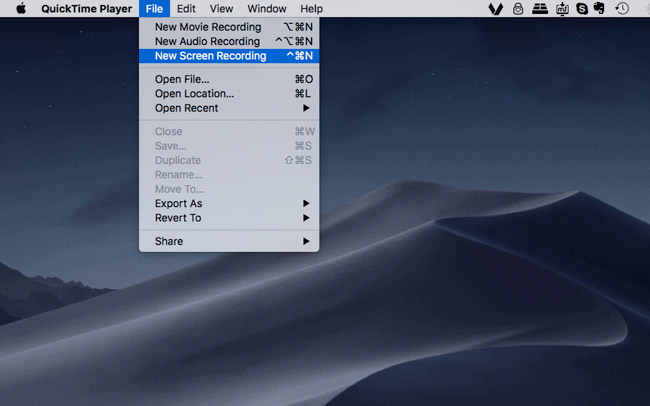
Step 1You can easily click LaunchPad to find QuickTime recorder, then click on it to open it.
Step 2Click File > New Screen Recording from menu bar. Then you can click the arrow next to the record button to enable Internal Microphone and Show Mouse Clicks in Recording if you want.
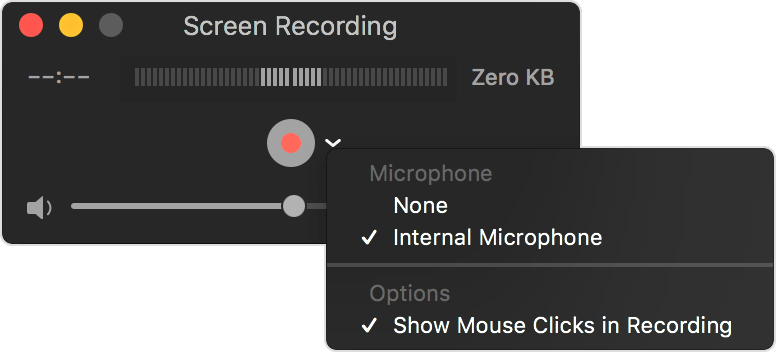
Step 3Click the red circle button to begin recording. Then you can drag to select then recording area or just click anywhere to start.
Step 4Click the grey button, which with black square button shape in it to stop recording. By default, the recorded video will be saved to desktop automatically.
Mac QuickTime screen recording with audio is not complex, but it won’t always figure your problem out as QuickTime recorder is unable to record internal audio from Mac for privacy protection purposes.
Therefore, you can try the following recommendation to capture screen with both internal and external audio on Mac accordingly.
Option 2. How to Record Mac Screen with Audio via Mac FoneLab Screen Recorder
To fix how to do a screen recording with audio on Mac, Mac FoneLab Screen Recorder is strongly recommended to you. It is a simple yet powerful software to record screen on Mac with audio within a few clicks. It is no doubt that it can record screen, audio, webcam individual or concurrently. In addition, it also enables you to capture screen for the entire screen or selected area.
More importantly, you can turn on task schedule on the taskbar to record screen for what you need when you are too busy to do it on the table. The following is the demonstration of how to record Mac screen with audio.
FoneLab Screen Recorder allows you to capture video, audio, online tutorial, etc on Windows/Mac, and you can easily customize size, edit the video or audio, and more.
- Record video, audio, webcam and take screenshots on Windows/Mac.
- Preview data before saving.
- It is safe and easy to use.
Step 1Open browser on computer, visit FoneLab Screen Recorder official site, then download and install the program. It will be opened automatically after that.
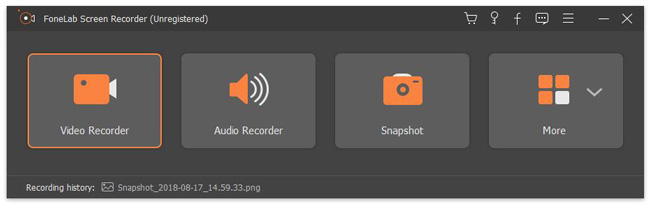
Step 2You can see Video Recorder, Webcam Recorder, Audio Recorder and Screen Capture. You should choose Video Recorder here.

Step 3You can just click REC button to begin recording if you are ready. And you are also allowed to adjust the settings for recording, mouse, hotkeys, output or others if you need.
Step 4Finally, click stop button and save the recorded files to computer folder.
Option 3. How to Record Screen with Audio Using Shift-Command-5
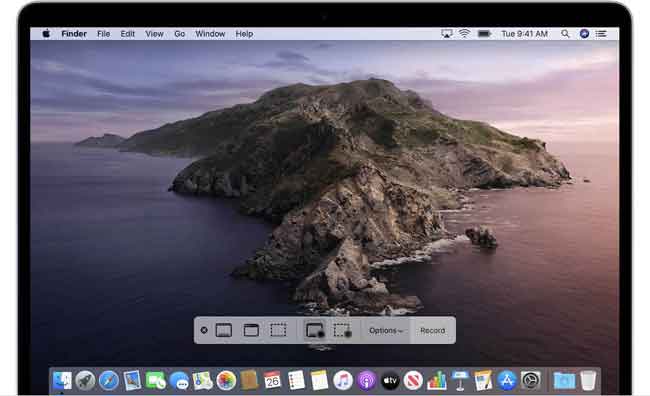
On macOS Mojave or Later, Mac comes with new features to record screen or take a screenshot.
You just need to press Shift-Command-5, then you can see the on-screen control bar of Mojave recording feature, click the fourth record button. You will be required to select the recording area if you want to capture part of the screen, then click Record on the taskbar.
Part 2: Record Screen with Audio on Windows
You have many choices to record screen on Windows, like PPT, online recorder, etc. Along with the development of Windows 10, you can even have an inbuilt feature which is called Game bar to capture screen on computer. You should know their limitations, for example, Game bar won’t capture the entire screen.
Instead, you can try FoneLab Screen Recorder to record whatever you want accordingly.
FoneLab Screen Recorder allows you to capture video, audio, online tutorial, etc on Windows/Mac, and you can easily customize size, edit the video or audio, and more.
- Record video, audio, webcam and take screenshots on Windows/Mac.
- Preview data before saving.
- It is safe and easy to use.
Option 1. How to Record Screen with Audio by FoneLab Screen Recorder
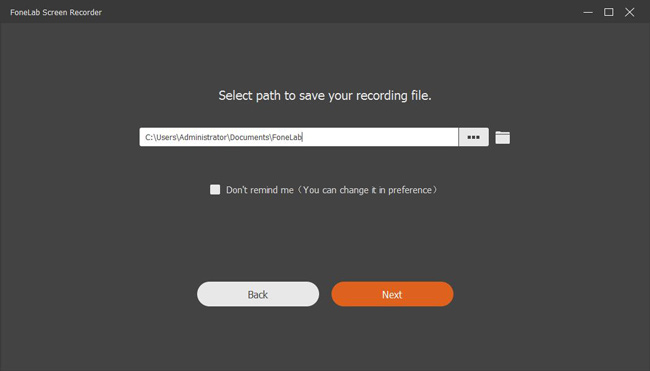
Step 1Run FoneLab Screen Recorder on computer, then choose Video Recorder on the main interface.
Step 2Then you don’t need any settings before recording, just click REC button to begin. However, you can choose customized recording area, choose another destination folder and many others.
What’s more, you can add annotations during the recording to make you videos more vivid and professional-like.
Step 3Just click stop button and save the video to computer.
Option 2. Record Screen with Audio with PPT on Windows
Here, we will also introduce another feature for Powerpoint users - screen recording. As a functional tool to make presentation files, sometime people would like to save the whole informative files as a video file conveniently.
This is the tutorial of how to record screen with audio.
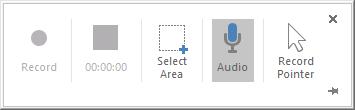
Step 1Choose Insert > Screen Recording to launch Powerpoint recorder.

Step 2Then enable Audio in the pop-up control bar, click Select Area to choose recording area.
As you can see, FoneLab Screen Recorder helps you record webcam, video, and audio with simple operations. You can easily try it on your computer to record screen for educational and other presentational purposes now!