[iTunes Backup] How to Restore and Backup iPad With iTunes
 Posted by Somei Liam / April 14, 2021 09:00
 iTunes is the Apple software to sync content between iOS devices and computers, including iPhone, iPad, iPod, Mac and PC. You can use iTunes for Windows to backup iPhone, iPad, iPod touch to PC, or the iTunes Mac version to backup iPhone, iPad and iPod touch to Mac.
Once a backup of your iPad has been created in iTunes and saved on your computer, you can restore backup to iPad with iTunes. Check out this guide to backup and restore iPad with iTunes. Today, we will use an iPad in the demo to explain how to use iTunes to backup iPad, change iTunes backup location and restore iPad from iTunes backup.


Guide List
1. How to Backup iPad to iTunes
If you have enabled iTunes backup, your iPad will be backup automatically when you connect it to your computer. You can also manually backup your iPad if you want to make a new backup while it is still connected.
we should update to the latest version of iTunes if we want to backup our iPad to iTunes.
Step 1Open iTunes and connect your device to your computer. If a message asks for your device passcode or to Trust This Computer, follow the onscreen steps.
Step 2Click on the Device icon next to the category drop-down menu on the left side of the iTunes window.
Step 3Select Summary from the sidebar, and then select This Computer under Automatically Back up.

Step 4If you want to save private data from your iOS device or Apple Watch, you need to encrypt your backup. Select the box called Encrypt [device] backup and create a memorable password.
If you don't need to save your private data, you can make a backup that isn't encrypted. Just click Back Up Now.
Step 5When the process ends, you can see if the backup finished successfully on the Summary screen in iTunes. Just look under Latest Backup to find the date and time.
Tips: Use FoneLab iOS Data Backup & Restore to backup your iPad
If you want more storage space or methods to backup your data of iPad or other iOS devices, you can use FoneLab iOS Data Backup & Restore which can backup your data on iPhone, iPad or iPod touch with one click.
FoneLab iOS Data Backup & Restore allows you to choose the file path on your computer and it won't modify or overwrite your old backups. All data on iOS devices are available, you can backup the data you want selectively and conveniently.
FoneLab enables you to backup and restore iPhone/iPad/iPod without data loss.
- Backup and restore iOS data to your PC/Mac easily.
- Preview data in detail before you restore data from backups.
- Backup and restore iPhone, iPad and iPod touch data Selectively.
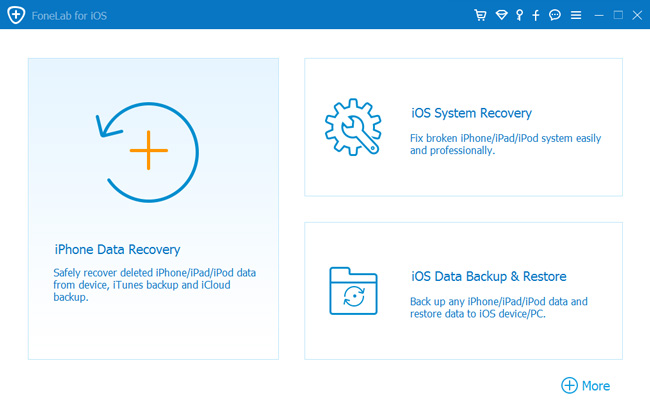
Step 1Download and install iOS Data Backup & Restore. It will launch automatically when the installation is completed. Choose iOS Data Backup & Restore on the first page of software.
Step 2Connect your iPad to your computer. A trust window will pop up when you connect your iPad to computer for the first time, tap Trust on the pop-up trust window.
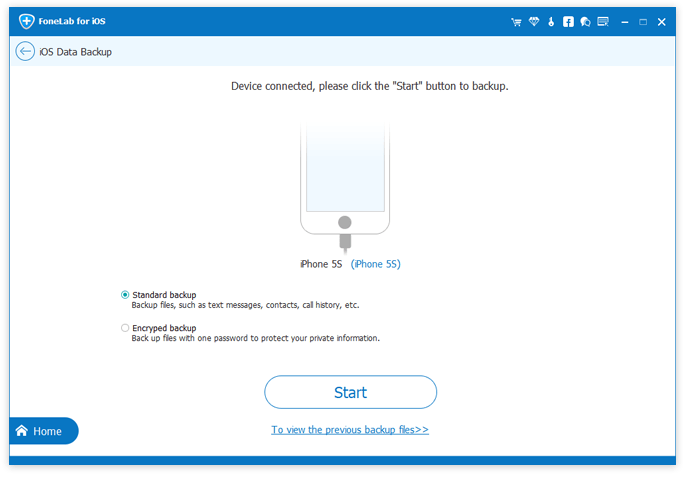
Step 3After choosing iOS Data Backup, you can choose Encrypted backup if you want to protect your backup files with password. Or just select Standard backup to move on. And then click Start.
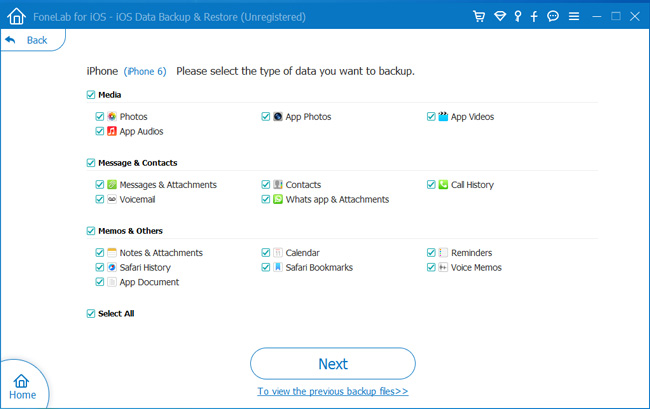
Step 4You can select the type of data you want to backup. If you want to backup all data, just tick the box next to the Select All option on the bottom-left. Then click Next to begin.
2. How to Change iTunes Backup Location
Changing the default music storage location is a little easier than changing your iPad backup location. Here you can just tell iTunes where to store your music and media and let the program get on with it.
If you want to change iTunes backup location, here is how to do it.
Step 1Open your iTunes on your computer.
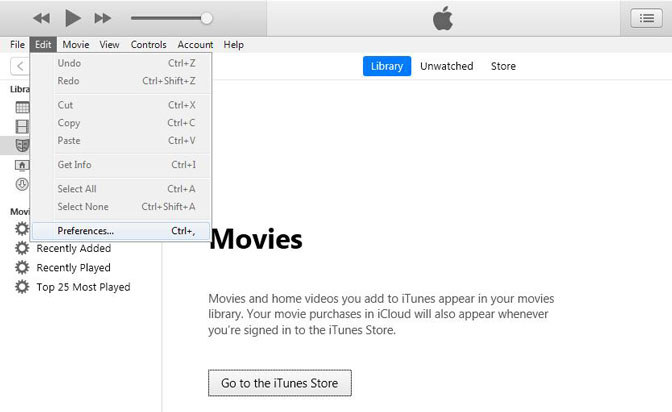
Step 2Click Edit which is the second button on menu bar on the left side of the main page.
Step 3Select Preferences and then click Advanced.
Step 4Click Change and then select the drive or location where you want iTunes to store your media.
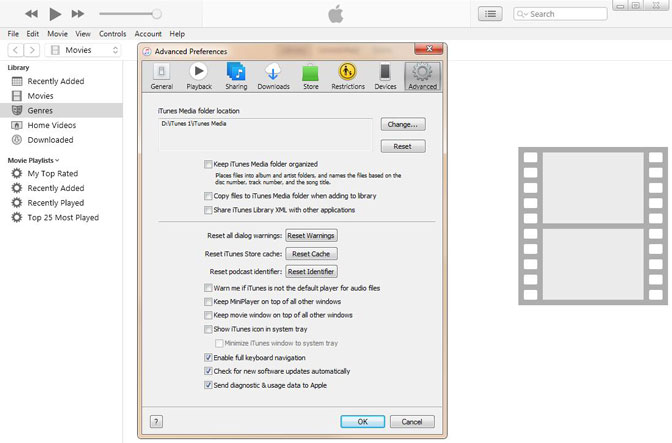
This is a straight folder change and not a symbolic link. The end result is the same though. Once changed, all the media you add to iTunes will be stored in this new location. That includes anything you buy and anything you import into iTunes.
3. How to Restore iPad from iTunes Backup
Method 1: Restore iPad from iTunes Backup via iTunes
If you choose to backup your iPad by connecting it to iTunes and storing the backups on your computer, you can also restore it from your most recent iTunes backup.
Step 1Connect iPad to computer and then launch iTunes on computer.
Step 2Click the iPad icon, go to Settings.
Step 3Go to Backups > Manually Backup and Restore > Restore Backup.
Step 4You will then have the chance to select a saved iPad backup or iTunes backup and restore it to iPad.
This will restore only your personal files, such as the contacts, calendars, notes, and settings, not the iPad firmware. If you have synced multiple iOS devices to the same computer, you can switch among the different backups in a drop-down menu.
Note: Find My iPad must be turned off before you restore iPad backups through iTunes. You can disable it from iPad > Settings > iCloud > Find My iPad.
Method 2: Restore iPad from iTunes Backup via FoneLab
We also can use FoneLab for iOS to restore your iPad from iTunes backup.
FoneLab for iOS can help you restore iPad from iTunes backup, It covers all possibilities to restore the lost or deleted media files, contacts, messages, and memos because the program offers you three recovery modes to achieve.
For example, you can recover directly from your iOS device, or extract files from iCloud/iTunes.
With FoneLab for iOS, you will recover the lost/deleted iPhone data including photos, contacts, videos, files, WhatsApp, Kik, Snapchat, WeChat and more data from your iCloud or iTunes backup or device.
- Recover photos, videos, contacts, WhatsApp, and more data with ease.
- Preview data before recovery.
- iPhone, iPad and iPod touch are available.
Step 1First of all, you need to download the software and install it afterward.
Step 2Double-click to get it opened and select the mode of Recover from iTunes Backup File on the interface.
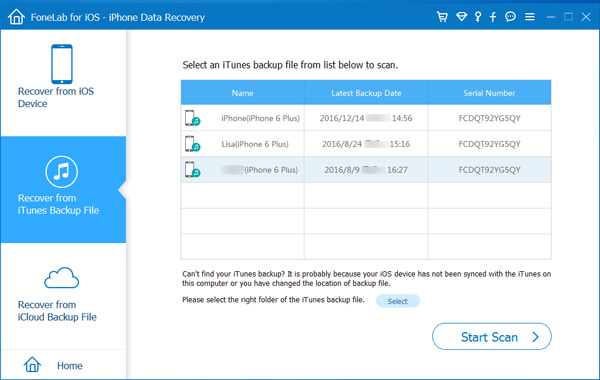
Step 3You will see the list of your backup history. Select the one that may contain what you want to start the scanning process.
Step 4Once the scanning process is done, the software will list the recovered contents in the left sorted by file types. Check them one by one or those you want to preview the details. Mark those you want to extract to the computer and click Recover.
Conclusion
As far as you can see, the whole recovery process is super easy, any one can definitely use it even without this guide.
Besides, if you have backed up your iPad data to iCloud before, you can choose to restore iPad from iCloud backup or retrieve documents from iCloud instead.
With FoneLab for iOS, you will recover the lost/deleted iPhone data including photos, contacts, videos, files, WhatsApp, Kik, Snapchat, WeChat and more data from your iCloud or iTunes backup or device.
- Recover photos, videos, contacts, WhatsApp, and more data with ease.
- Preview data before recovery.
- iPhone, iPad and iPod touch are available.