
 iPhone Data Recovery
 iOS System Recovery
 iOS Data Backup & Restore
 iOS Unlocker
 iPhone Password Manager
 Location Changer
 Android Data Recovery
 Broken Android Data Extraction
 Android Data Backup & Restore
 Android Unlocker
 FoneTrans for iOS
 iPhone Data Eraser
 iPhone Cleaner
 HEIC Converter
 HyperTrans
 WhatsApp Transfer for iOS
 Mac Sweep
 Data Retriever
 Mac Data Retriever
 Video Converter Ultimate
 Screen Recorder
 Phone Mirror
How to Take Screenshots in VLC Media Player
 Posted by
 VLC Media Player is more than just a tool to watch movies; it is one of the most powerful frame-capture utilities available today. Whether I am grabbing a reference frame for a video project or isolating a high-resolution still from a 4K film, I rely on VLC's built-in snapshot tool daily.
However, capturing the "perfect" frame is not always as simple as hitting a keyboard shortcut. Users frequently run into issues like black screens, blurry images, or missing directories. In this guide, I will share my professional-grade workflow for mastering VLC screenshots and provide solutions for when things go wrong.

Guide List
Part 1: The Basics - Mastering the VLC Shortcut
The most common way to capture a frame is through keyboard shortcuts. It is fast, efficient, and requires no external software.
Step 1Set your preferences. Open VLC and navigate to Tools > Preferences > Video. Look for the "Snapshot" section. Here, you can define the directory where your images are saved and choose your preferred format. I personally recommend PNG over JPG because it preserves the raw quality of the video frame without compression artifacts.
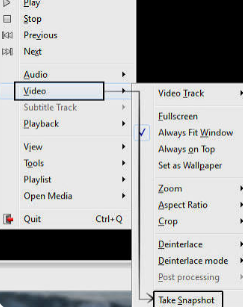
Step 2Trigger the capture. While your video is playing, press Shift + S (Windows/Linux) or Command + Alt + S (macOS).
Step 3Confirm the capture. A small thumbnail will briefly appear in the top-left corner of the video player, confirming that the snapshot has been saved to your specified directory.
Expert Insight: If you don't want to use keyboard shortcuts, click View in the top menu and select Advanced Controls. This will reveal a snapshot button (camera icon) at the bottom of the player, which you can click to grab a frame at any time.

FoneLab Screen Recorder allows you to capture video, audio, online tutorial, etc on Windows/Mac, and you can easily customize size, edit the video or audio, and more.
- Record video, audio, webcam and take screenshots on Windows/Mac.
- Preview data before saving.
- It is safe and easy to use.
Part 2: Solving the "VLC Black Screen" Issue
One of the most frustrating experiences is taking a snapshot, only to find the file is solid black. This usually happens due to DRM (Digital Rights Management) protection or hardware acceleration conflicts.
Step 1Disable Hardware Acceleration. Go to Tools > Preferences > Input / Codecs. Look for "Hardware-accelerated decoding" and set it to Disable.
Step 2Adjust Video Output. Sometimes the video output module interferes with the screen-capture process. Navigate to Tools > Preferences > Video. Under the "Output" dropdown menu, try changing the setting from "Automatic" to DirectX (DirectDraw) video output or OpenGL video output.
Step 3Restart VLC. After applying these changes, close and reopen the media player. Attempt your snapshot again; in 90% of cases, this eliminates the black frame issue.
FoneLab Screen Recorder allows you to capture video, audio, online tutorial, etc on Windows/Mac, and you can easily customize size, edit the video or audio, and more.
- Record video, audio, webcam and take screenshots on Windows/Mac.
- Preview data before saving.
- It is safe and easy to use.
Part 3: Professional Capture with FoneLab
While VLC is excellent for quick, one-off snapshots, it often lacks the flexibility needed for professional workflows. If you need to capture a specific region of a window, record a sequence of frames, or work around stubborn DRM blocks, I recommend using FoneLab Screen Recorder.
Step 1Set your capture area. Open FoneLab Screen Recorder and select Snapshot. This allows you to draw a precise box over your video player, ensuring you don't capture the UI or desktop clutter.
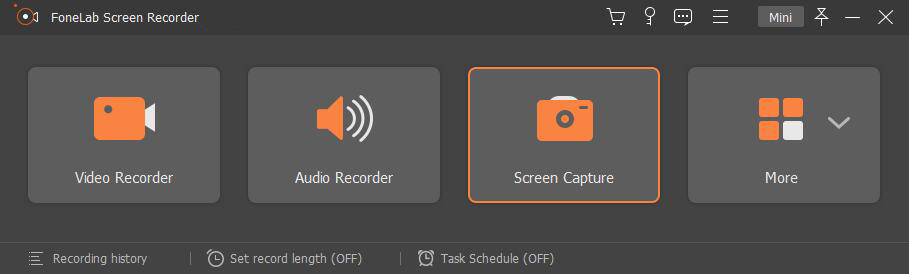
Step 2Adjust quality settings. Before capturing, you can set the image output to high-resolution PNG or TIFF formats, which are often better for print or professional graphic design work.
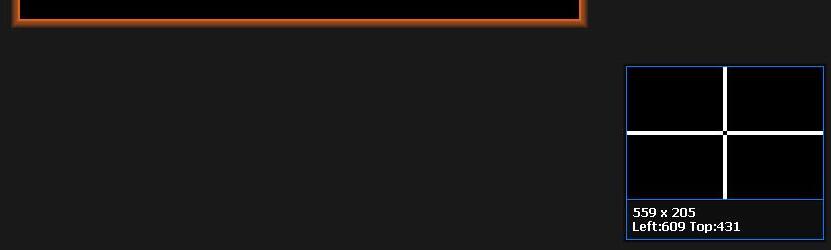
Step 3Capture and Annotate. Unlike VLC, which just saves the file, FoneLab allows you to annotate your snapshot immediately—adding arrows, text, or highlights, which is essential if you are creating technical documentation or tutorials.
Why this matters: Professional content creators need precision. FoneLab's ability to bypass frame-grab limitations makes it a more reliable tool than the built-in VLC snapshot function.
FoneLab Screen Recorder allows you to capture video, audio, online tutorial, etc on Windows/Mac, and you can easily customize size, edit the video or audio, and more.
- Record video, audio, webcam and take screenshots on Windows/Mac.
- Preview data before saving.
- It is safe and easy to use.
Part 4: Comparison Table: VLC vs. Professional Capture
| Feature | VLC Media Player | FoneLab Screen Recorder |
|---|---|---|
| Primary Use | Quick frame snapshots | High-quality/Region capture |
| Output Quality | Fixed to video resolution | User-defined (up to 4K) |
| DRM Compatibility | Often blocked (Black screen) | High compatibility |
| Annotation Tools | None | Built-in (Arrows, Text) |
Part 5: Frequently Asked Questions (FAQ)
Why are my VLC screenshots blurry?
If the source video is low resolution, your screenshot will be too. VLC captures the frame exactly as it is stored. For better results, ensure you are viewing the video at 100% size or using a professional tool like FoneLab Screen Recorder that offers image scaling.
Can I take a screenshot of a 4K movie without quality loss?
Yes, but you must set the screenshot format to PNG in VLC preferences. JPG compression will introduce "noise" and artifacts that ruin high-definition captures.
FoneLab Screen Recorder allows you to capture video, audio, online tutorial, etc on Windows/Mac, and you can easily customize size, edit the video or audio, and more.
- Record video, audio, webcam and take screenshots on Windows/Mac.
- Preview data before saving.
- It is safe and easy to use.



