3 Best Tools to Screen Capture Video on Mac Smoothly
 Updated by
 Good day! I just have to ask, what is a good video capture software on Mac? I only got mine recently, so I'm still unfamiliar with the programs and features it offers or is compatible with. Now that I have some video projects to work on, I need a reliable tool that can record my screen smoothly without lag or quality loss. Any recommendations would be greatly appreciated!
Recording your Mac's screen for tutorials, presentations, or gaming can be seamless if you have the right software. However, with numerous options available, picking the best one for your needs can be overwhelming. So, whether you're a vlogger, educator, or just someone who needs to capture your screen at times, having a trusted tool is essential for high-quality results.
Fortunately, you don't have to settle for mediocre recordings, as we've compiled the three best options to help you capture your screen effortlessly. You can guarantee that each tool can deliver excellent outputs, a smooth performance, and user-friendly functions. Discover their details, including the features and processes, in the upcoming parts to capture videos smoothly.

Guide List
Part 1. Top 3 Tools for Video Screen Capture on Mac
Whether you need to record high-resolution tutorials, gameplay, or professional presentations, having the right screen capture tool makes all the difference. The following methods include both built-in Mac solutions and a professional third-party program, each offering unique features for smooth, high-quality recordings. Regardless of your skill level or recording needs, these top three tools deliver reliable performance with easy-to-follow steps.
Top 1. FoneLab Screen Recorder
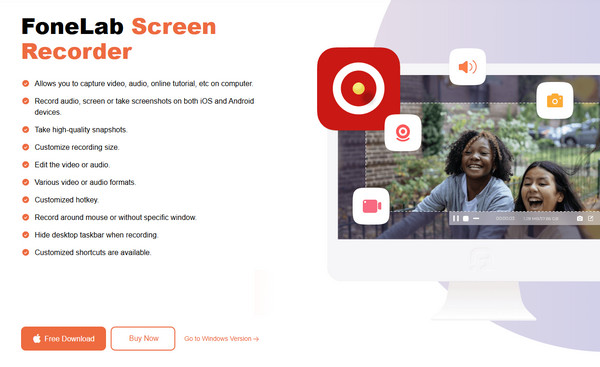
FoneLab Screen Recorder stands out as a top-tier solution for seamless and high-quality video screen recording or capturing on a Mac screen. Designed with both simplicity and advanced functionality, this professional tool delivers smooth, lag-free recordings that are perfect for tutorials, presentations, gaming, or any other screen capture need. Additionally, its intuitive interface makes this screen recorder a great choice for both novice and experienced users.
Meanwhile, FoneLab Screen Recorder not only excels in producing first-rate recordings. Many also applaud it for its additional features. For instance, you can enjoy the tool's customizable settings, which help you personalize your screen recording's frame rate, audio sources, and more. You must also not miss its capabilities, which include the ability to include your webcam in the recording, enable system sound, microphone, and more. Explore the tool to learn them all.
Recognize the beginner-friendly steps below as a pattern of how to capture video on a Mac screen with FoneLab Screen Recorder:
Step 1Enter a reliable browser on your Mac to display FoneLab Screen Recorder's main website. Afterward, click Go to Mac Version first before selecting Free Download to obtain the program's Mac version. Once saved, transfer it to your Applications folder to open the screen recorder afterward.
Step 2Click the Video Recorder option on the far left side of the main interface once the program launches. It will bring up the recording settings panel, where you can customize all available options to suit your needs. Don't forget to toggle on either System Sound, Microphone, or both to ensure your recording includes the audio you want to capture.
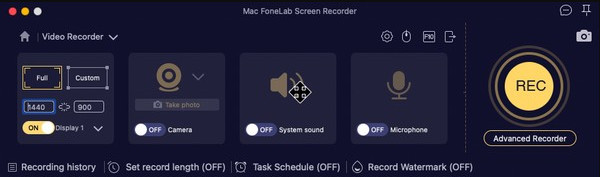
Step 3When all your settings are ready, simply tick the red REC button on the right to start capturing your screen. A control bar will show the options to stop, pause, or adjust your recording afterward. Use these controls as needed during your screen capture session.
Top 2. Screenshot Toolbar
For Mac users seeking a built-in solution for video capturing the Mac screen, the Screenshot Toolbar is also a convenient option. This native macOS feature provides essential screen capture capabilities without requiring any installation, making it ideal for quick recordings without extra setup. It allows you to record either the whole screen or a selected portion, with options to include microphone audio or system sound. Meanwhile, the main advantage of Screenshot Toolbar is its integration with macOS. Since the feature is built-in, it ensures smooth operation and immediate access whenever needed. You must only press the correct keys to use it.
Take to heart the comfortable procedure below to screen video capture Mac using the Screenshot Toolbar:
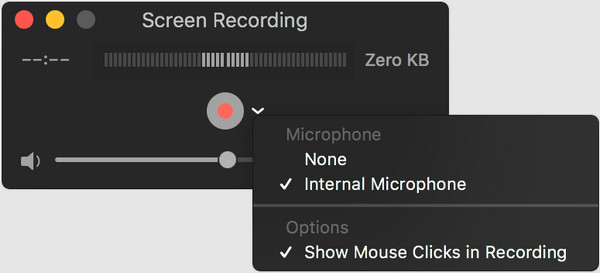
Step 1First, press the keys Shift + Command + 5 altogether, and the Screenshot Toolbar will pop up. Various screen capture buttons will then appear. Before that, you may click the Options button to adjust your preferred settings, such as the microphone.
Step 2 Once ready, click the screen capture option you'd like to use. The fourth button is for recording your entire Mac screen as a video, while the fifth one is for recording only a chosen portion. Afterward, you will see a Stop button; click it anytime after you finish.

Although the Screenshot Toolbar excels in convenience, the previous recording program may still be the best option, especially if you need more advanced functions. Unfortunately, this method can only offer basic screen recording without customizable settings, unlike the prior one.
Top 3. QuickTime
Another excellent built-in option for Mac users is QuickTime Player. It is Apple's versatile multimedia tool that includes reliable screen recording capabilities. Yes, that is correct! While primarily known for video playback, QuickTime Player also serves as a dependable screen capture solution, perfect for basic recording needs, allowing you to capture anything on your Mac's screen. Like before, this program is helpful for quick recordings without any installation. Its screen recording function lets you capture your entire display or a chosen portion, whichever you need. Additionally, its interface is refreshingly simple, making it easy for anyone to grasp.
Mimic the appropriate directions below for a Mac screen capture video procedure through QuickTime:
Step 1From your Applications folder or Launchpad, click and launch the QuickTime program. After that, hit File from the menu bar above and pick the New Screen Recording option.
Step 2Following that, click the arrow next to the record button to adjust a few settings according to your preference. When ready, select the Record button to begin capturing your Mac screen. You can then hit the appearing Stop button anytime when you're satisfied
While QuickTime Player offers convenient built-in screen recording, it does come with some notable limitations. The most significant drawback is the lack of advanced features, like the Screenshot Toolbar. Its audio recording capabilities are also limited, as QuickTime can't natively record system audio without third-party workarounds, such as Soundflower.
Part 2. FAQs about Video Screen Capture on Mac
Can I capture video on a Mac from a browser?
Yes, you can. With the help of the top recorders above, screen recording videos from your browser is effortless. Simply use the step-by-step directions.
Is it legal to capture online videos on my Mac screen?
Yes, it is as long as it is for personal use. It will only be illegal if you record and share an online video that infringes on copyright limitations.
Among the recommended screen capture solutions on Mac, FoneLab Screen Recorder is the one we can guarantee will provide you with the most advantages. So, rely on its details and detailed instructions for a seamless screen-capturing process.