Recording Music on iPhone: 4 Proven Techniques
 Posted by Lisa Ou / March 08, 2022 16:00
A lot of people are music lovers. We actually listen to music every now and then, and in whatever we do. But, have you come to the point that you want to record your favorite music? Of course, it is not an easy thing to do as you cannot just record anytime and even anywhere. Another thing is that not all who enjoy songs know how to do it. That is why it is a good thing you are here, for we have listed 4 methods and programs that you can use. Come to know these proven techniques on how to record music on iPhone.


Guide List
FoneLab Screen Recorder allows you to capture video, audio, online tutorial, etc on Windows/Mac, and you can easily customize size, edit the video or audio, and more.
- Record video, audio, webcam and take screenshots on Windows/Mac.
- Preview data before saving.
- It is safe and easy to use.
Part 1. Record while Playing Music on iPhone with Built-in Feature
To shoot a video while playing background music on your iPhone is possible with its built-in feature called Screen Recording. It has the capacity to record your screen along with internal audio. In addition, you can record your voice by turning on the Microphone.
Steps on How to Record Music on iPhone using Inbuilt Screen Recorder:
Step 1Firstly, set it up by going to the Settings > Control Center and adding the Screen Recording option.
Step 2After that, play any song from your iPhone and go to the Control Center.
Step 3Then, tap the Screen Recording icon to begin recording your favorite song or part of the music.
Step 4Next, hit the red recording icon at the top-left corner of your screen to end the music recording.
Step 5Finally, you’ll be able to view and listen to the recorded music on your Photos app.
The only disadvantage of this is that you cannot record music without a captured screen video. The Screen Recording feature is not for you if you want to record music only. Yet, you can try another built-in app called QuickTime Player to record your audio or music on iPhone.
FoneLab Screen Recorder allows you to capture video, audio, online tutorial, etc on Windows/Mac, and you can easily customize size, edit the video or audio, and more.
- Record video, audio, webcam and take screenshots on Windows/Mac.
- Preview data before saving.
- It is safe and easy to use.
Part 2. Record while Playing Music iPhone through Quicktime
The QuickTime Player of the Mac allows the users to mirror iPhone screen to Mac. As a result, they can record their iPhone screen or even record any audio or music that is playing on their iOS devices. And so, if you prefer using a Mac and want to record music on your iPhone on it, you can make this approach. Here’s how to do it.
Steps on How to Record while Playing Music on iPhone through QuickTime:
Step 1First of all, launch the QuickTime Player on your Mac.
Step 2Then, connect your iPhone device to your Mac using a USB cable.
Step 3Next, click the File option on the menu and click the New Audio Recording on the drop-down menu. Then, a recording window will appear.
Step 4After that, click the arrow down button next to the Record button. Then, select your iPhone from the drop-down list. Now, play the music you want to be recorded on your iPhone.
Step 5And to start the recording, click the Record icon. Finally, to finish it, click the Stop button. That’s it!
But, with it, there are a lot of times that the sound quality is not good. Another thing is that there are a lot of settings that need to be done before you can start recording. However, you can try FoneLab Screen Recorder, an easy-to-use and easy-to-comprehend tool that will fit your needs.
Part 3. Record A Song on iPhone using Third-Party App
The best music recorder that can help you record your voice, audio, or background music on your iOS device is FoneLab Screen Recorder. It is the most professional and powerful but easy-to-use tool to record any screen and audio. The program also has a lot of commendable editing features, allowing you to modify the recorded audio or video and save it as you like. If you only want to record your screen, you can do so; the same goes for the music or audio. Now, start recording music on your iPhone with this tool.
FoneLab Screen Recorder allows you to capture video, audio, online tutorial, etc on Windows/Mac, and you can easily customize size, edit the video or audio, and more.
- Record video, audio, webcam and take screenshots on Windows/Mac.
- Preview data before saving.
- It is safe and easy to use.
Steps on How to Record Music on iPhone via FoneLab Screen Recorder:
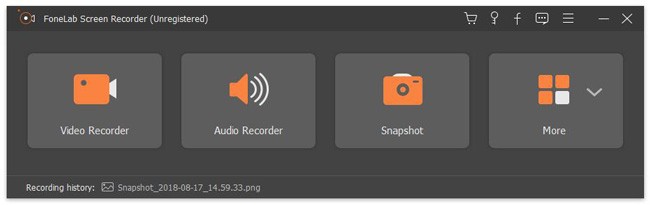
Step 1First and foremost, download and install FoneLab Screen Recorder to your computer on its official website. After that, it will open automatically.
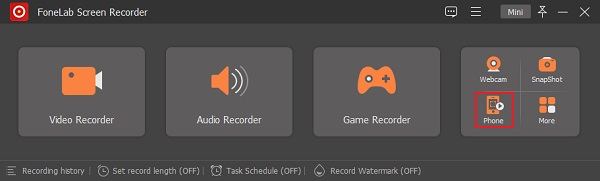
Step 2Next, connect your iPhone to the computer via USB cable. Then, click the Phone option on the tool's main interface on the right pane.
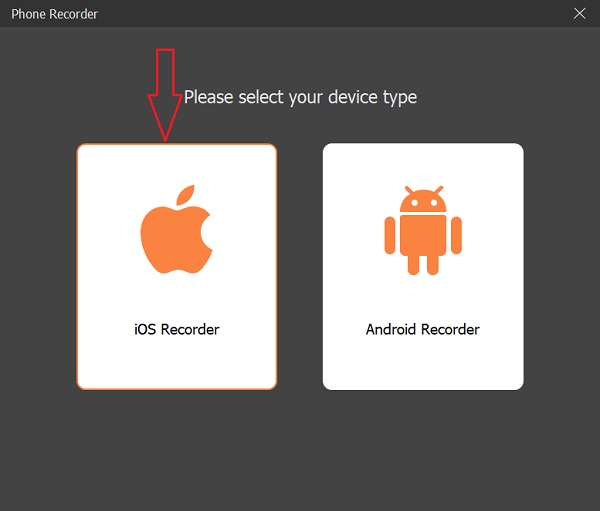
Step 3Afterward, select and click the iOS Recorder as your device type.
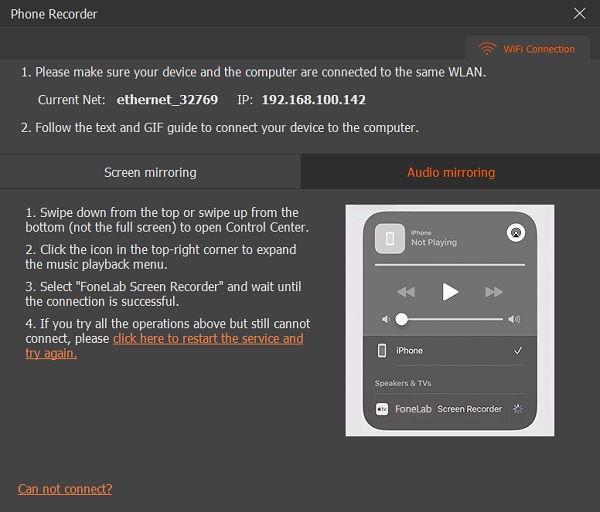
Step 4Then, click the Audio Mirroring since you are recording music. And simply follow the given instruction to connect your iPhone device to the computer.
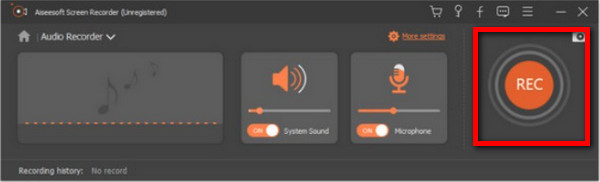
Step 5On the next window, click the Record button to begin recording. Play any music from your iPhone.
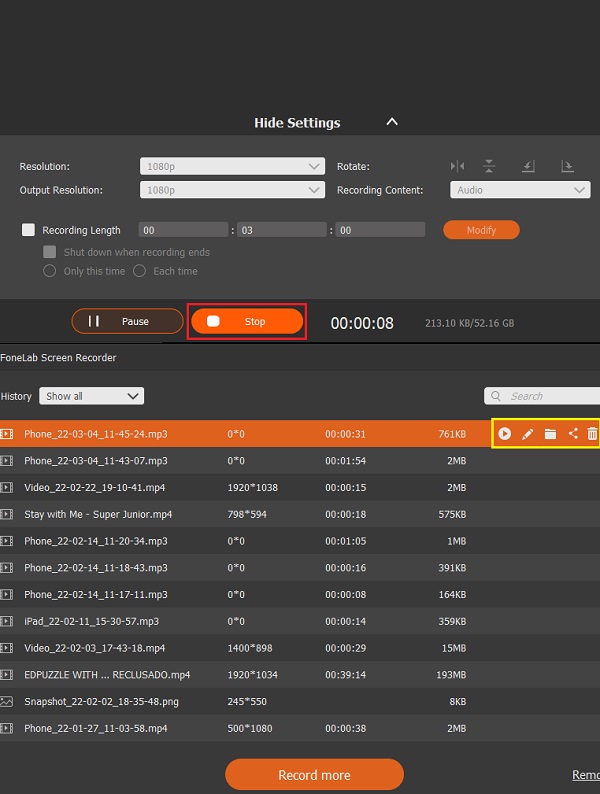
Step 6Lastly, click the Stop button. And you have the freedom to rename the file, play it, share or delete it. Or you can also Record More if you want. And that’s it!
Indeed, you can record music using this program. What’s more interesting about this tool is that it is easy to comprehend, which is the best option even for beginners.
Part 4. Record Music on iPhone on iPhone via Fonelab Screen Recorder
If you prefer using or installing a third-party app on your device, you can use the MapMySound application. It allows users to record and edit the audio using their mobile devices. You can record your voice or demonstration of your song using it.
Steps on How to Record A Song on iPhone using Third-Party App:
Step 1First off, go to the App Store on your iPhone, and search for MapMySound.
Step 2After installing it, launch the app. Then, tap on the Microphone icon at the bottom part of your screen.
Step 3Next, long-press the microphone icon at the middle part to start the recording.
Step 4Finally, remove your finger on the recording button after recording your audio or music. And that’s it!
However, using this application will not enable you to record your iPhone's background music or internal sound. Unlike FoneLab Screen Recorder, you can record audio or song, even mic, and more, so we still highly suggest it to you.
Part 5. FAQs About Recording Music on iPhone
1. How to record while playing music on Snapchat on iPhone?
To do it, play any music from your iPhone. Then, launch the Snapchat app on your iPhone. Next, tap and hold the capture button. And it will record immediately while playing music. To make sure, play the video you have recorded.
2. Why is there no audio when recording on my iPhone?
Two of the significant causes why there is no sound when you record on your iPhone. First, the sound is not allowed or locked when you record. And two, the Microphone has been turned off when you record on your iPhone.
To wrap it up, these are the top 4 proven techniques that you can use to record music on iPhone. All of these methods are reliable and working. But, for beginners and looking for an easy-to-use alternative solution, FoneLab Screen Recorder is the best option. Yet, it will be your decision.
FoneLab Screen Recorder allows you to capture video, audio, online tutorial, etc on Windows/Mac, and you can easily customize size, edit the video or audio, and more.
- Record video, audio, webcam and take screenshots on Windows/Mac.
- Preview data before saving.
- It is safe and easy to use.