- Part 1. How to Remove Photos from iPhone Photos App
- Part 2. Remove Photos from iPhone with File Explorer
- Part 3. How to Delete Photos on iPhone via iCloud
- Part 4. How to Delete iPhone Photos from iPhone with FoneEraser for iOS
- Part 5. How to Backup iPhone Data
- Part 6. FAQa about How to Permanently Delete Photos from iPhone
Easily erase all contents and settings on iPhone, iPad or iPod completely and permanently.
- Clear iPhone Junk Files
- Clear iPad Cache
- Clear iPhone Safari Cookies
- Clear iPhone Cache
- Clear iPad Memory
- Clear iPhone Safari History
- Delete iPhone Contacts
- Delete iCloud Backup
- Delete iPhone Emails
- Delete iPhone WeChat
- Delete iPhone WhatsApp
- Delete iPhone Messages
- Delete iPhone Photos
- Delete iPhone Playlist
- Delete iPhone Restrctions Passcode
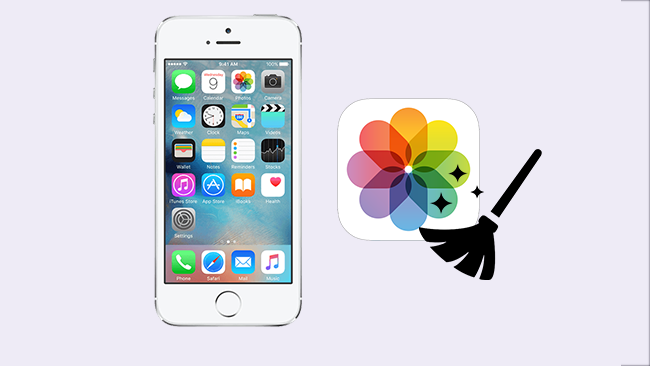
How to Delete Photos from iPhone(4 Proven Ways)
 Posted by Lisa Ou / August 16, 2021 09:00
There are more than 1500 photos on my iPhone so I think it has run out the device space and there is not enough storage to iOS 26 update. That decided me to delete these pictures of iPhone, any easy and safe way to do it?
Most of iPhone users like to take photos with their phones because its higher and higher quality of taking photos. But the size of photos takes too much storage space to run their phones smoothly or update successfully. That's why they begin to remove photos from iPhone. As you know, there are various of methods to remove photos from iPhone, but most of them are not thorough and safe. It is better that you can find an efficient and guaranteed way to do it.

Guide List
- Part 1. How to Remove Photos from iPhone Photos App
- Part 2. Remove Photos from iPhone with File Explorer
- Part 3. How to Delete Photos on iPhone via iCloud
- Part 4. How to Delete iPhone Photos from iPhone with FoneEraser for iOS
- Part 5. How to Backup iPhone Data
- Part 6. FAQa about How to Permanently Delete Photos from iPhone
FoneEraser for iOS is the best iOS data cleaner which can easily erase all contents and settings on iPhone, iPad or iPod completely and permanently.
- Clean unwanted data from iPhone, iPad or iPod touch.
- Erase data quickly with one-time overwriting, which can save you time for plenty of data files.
Part 1. How to Remove Photos from iPhone Photos App
First of all, you can go to iPhone Photos app to manage your photos and videos. It allows you to delete photos from iPhone within simple clicks.
Step 1Find the Photos app on your iPhone, and get the albums you want to delete.
Step 2Tab Select on the upper-right corner and check the right items.
Step 3Hit the delete icon on the bottom-right and confirm delete these items to move on.
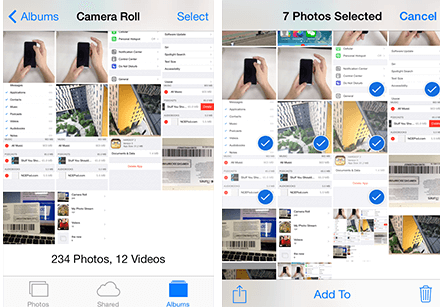
You should note that the deleted photos will be moved to the Recently Deleted album and you can restore them within 30 days. Thus, if you want to delete photos from iPhone permanently, you should repeat the above-mentioned steps in Recently Deleted album again.
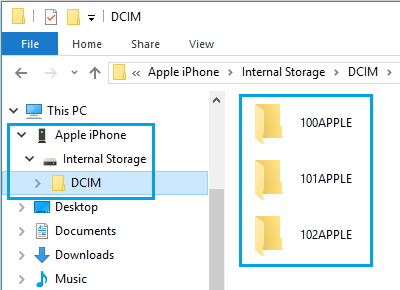
Part 2. Remove Photos from iPhone with File Explorer
iPhone allows you to access photos on Windows computer, so you can also delete photos with it as below.
Step 1Open File Explorer and find your iPhone listed under Devices and drives.
Step 2Click on your phone you will see the DCIM folder which stores all your photos.
Step 3You can remove the pictures from your iPhone without any hassle.
Part 3. How to Delete Photos on iPhone via iCloud
If you have enabled Photos in iCloud syncing settings, you can also access your iCloud photos and remove them from cloud service, then the photos on your other devices will be removed after that.
Below is how.
If you have a Windows computer or iOS mobile devices, visit icloud.com and log into your iCloud account. Open Photos, then choose the items you want to delete and click delete icon on the upper corner of the window.
For macOS users, you can go ahead to Photos app on Mac, delete them from computer directly.
Above 3 ways cannot guarantee that your data are deleted thoroughly, and some third-party software can recover deleted photos from the device.
Part 4. How to Delete iPhone Photos from iPhone with FoneEraser for iOS
So FoneEraser for iOS is strongly recommended to you because it ensures your data are safe and cannot be recovered. It has a feature to help you manage iPhone photos with ease.
Step 1Download and install FoneEraser for iOS and launch it after that.
FoneEraser for iOS is the best iOS data cleaner which can easily erase all contents and settings on iPhone, iPad or iPod completely and permanently.
- Clean unwanted data from iPhone, iPad or iPod touch.
- Erase data quickly with one-time overwriting, which can save you time for plenty of data files.
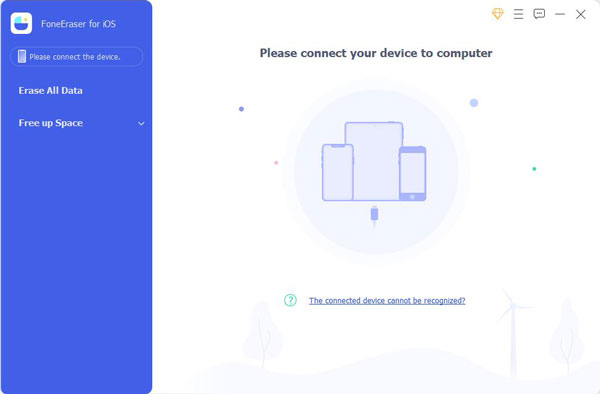
Step 2Connect your iPhone and computer with USB cable.
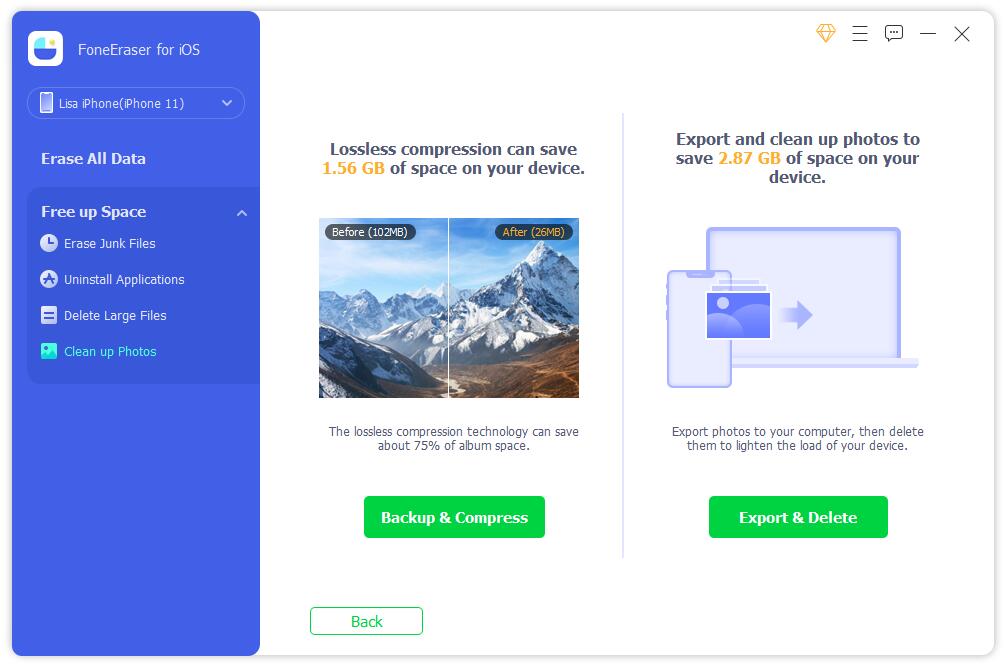
Step 3For peopele who just want to clean up iPhone photos, you can choose Free up Space > Clean up Photos instead. Then choose Backup & Compress or Export & Delete from the 2 options.
It also erases all your personal information and data including all iPhone photos so that you have no need to worry about data disclosure even you want to resell or donate your device.
Step 1If you want to remove all data from iPhone, select Erase All Data.
Step 2Then a suitable erasing level from the three options. Each level ensures the deleted data are uncoverable. Then click Start button.

Part 5. How to Backup iPhone Data
No matter the erased data can be recovered or not, you should backup your photos on computer or iCloud before deleting all photos from iPhone. There are 4 methods to solve this problem for you.
Option 1. Backup iPhone Photos with iTunes to computer
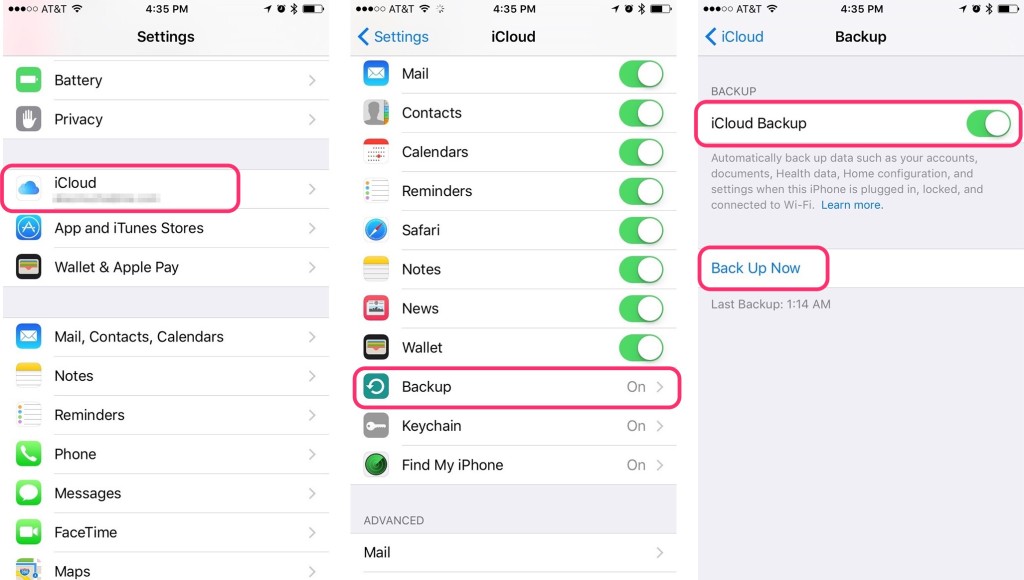
Step 1Turn on the iCloud Photo Library: Stetting>iCloud>iCloud Photo Library.
Step 2Go to Settings > iCloud.
Step 3Scroll down to find the Backup.
Step 4Turn on iCloud Backup and tap Back Up Now.
Option 2. Transfer iPhone Photos to iCloud
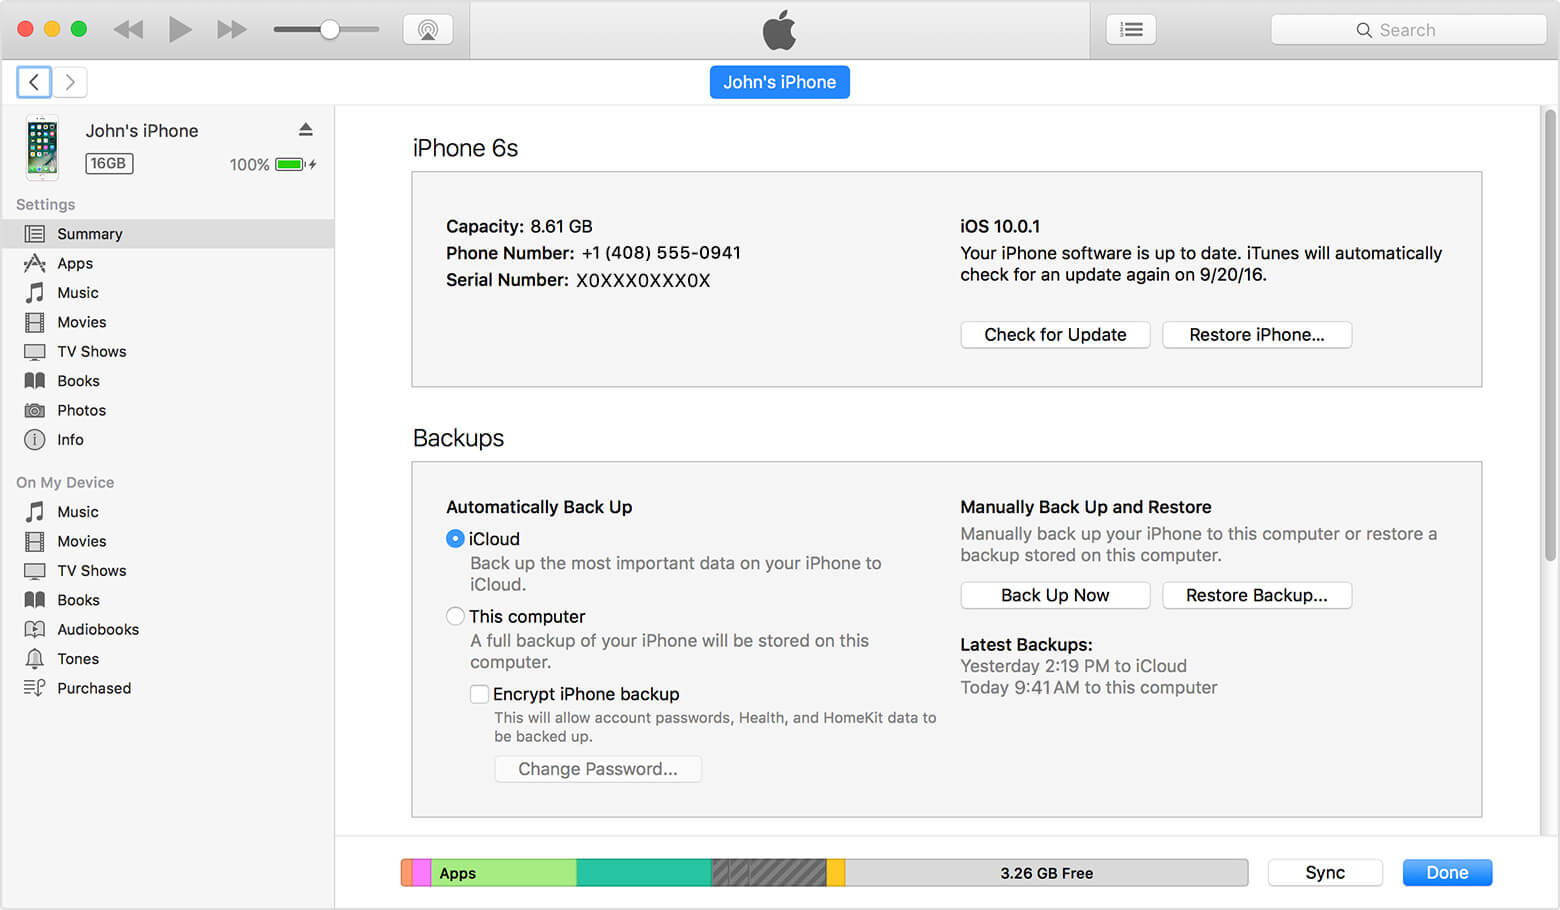
Step 1Run the latest version iTunes on your computer and connect your iPhone with it.
Step 2Click the Device icon on the top and select Summary from the left panel
Step 3Choose This computer and click the Back Up Now.
Option 3. Move iPhone Photos to PC with FoneTrans for iOS
FoneTrans for iOS is a functional tool to help you move data among iOS devices and computer. You can use it to tranfer iPhone photos, contacts, videos, texts, etc. And it is helpful to restore contacts, make a ringtone, convert HEIC images, and more. Below is how to use it.
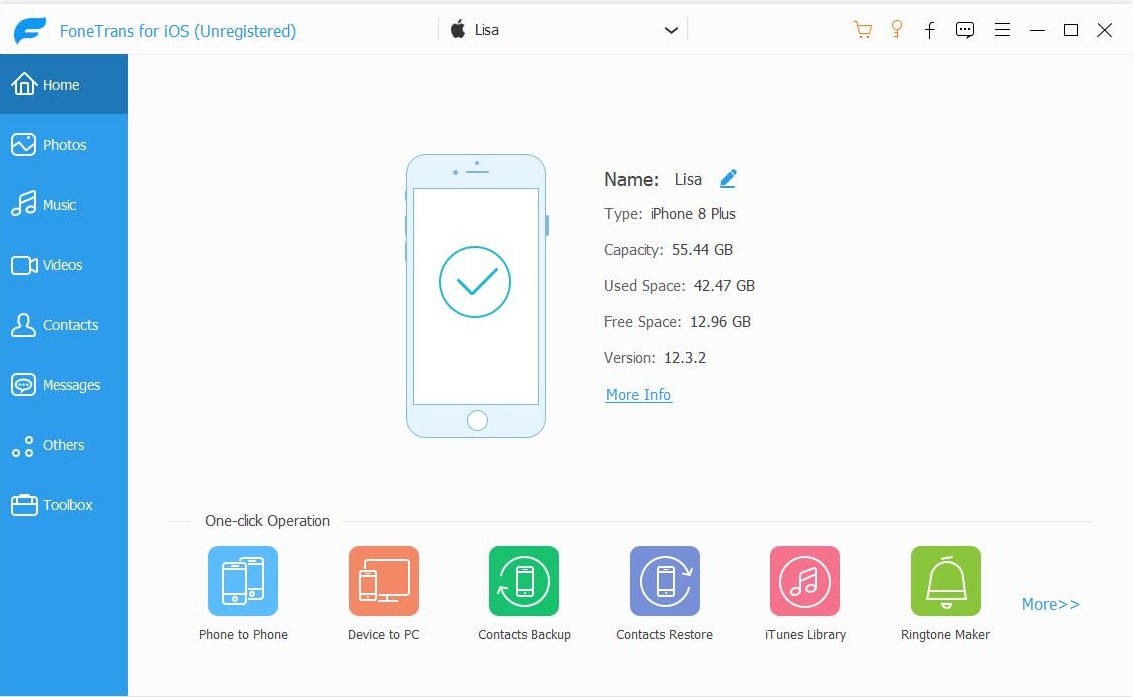
Step 1Launch the software and connect your device with the computer after downloading and installing the program.
With FoneTrans for iOS, you will enjoy freedom to transfer your data from iPhone to computer. You can not only transfer iPhone text messages to computer, but also photos, videos and contacts can be moved to PC easily.
- Transfer photos, videos, contacts, WhatsApp, and more data with ease.
- Preview data before transferring.
- iPhone, iPad and iPod touch are available.
Step 2Tab Trust on your iPhone screen after successful connection and begin scanning.
Step 3Click Photos from the left panel and choose the items you want to transfer to the computer.
Step 4Click Export to at the upper-right corner and choose the local path you save the photos.
Step 5Click Open.
Option 4. Backup iPhone Data via iOS Data Backup & Restore
If you prefer to backup iPhone without taking too much storage on compuer, iOS Data Backup & Restore can help you fix this. It backs up iPhone data as a complete file which is with .data file extension. And you can choose encrypt mode to protect your data from others.
FoneLab enables you to backup and restore iPhone/iPad/iPod without data loss.
- Backup and restore iOS data to your PC/Mac easily.
- Preview data in detail before you restore data from backups.
- Backup and restore iPhone, iPad and iPod touch data Selectively.
Part 6. FAQa about How to Permanently Delete Photos from iPhone
Why can't I delete photos from my iPhone?
If your photos are synced from iTunes or Finder, then you are unable to delete photos directly. Firstly, you need to turn off iCloud photos if you did it before. Then connect iPhone to computer and delete your iPhone photos.
How do I delete photos from my iPhone to free up space?
Run FoneEraser for iOS on computer, choose Free up Space and choose one feature accordingly to free up iPhone space.
What is the fastest way to delete photos from iPhone?
Launch FoneEraser for iOS and choose Eraser All Data, choose an erasing level and click START button.
How do I clean up my iPhone photos?
Launch FoneEraser for iOS and choose Free up Space > Clean Up Photos. After scanning, click Eraser button.
That's all. As you see, FoneEraser for iOS is an efficient and easy software to delete songs, movides, photos from iPhone but not iCloud, download and have a try now!