Screen Record on iPad [4 Reliable Ways to Discover]
 Posted by Valyn Hua / Sept 10, 2024 09:20
Hi! My friend called a while ago and asked for help using the software we made for our thesis. The procedure has multiple steps that cannot be studied if only explained on chat. He does not want to video call since he's busy. I plan to record my iPad screen to send to him and let him watch it during his free time. Can you screen record on iPad? Please teach me how. Thanks!
Recording the screen activities can be performed on your iPad. It can happen when no restrictions are made to the screen or app you will record. Please continue reading this post to see the 4 top picks ways to record iPad screens.
![Screen Record on iPad [4 Reliable Ways to Discover]](/images/screen-recorder/ipad-screen-recorder/ipad-screen-recorder.jpg)

Guide List
Part 1. How to Screen Record on iPad with Built-in Tools
Let’s start with the most advantageous way to record iPad screen, which is the built-in way. Have you seen the features on the iPad Control Center? These icons are called Active Tiles. They can be executed for a quick command. See how to use the screen recording feature on iPad by following the detailed steps below.
Step 1First, activate the screen recorder tool on your iPad. Go to the Settings app and choose the Control Center button. On the next screen, swipe down until you see the inactive tiles on your iPad. Locate the screen recording button and tap the Plus button it contains. You will now see the feature mentioned on the active tiles on the control center.
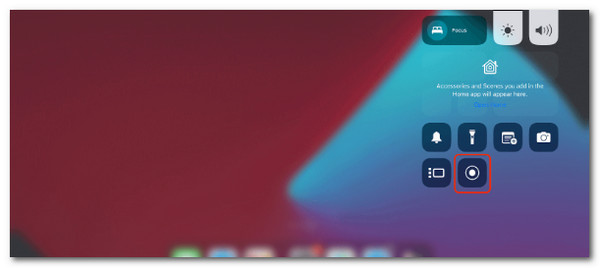
Step 2Swipe down at the top of the screen to see the control center section of your iPad. After that, locate the screen recording button and start the recording process. Record your preferred time interval and tap the Stop button at the top left of the main interface to automatically save the recorded video on your iPad.
FoneLab Data Retriever - recover the lost/deleted data from computer, hard drive, flash drive, memory card, digital camera and more.
- Recover photos, videos, contacts, WhatsApp, and more data with ease.
- Preview data before recovery.
Part 2. How to Screen Record on iPad with App
Numerous apps are available on the App Store for iPad screen record. However, which one is the best? You can try the Record It Screen Recorder app! It is available on iPad, iPhone, and other smartphones. However, this tool will cause lag on your iPad screen when not set up properly. See how to use it below.
Step 1Download the screen recorder mentioned above for your iPad and set it up. To continue using it, you must allow its floating button to appear in the background and screen of your iPad.
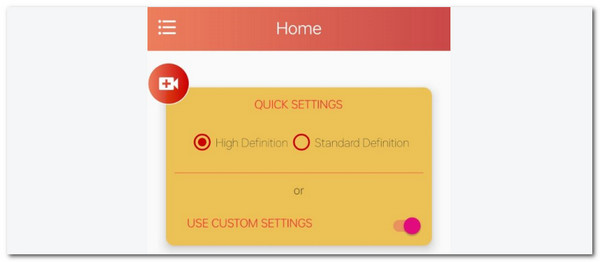
Step 2If that's the case, allow all the permissions it requires. After that, tap the App button and choose the Broken Box button on your iPad. Later, tap the Start Now button to start the recording process.
FoneLab Data Retriever - recover the lost/deleted data from computer, hard drive, flash drive, memory card, digital camera and more.
- Recover photos, videos, contacts, WhatsApp, and more data with ease.
- Preview data before recovery.
Part 3. How to Screen Record on iPad with Online Tool
ScreenApp.io is an online tool that has multiple advanced features for screen recording. It allows you to organize the recorded videos by logging in or creating an account on their website. However, it takes a minute or more to load this online tool because of its multiple tools. See below for instructions on how to screen record on an iPad using this online tool.
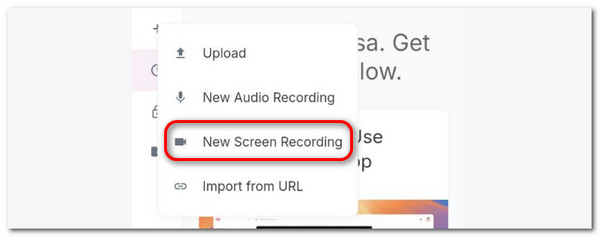
Step 1Go to the screenapp.io website, and you will see the description of the online tool on the first interface. You only need to tap the Start Now button at the center of the screen to proceed to the next window. Later, the advanced features of the tool will be shown. Tap the Plus button at the top left. Then, drop-down options will be displayed, and you can choose the New Screen Recording button.
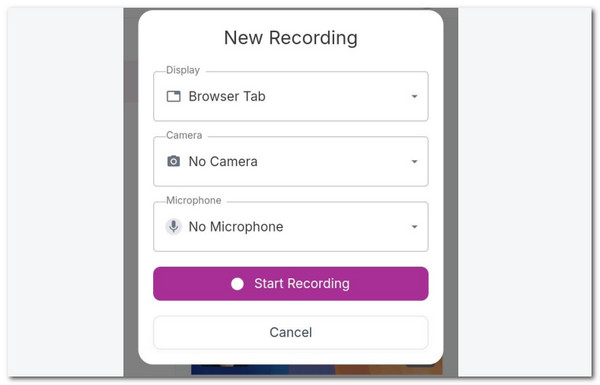
Step 2Allow the permissions it asks from your iPad. After that, you will see three options on the iPad screen, and you need to set them up before the capturing procedure. Finally, tap the Start Recording button at the end of the dialog box to begin the screen recording session.
FoneLab Data Retriever - recover the lost/deleted data from computer, hard drive, flash drive, memory card, digital camera and more.
- Recover photos, videos, contacts, WhatsApp, and more data with ease.
- Preview data before recovery.
Part 4. How to Screen Record on iPad with FoneLab Screen Recorder
Discover how to screen record iPad on your computer in this section! FoneLab Screen Recorder is a third-party program that can capture computer and smartphone screens. One of the top features of this tool is that it allows you to edit the recorded videos. In addition, you can add the sound of the iPad during the recording procedure. See the detailed steps below by following the quick steps below.
FoneLab Data Retriever - recover the lost/deleted data from computer, hard drive, flash drive, memory card, digital camera and more.
- Recover photos, videos, contacts, WhatsApp, and more data with ease.
- Preview data before recovery.
Step 1Go to the software website and choose the Free Download button. The action will lead you to download the software. Set up the tool afterward, and it will be launched automatically.

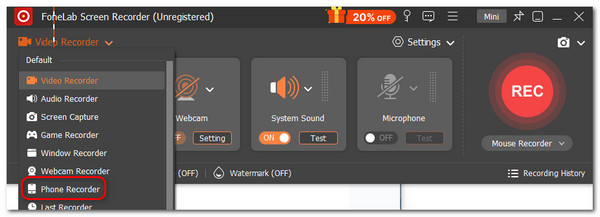
Step 2The first interface will reveal the Video Recorder interface. Click the button mentioned to see more drop-down options for the software. Then, choose the Phone Recorder button to proceed to the next step.
Step 3Choose the iOS Recorder button in the new window, and it will reveal the different ways you can plug the iPad into your computer. If you choose the USB Connection at the top right, you can use a USB or Lightning cable. In contrast, you can wirelessly connect your iPad to the computer by swiping down the Control Center on your iPad. Then tap the Mirror button and choose the FoneLab Screen Recorder option.
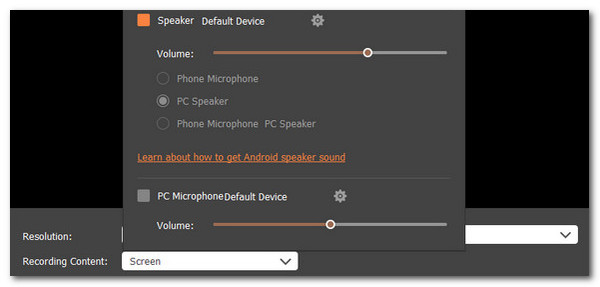
Step 4The iPad screen must appear on the software interface. Then, you only need to click the Record button on the software, and the recording process will start. You can also set up the recording content using the Recording Content button. Once you want to end the recording, you only need to click the Box button on the menu bar it offers. Click the Export Now button to save the recorded screen on your computer.
FoneLab Data Retriever - recover the lost/deleted data from computer, hard drive, flash drive, memory card, digital camera and more.
- Recover photos, videos, contacts, WhatsApp, and more data with ease.
- Preview data before recovery.
Part 5. FAQs about How to Screen Record on iPad
How long can an iPad screen record?
There's no time limit for screen recording on your iPad. The limitations will depend on the available storage space of the Apple device. The more free storage space it has, the longer the screen recording will take. It is better to free up space on your iPad before capturing a long screen recording.
Why is there no sound when I record my iPad screen?
You might not have turned on the microphone feature before screen recording on your iPad, which is why it has no sound. In addition, it might be because of glitches in the iPad's system. Lastly, your iPad might also experience hardware issues that hinder the screen recording sound, including the microphone. If that's the case, it needs a replacement or cleaning.
FoneLab Screen Recorder allows you to capture video, audio, online tutorial, etc on Windows/Mac, and you can easily customize size, edit the video or audio, and more.
- Record video, audio, webcam and take screenshots on Windows/Mac.
- Preview data before saving.
- It is safe and easy to use.
That's how to record screen on iPad conveniently! This post has 4 reliable ways to do that, including the FoneLab Screen Recorder. It can record computer and smartphone screens in a few clicks. Do you have questions or suggestions? Leave them in the comment section at the end of this post. Thank you!