- Convert AVCHD to MP4
- Convert MP4 to WAV
- Convert MP4 to WebM
- Convert MPG to MP4
- Convert SWF to MP4
- Convert MP4 to OGG
- Convert VOB to MP4
- Convert M3U8 to MP4
- Convert MP4 to MPEG
- Embed Subtitles into MP4
- MP4 Splitters
- Remove Audio from MP4
- Convert 3GP Videos to MP4
- Edit MP4 Files
- Convert AVI to MP4
- Convert MOD to MP4
- Convert MP4 to MKV
- Convert WMA to MP4
- Convert MP4 to WMV
How to Cut A Part of A Video on MacBook via 3 Simplest Methods
 Updated by Lisa Ou / Oct 19, 2023 16:30
Hi, guys! We have a school project in our subject related to film. I was assigned to be the editor of the group. Upon recording our dramatic scenes, there are many bloopers. The problem is that we only paused the video and did not stop it while filming. If so, the wrong and good takes collide. Please teach me how to cut a part of a video on MacBook. Thanks!
It is unnecessary to add the wrong takes on your film. The unwanted parts of the video will surely ruin the quality or story of it. You're in luck! We have prepared the 3 methods to help you cut parts of your videos on MacBook. Please discover them below this description.

Guide List
Part 1. How to Cut A Part of A Video on MacBook with Photos App
When we have videos on our MacBooks, we all know that they don’t go directly to the Photos app. But we have some good news that we will share with you. You can use the Photos app to cut video length on Mac. You only need to import the video into the program. It will store them on its Import album afterward.
Aside from trimming your videos, you can use the Photos app for many more functions. You can use it to apply filters to your videos, crop, and more. Another good thing about this tool is that it supports the drag-and-drop technique to import your videos.
See the detailed steps below on how to cut a part of a video on a MacBook via the Photos app. Move on.
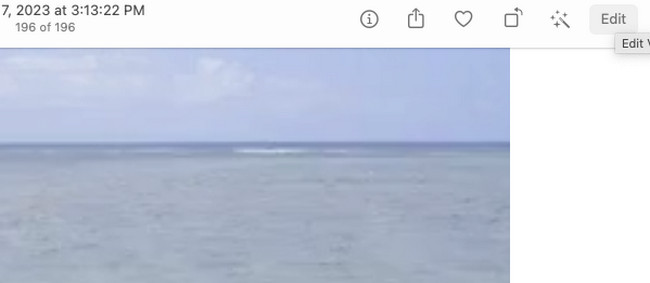
Step 1Please open the Photos app by clicking it on the Dock. The first interface you will see is for the recent items on the program. If the video is not yet on the program, please import it. You can drag and drop it to the Photos app. After that, you will see the video by clicking the Import button on the left side of the main interface.
Step 2Please click the video to maximize it. After that, please click the Edit button at the top right corner. The program will show you all of its editing tools. Since you want to cut a part of your video, please drag and adjust the Slider at the bottom. Set the beginning and ending points of the video afterward.
Part 2. How to Cut A Part of A Video on MacBook with QuickTime
We all know that QuickTime Player is a tool on Mac that can play videos. It can also record on your screen on a Mac. It has 3 features: New Movie Recording, New Audio Recording, and New Screen Recording.
QuickTime is another built-in tool of your MacBook that can cut a part of your video. It can trim your videos at the beginning and end of your video. The good thing about this built-in tool is that it will not ruin the quality of your videos upon saving them.
See below how QuickTime cuts a part of your videos on MacBook. Please proceed.
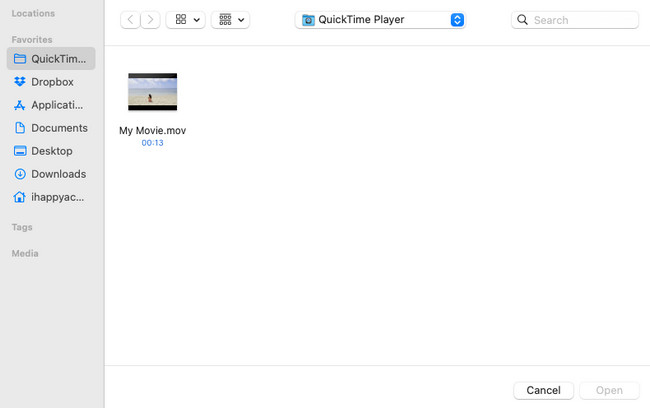
Step 1Please launch first the QuickTime Player on your MacBook. After that, choose the File button at the top of the main interface. Drop-down options will appear. Among all of them, choose the Open File button. The available videos on your MacBook will appear. Please select the one that you want to trim. Click the Open button afterward.
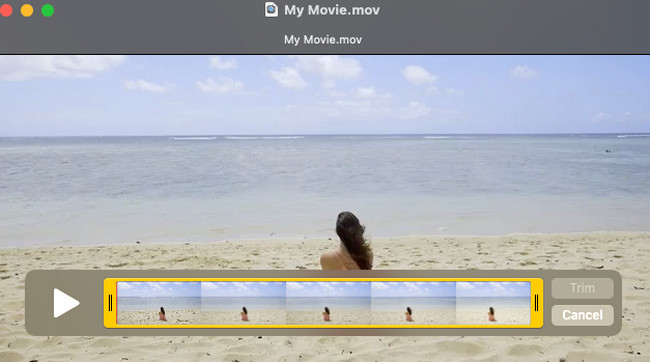
Step 2At the top, please click the Edit button. After that, you need to click the Trim button at the button. The Slider icon will appear at the bottom. Slide it depending on your preference on your video. Click the Trim button afterward. Save the video by clicking the File > Export As button.
Part 3. How to Cut A Part of A Video on MacBook with FoneLab Mac Video Converter Ultimate
FoneLab Video Converter Ultimate is the leading alternative for the built-in tools above. It can cut a part of your MacBook videos with ease. There’s more! This tool has complex yet easy-to-use tools for your videos!
Video Converter Ultimate is the best video and audio converting software which can convert MPG/MPEG to MP4 with fast speed and high output image/sound quality.
- Convert any video/audio like MPG, MP4, MOV, AVI, FLV, MP3, etc.
- Support 1080p/720p HD and 4K UHD video converting.
- Powerful editing features like Trim, Crop, Rotate, Effects, Enhance, 3D and more.
The software can also convert your video with a fast conversion speed. It also supports batch conversion. Some of the additional tools it offers are Media Metadata Editor, Video Compressor, GIF Maker, 3D Maker, Video Enhancer, and more.
Please see the detailed steps below on using FoneLab Video Converter Ultimate to cut a part of your Mac videos.
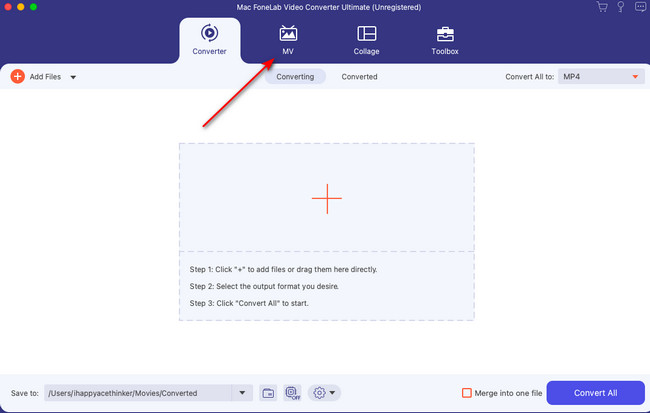
Step 1Download the tool first. To do that, visit the FoneLab Mac Video Converter Ultimate official website. After that, click the Free Download button with an Apple icon on the left. Set it up and launch it afterward on your computer.
Step 2Please click the MV button with a Television icon at the top. After that, you will see the first interface of the tool. It includes its premade Themes on the left side of the software. Tick the Plus icon at the bottom left and upload your video.
Step 3You will see tools at the top of the video. Please click the Trim button with a Scissor icon to see the trimmer tools. Please adjust the slider depending on your preference for your video's starting and ending points. Click the Save button afterward.

Step 4It is time to save the video. To do that, please click the Export button.

Video Converter Ultimate is the best video and audio converting software which can convert MPG/MPEG to MP4 with fast speed and high output image/sound quality.
- Convert any video/audio like MPG, MP4, MOV, AVI, FLV, MP3, etc.
- Support 1080p/720p HD and 4K UHD video converting.
- Powerful editing features like Trim, Crop, Rotate, Effects, Enhance, 3D and more.
Part 4. FAQs about How to Cut A Part of A Video on MacBook
1. Is video cutter joiner Mac free?
Before, Video Cutter Joiner on Mac allowed you to access all its features for free. However, its latest update removes the video-cutting tool for free access. You need to purchase the software first before you can use it. Alternatively, you can have FoneLab Video Converter Ultimate on computer to finis your tasks.
2. How do I delete a little part of a video in iMovie?
If you do not have the software yet, please download it first on your Mac. Set it up afterward and launch it on your Mac. After that, click the Plus icon on the startup page of Mac. Locate the video that you want to trim. Drag and drop it into the software afterward. After that, you will see the video on the tool. To trim it, please adjust the Slider at the bottom. Save the video by ticking the Export button at the top-right corner.
We hope that we have helped you a lot with your video today. If you want more information and tutorials, do not be shy to ask for help from us. We will be glad to help you. Please leave your comments below. Thank you!
Video Converter Ultimate is the best video and audio converting software which can convert MPG/MPEG to MP4 with fast speed and high output image/sound quality.
- Convert any video/audio like MPG, MP4, MOV, AVI, FLV, MP3, etc.
- Support 1080p/720p HD and 4K UHD video converting.
- Powerful editing features like Trim, Crop, Rotate, Effects, Enhance, 3D and more.