Easily erase all contents and settings on iPhone, iPad or iPod completely and permanently.
- Clear iPhone Junk Files
- Clear iPad Cache
- Clear iPhone Safari Cookies
- Clear iPhone Cache
- Clear iPad Memory
- Clear iPhone Safari History
- Delete iPhone Contacts
- Delete iCloud Backup
- Delete iPhone Emails
- Delete iPhone WeChat
- Delete iPhone WhatsApp
- Delete iPhone Messages
- Delete iPhone Photos
- Delete iPhone Playlist
- Delete iPhone Restrctions Passcode
Excellent Guide on How to Clear Browser History on iPad
 Updated by Lisa Ou / Sept 11, 2024 14:20
Hello! Can anyone tell me how to clear history on iPad browsers? My niece plans to borrow my device tomorrow for school, but I'm uncomfortable exposing my iPad history once she uses the browsing app to research. It's not that I'm hiding something; I just don't want my private data or information, like accounts, to be exposed. Will someone please help me with this? Thank you!
Clearing history on browsing apps is often performed on an iPad and other devices to protect the user's privacy. They contain several account details and other information when you use the browsers to log into different websites. Thus, it's unsurprising that users want to clear their iPad history now and then. The only question is, what are the proper ways to clean them properly?
Prepare to resolve your curiosity after exploring the information below. This post has listed suitable guidelines for clearing history on your iPad browsers in the following parts. We included the processes for all popular browsing apps, so you should be able to clean everything even if all the browsers are installed on your iPad. A bonus tool is also listed to help you later.

Guide List
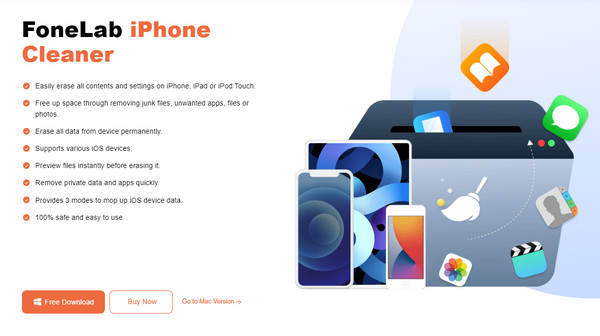
FoneLab iPhone Cleaner is the best iOS data cleaner which can easily erase all contents and settings or specific data on iPhone, iPad or iPod Touch.
- Clean unwanted data from iPhone, iPad or iPod touch.
- Erase data quickly with one-time overwriting, which can save you time for plenty of data files.
- It is safe and easy to use.
Part 1. How to Clear History on iPad Safari
iPad’s default browsing is Safari. It is pre-installed on all Apple devices, like iPad, regardless of its model and version. So, this browsing app is most likely the one you frequently use on the device, especially since it is specifically designed for Apple users, providing numerous beneficial features. Meanwhile, even though it differs slightly from other browsers, it still saves browsing history like them, allowing you to revisit the previous websites. If you’d like to clear the history from your iPad Safari, you can quickly do so since the process only takes a few moments.
Pay attention to the proper guidelines below to master how to clear browsing history on iPad Safari:
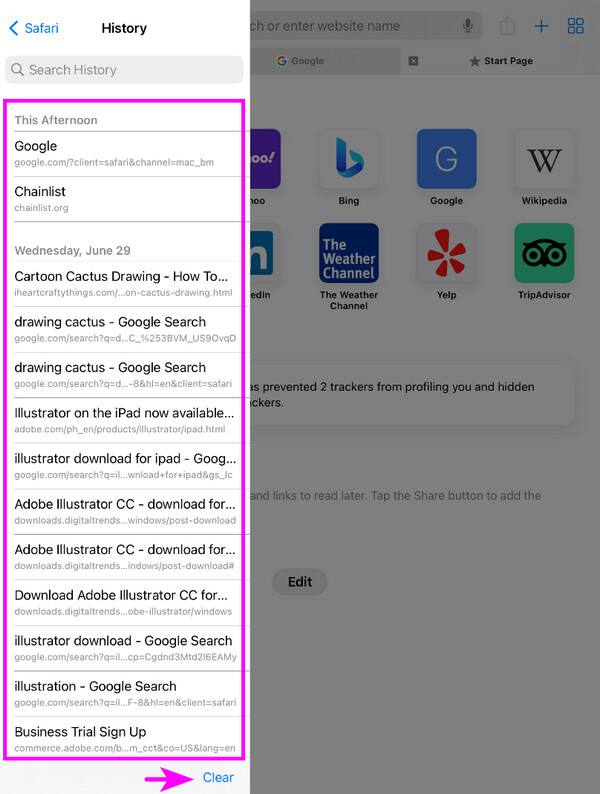
Step 1Open your iPad’s Safari app and click the menu button at the top left corner of the browser. Once the options materialize, pick History to view your browsing history on the screen.
Step 2When shown, select the Clear option on the lowermost right of the history column. Then, confirm the action when prompted to clear your browsing app’s history on the iPad.
Even though Safari is the iPad’s official browser and offers several advantages, some users still prefer other browsers for certain reasons. If you are among them, kindly proceed to the next parts, as we will still tackle the processes for clearing browsing histories on the other 2 most popular browsers worldwide. After all, each browsing app is built differently.
FoneLab iPhone Cleaner is the best iOS data cleaner which can easily erase all contents and settings or specific data on iPhone, iPad or iPod Touch.
- Clean unwanted data from iPhone, iPad or iPod touch.
- Erase data quickly with one-time overwriting, which can save you time for plenty of data files.
- It is safe and easy to use.
Part 2. How to Clear History on iPad Chrome
Chrome is a browsing app you will most likely install on an iPad. Even if it is not pre-installed like Safari, its popularity and reliability must have encouraged you to acquire it on your device; it is widely used worldwide, especially because of its availability on multiple platforms. You can get it on iPadOS, iOS, Android, Windows, macOS, and Linux, allowing you to be more familiarized with its functions since it can be navigated on almost any device you use. That said, it is not unexpected if you often browse the internet using this certain browser. Thankfully, like Safari, clearing its history is hassle-free since you only have to maneuver a few options.
Bear in mind the unchallenging task below to determine how to clear browser history on iPad Chrome:
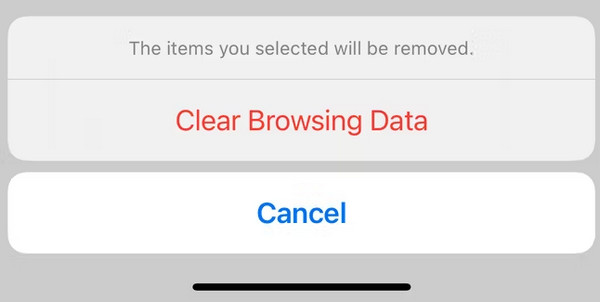
Step 1Select the Chrome browser on your iPad’s Home screen, then tap the three-dotted button to exhibit further options. From there, choose the Delete Browsing Data tab.
Step 2When the popup window appears, pick the browsing data you want to delete. Ensure you will include the browsing history option. Then, tap Delete Browsing Data and confirm.
FoneLab iPhone Cleaner is the best iOS data cleaner which can easily erase all contents and settings or specific data on iPhone, iPad or iPod Touch.
- Clean unwanted data from iPhone, iPad or iPod touch.
- Erase data quickly with one-time overwriting, which can save you time for plenty of data files.
- It is safe and easy to use.
Part 3. How to Clear History on iPad Firefox
Meanwhile, Firefox is consistently among the 3 leading browsers worldwide, following the previous browsing apps above. Like Chrome, its availability is also applaudable since you can install it on many devices, like your iPad, regardless of its model and version. Its performance also doesn’t fall short, and you can rely on its ability to secure your information with its features, such as enhanced tracking protection. However, you still can never be too sure because, like the other two browsers, it saves your browsing history, which is understandable since it makes users explore online more conveniently. But no worries; you are also free to clear them anytime.
Take to heart the appropriate steps below to understand how to clear history on iPad Firefox:
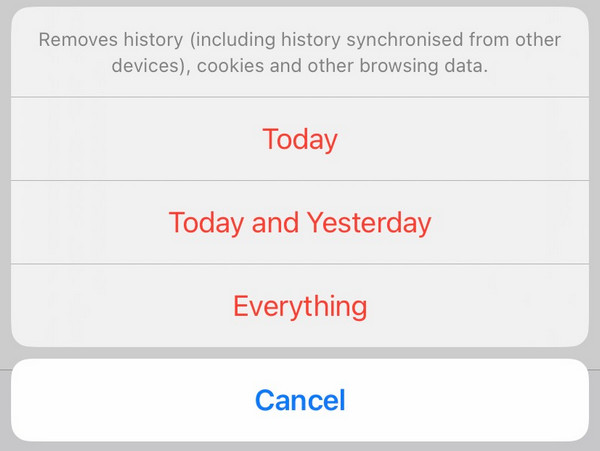
Step 1Select the menu button at the bottom of the Firefox browsing app’s interface. After that, hit the History option, and your browsing history will be displayed on the app screen.
Step 2Next, tick the Trash button in the bottom left section. When options are exhibited, check the timeframes of the browsing history you wish to clear. Finally, tap Delete to erase them.
As you may know, countless users rely on every browser in this article not only because of its advantageous features but also because it provides security. After all, they’re the most trusted browsing apps worldwide, so it’s only right that they should make users feel protected. However, you can’t be complacent since they save other data besides browsing history. If you want to protect your privacy further, we suggest checking out the bonus program below.
Part 4. Bonus Tip - Notable iPad Private Data Remover
When evaluating the best programs for erasing private data, you should use FoneLab iPhone Cleaner. As mentioned, the processes above can clear your browsing history, but not all the private data stored on your iPad. Fortunately, this cleaning program can help you remove them from your device, preventing others from using your private data to access or invade your personal information and content. Besides, it only consumes a little space in computer storage.
Meanwhile, FoneLab iPhone Cleaner’s private data eraser feature contains Custom Erase and One-click Erase modes. If you’d like to delete all your iPad’s private data at once, Once-click Erase mode would be the appropriate one for you. On the other hand, you can pick your private data individually before deletion using Custom Erase mode. Simply use your preferred mode, and you may also try the other cleaning features later. They will secure the iPad from junk.
FoneLab iPhone Cleaner is the best iOS data cleaner which can easily erase all contents and settings or specific data on iPhone, iPad or iPod Touch.
- Clean unwanted data from iPhone, iPad or iPod touch.
- Erase data quickly with one-time overwriting, which can save you time for plenty of data files.
- It is safe and easy to use.
Comprehend the safe operation underneath as a model for cleaning your private data on iPad or other iOS devices with FoneLab iPhone Cleaner:
Step 1Use the official website's Free Download button to obtain a copy of FoneLab iPhone Cleaner’s installer. The file will be saved immediately in the Downloads section, so double-click it afterward to initialize the installation. Stand by while waiting for the status bar on the lower area to complete. Lastly, choose Start once it pops up to run the tool on your computer.
Step 2Next, linking your iPad is necessary to establish its connection to your computer. Use a lightning cable, and a Quick Scan option will appear once linked. Click it for the program to begin accessing your iPad’s content, and when finished, select the Erase Private Data option in the left column. The feature’s erasing modes will then be shown on the right interface.
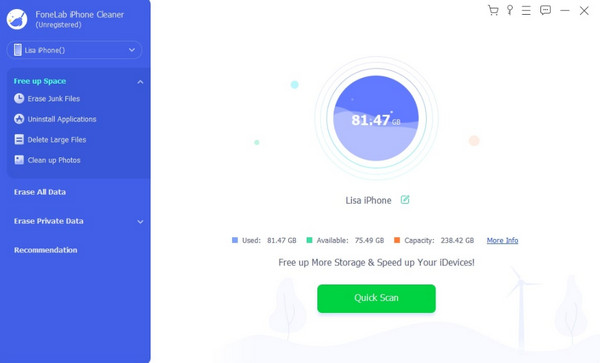
Step 3Select Custom Erase or One-click Erase according to your preferred mode. As mentioned, the Custom Erase mode lets you choose the private data you intend to delete individually, while Once-click Erase will erase everything simultaneously. If you chose Custom, proceed by selecting the items and choosing the deletion option to remove them from your iPad.

FoneLab iPhone Cleaner is the best iOS data cleaner which can easily erase all contents and settings or specific data on iPhone, iPad or iPod Touch.
- Clean unwanted data from iPhone, iPad or iPod touch.
- Erase data quickly with one-time overwriting, which can save you time for plenty of data files.
- It is safe and easy to use.
Part 5. FAQs about How to Clear History on iPad
How to clear search history on iPad?
Safari is the iPad's default browser, so if you often use it to search the Internet, you can clear its history by navigating to the Settings app. Unlike other browsers, Safari has its section in Settings, allowing users to manage it better, including data like search history. So, clearing your browser's search history will be possible by clicking Safari on the Settings app and tapping Clear History and Website Data. However, this process won't erase only the search history. As you can see, your browsing history and other website data will also be included in the deletion.
Can I delete only the recently visited websites on my iPad?
Yes, you can. When browsing on the iPad, your recently visited websites are usually at the top of the history section. So you can quickly select them to delete without exploring the other older websites you have visited.
Trusting the information we provided above will guarantee success in clearing the history of your iPad's browsing apps. Don't also forget the bonus tool we recommended, as it will greatly help you manage your iPad data better.
FoneLab iPhone Cleaner is the best iOS data cleaner which can easily erase all contents and settings or specific data on iPhone, iPad or iPod Touch.
- Clean unwanted data from iPhone, iPad or iPod touch.
- Erase data quickly with one-time overwriting, which can save you time for plenty of data files.
- It is safe and easy to use.