- Part 1. How to Clear Facebook Cache on iPhone with App Settings
- Part 2. How to Clear Cache on Facebook on iPhone by Reinstalling
- Part 3. How to Clear Facebook Cache on iPhone by Clearing Search History
- Part 4. How to Clear Cache on Facebook on iPhone with FoneEraser for iOS
- Part 5. FAQs about How to Clear Facebook Cache on iPhone
Easily erase all contents and settings on iPhone, iPad or iPod completely and permanently.
- Clear iPhone Junk Files
- Clear iPad Cache
- Clear iPhone Safari Cookies
- Clear iPhone Cache
- Clear iPad Memory
- Clear iPhone Safari History
- Delete iPhone Contacts
- Delete iCloud Backup
- Delete iPhone Emails
- Delete iPhone WeChat
- Delete iPhone WhatsApp
- Delete iPhone Messages
- Delete iPhone Photos
- Delete iPhone Playlist
- Delete iPhone Restrctions Passcode
How to Clear Cache on Facebook on iPhone in 4 Proven Ways
 Updated by
 There are countless famous social media platforms nowadays, including Facebook. This platform is accessible on various devices, such as the iPhone. The Facebook app can store and share files from the mentioned Apple device. Even before and after signing in, it stores caches on your iPhone, including other operations. These temporary files take up storage space and cause minor issues with the application.
Let's clear cache on Facebook on iPhone! This article outlines the 4 proven and tested ways to do that. These methods encompass both built-in options and the most effective third-party tools. Discover them by scrolling below.


Guide List
- Part 1. How to Clear Facebook Cache on iPhone with App Settings
- Part 2. How to Clear Cache on Facebook on iPhone by Reinstalling
- Part 3. How to Clear Facebook Cache on iPhone by Clearing Search History
- Part 4. How to Clear Cache on Facebook on iPhone with FoneEraser for iOS
- Part 5. FAQs about How to Clear Facebook Cache on iPhone
Part 1. How to Clear Facebook Cache on iPhone with App Settings
Facebook has its built-in settings that can be found on your account. These settings help manage your posts, activities, and data. Additionally, it allows you to clear and reduce the temporary files that can be stored on your iPhone. There are lots of settings that can be applied to your Facebook account. You may not be aware of this if you are a beginner. Please follow the steps below.
Step 1Ensure that you are logged in to any Facebook account on your iPhone. Then, select the Three Horizontal Lines button at the top right of the main interface. After that, tap the Settings & Privacy button from the main interface. Later, the screen will be replaced. Tap the Settings button afterward.
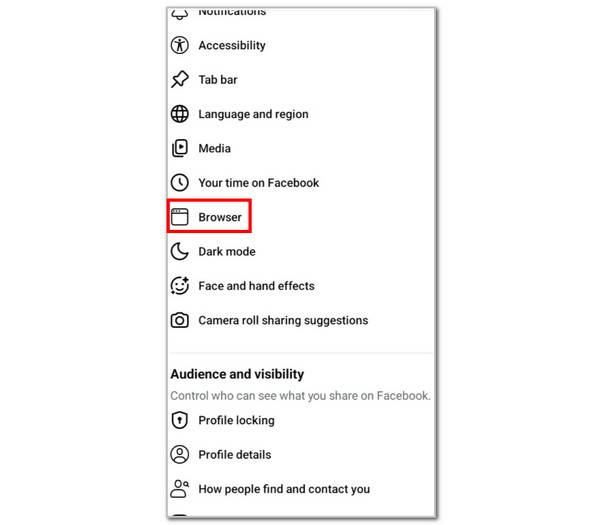
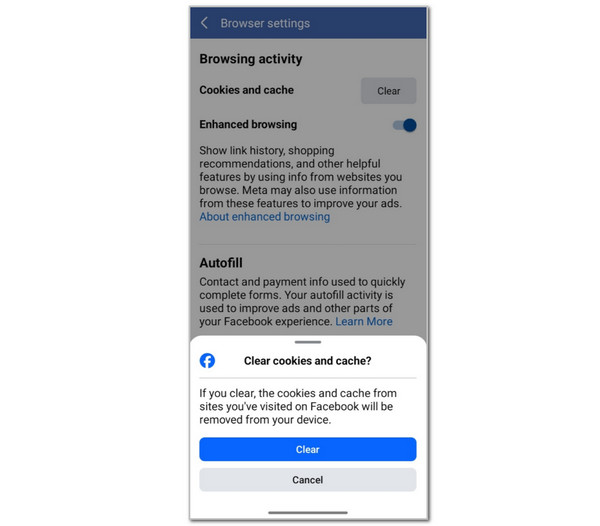
Step 2All the settings that can be applied to the Facebook account will appear. Swipe down on the main screen and tap the Browser button. Then, please tap the Clear button at the top right. A small window will be prompted on the screen. Tap the Clear button to confirm the process.
Part 2. How to Clear Cache on Facebook on iPhone by Reinstalling
While having the Facebook app on your iPhone, it consumes and stores caches in its storage. The Facebook app will contain the caches while it is installed on your iPhone. You can try uninstalling and reinstalling it afterward to clear the current stored caches. The steps below will be the best guide for this procedure.
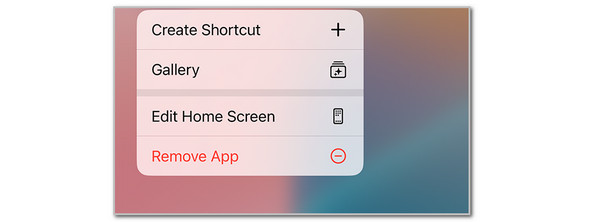
Step 1Unlock your iPhone, and the Home Screen interface will be prompted. Please locate the Facebook application from the list. Once you see it, please long-press it using your finger until the small window appears. Then, tap the Remove App button on the screen. Then, a confirmation dialog box will appear. Please tap the Delete App button and select Delete to confirm.
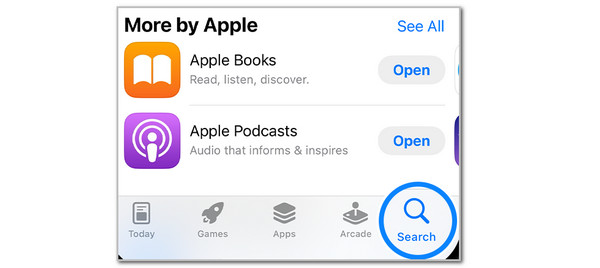
Step 2Open your iPhone App Store and tap Search at the bottom right of the screen. After that, search for the Facebook name by typing it in the search bar. Then, tap the Get button on its right side to start the download process. Once done, please tap the Open button to access the app on your iPhone. You may now log in to your Facebook account.
Part 3. How to Clear Facebook Cache on iPhone by Clearing Search History
The search history on your Facebook account creates caches on your iPhone. Usually, it is one of the most operated features on the mentioned application. Clearing it will help you lessen the storage space Facebook consumes due to its caches. Let us clear the search history on your iPhone using the detailed steps posted below.
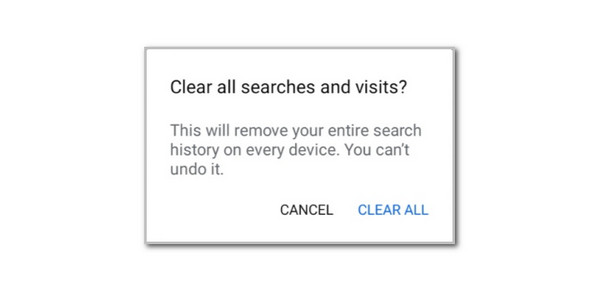
Open your Facebook app on your iPhone and sign in to your Facebook account. After that, tap the Search button at the top right corner. The recent searches for your Facebook account will appear on the screen. Please tap the See All button at the top right. Then, tap the Clear All button at the top right again. A small window will appear. Select the Clear All button to confirm the process.
Part 4. How to Clear Cache on Facebook on iPhone with FoneEraser for iOS
FoneEraser for iOS is designed for erasing unnecessary data from your iPhone. This tool erases the data that will be unrecoverable even by the most powerful recovery tool. It deletes caches from your iPhone, including the Facebook app's temporary files. The best feature of this software is that it allows you to preview the data before deletion.
Additionally, it offers 3 erasing levels to meet your personal needs! It includes the low, medium, and high levels. Please imitate the steps below to clear cache on Facebook on iPhone using this tool.
FoneEraser for iOS is the best iOS data cleaner which can easily erase all contents and settings on iPhone, iPad or iPod completely and permanently.
- Clean unwanted data from iPhone, iPad or iPod touch.
- Erase data quickly with one-time overwriting, which can save you time for plenty of data files.
- It is safe and easy to use.
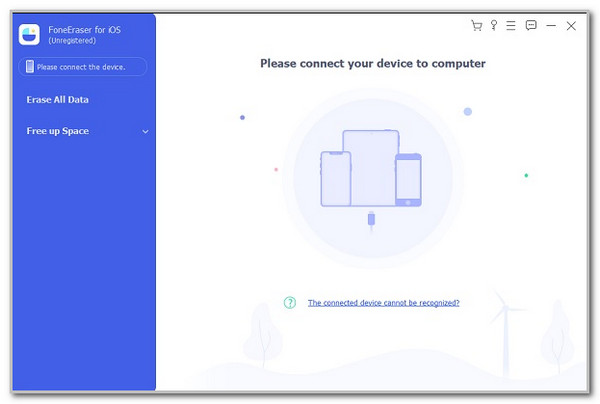
Step 1Go to the main website of FoneEraser for iOS. After that, click Free Download on the main interface to initiate the download process. Then, please plug the iPhone into your computer using a USB cable to ensure it is connected correctly.
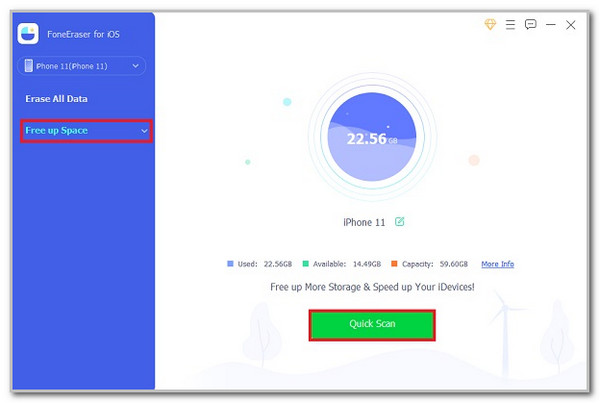
Step 2Click the Free Up Space button in the sidebar. After that, your iPhone name and version will appear on the right. Please click the Quick Scan button below to scan the available data that can be deleted from various applications, including Facebook.
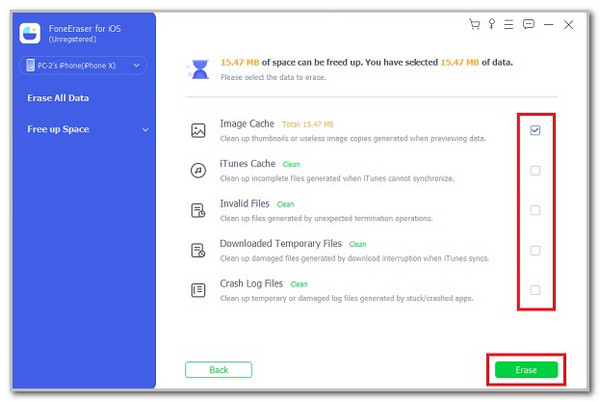
Step 3The list of data and options will appear after the scanning procedure. Please click all the boxes on the right side. Then, click Erase at the bottom right of the screen. This will delete all the caches from the listed data types, including the Facebook caches stored on your iPhone.
Part 5. FAQs about How to Clear Facebook Cache on iPhone
How do I turn off data collection on Facebook?
Open the Facebook app and select the Profile Picture button at the top right. Then, choose the Settings & Privacy button from the list and tap the Settings button. After that, tap the Account Center button on the screen. Tap the Your Information and Permissions button and then select the Your Activity Off Meta button. Navigate to the Manage Future Activity section and tap the Disconnect Future Activity option. Finally, select the Continue button and tap the Confirm button.
How can I limit Facebook's data usage?
You can enable Data Saver mode to prevent Facebook from using your iPhone's limited data. Open the Facebook application on the mentioned Apple device. Then, tap the Settings & Privacy button. After that, select the Settings button on the next screen. Toggle the Data Saver slider on afterward to reduce image and video quality.
In conclusion, this post outlines 4 easy ways to guide you on how to clear cache on Facebook on iPhone. The built-in ways are posted for your reference. Additionally, FoneEraser for iOS has also been introduced. It is the best third-party software for clearing caches from various apps and data on your iPhone. You can download it to learn more about its features. Thank you!