Easily erase all contents and settings on iPhone, iPad or iPod completely and permanently.
- Clear iPhone Junk Files
- Clear iPad Cache
- Clear iPhone Safari Cookies
- Clear iPhone Cache
- Clear iPad Memory
- Clear iPhone Safari History
- Delete iPhone Contacts
- Delete iCloud Backup
- Delete iPhone Emails
- Delete iPhone WeChat
- Delete iPhone WhatsApp
- Delete iPhone Messages
- Delete iPhone Photos
- Delete iPhone Playlist
- Delete iPhone Restrctions Passcode
How to Clear Facebook Cache on iPhone using 2 Proven Ways
 Posted by Boey Wong / Oct 15, 2021 09:00
Facebook is maybe one of the most popular and most hooked social media platforms. It allows users to sign-up for free profiles to connect with people online. One of its remarkable features is that it allows you to share pictures, music, videos, and articles, as well as their own thoughts and opinions with how many people you like. With that, you’ll probably spend most of your time on Facebook. But the thing is that when you use Facebook on your iPhone, it stores small bits of information on your iPhone’s storage that is called cache. This cache can cause your device's performance to function at a slow pace if overloaded. It can certainly cause problems like loading and formatting issues when you are using Facebook. Having that in mind, let us proceed on how to clear Facebook cache on iPhone.


Guide List
FoneEraser for iOS is the best iOS data cleaner which can easily erase all contents and settings on iPhone, iPad or iPod completely and permanently.
- Clean unwanted data from iPhone, iPad or iPod touch.
- Erase data quickly with one-time overwriting, which can save you time for plenty of data files.
Part 1. Why You Need to Clear Facebook Cache on iPhone
When you are scrolling and browsing over the Facebook app on your iPhone, the links you have clicked, the pages you have visited, and much of your other activities within the Facebook app and every activity that you perform are recorded. This recorded data consumes cache and is stored on your iPhone. But in a general sense, you do not need to worry about small-file cache on your iPhone. You can just leave it as it is and continue browsing. However, there could be certain cases where you need to clear this data before it causes a severe problem on your device. To get rid of that as early as possible, here is the essential information you can pay attention to:
Facebook caches that your activity made on the app will be piled up on your device which becomes the reason why you are losing space for your storage. Considering that cache are small-sized files, it does not mean that you will not give importance to it. For a sure thing, excessive unnecessary caches can bring about damage or poor performance on your iPhone.
Additionally, clearing caches not only helps your device to work at a fast pace but also allows the app to function smoothly. Lastly, the more cache on your iPhone, the slower your device will be browsing the web.
Basically, that is the main reason why you need to clear caches on your iPhone. You do it as there is a need to frequently clear cache on your iPhone in order to help optimize your storage and the use of data. It can help you to troubleshoot your device to increase the loading time of web pages and increase the performance of your iPhone for more productive and excellent performance.
Part 2. How to Clear Facebook Cache on iPhone Settings
Do you know the reason why your iPhone is not functioning smoothly? It is because of the overloaded unnecessary file on your device. Well, that’s not a problem, your iPhone’s performance can be improved if you do Facebook cache clearing. With that, you need to Offload your Facebook app. Offloading Facebook means deleting its program data but keeping any documents or settings associated with it on your iPhone. You need to Offload as frequently as possible to help enhance your iPhone’s performance. With that being said, here are the simplified steps for you to follow:
Step 1Go to your iPhone home menu. Then open the Settings App to access the full settings navigation of your device.
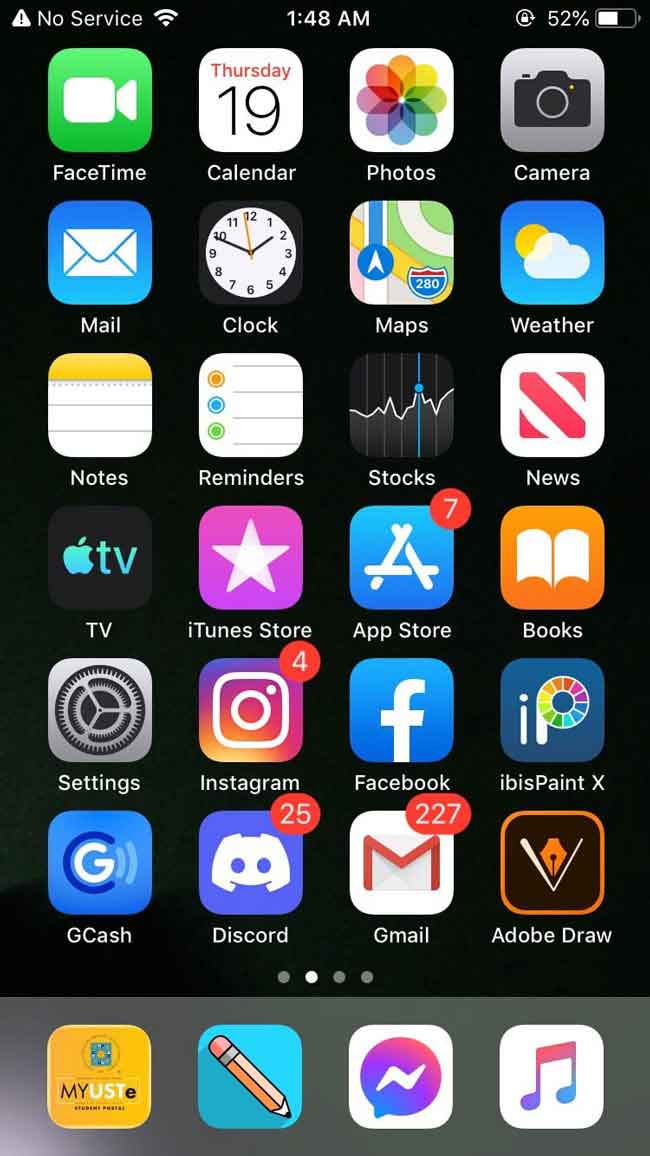
Step 2Then click the General panel on the interface. Just scroll down then see for iPhone storage.

Step 3Wait for the device to load and scroll down to see Facebook. Then click the Facebook app.

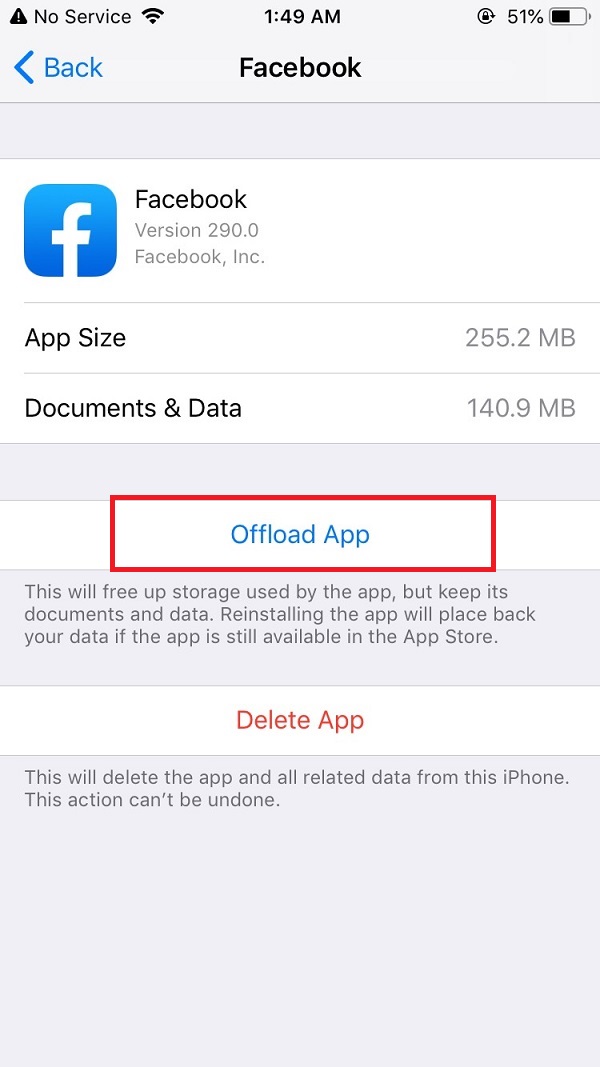
Step 4Clicking the app will give you another interface where you can find the Offload App button. Just click it and confirm the offloading of the app.
Step 5Wait for it to load while clearing your iPhone’s cache data. When it's done, check the App size and Document & Data if it has changed. Then just click the Reinstall App button.
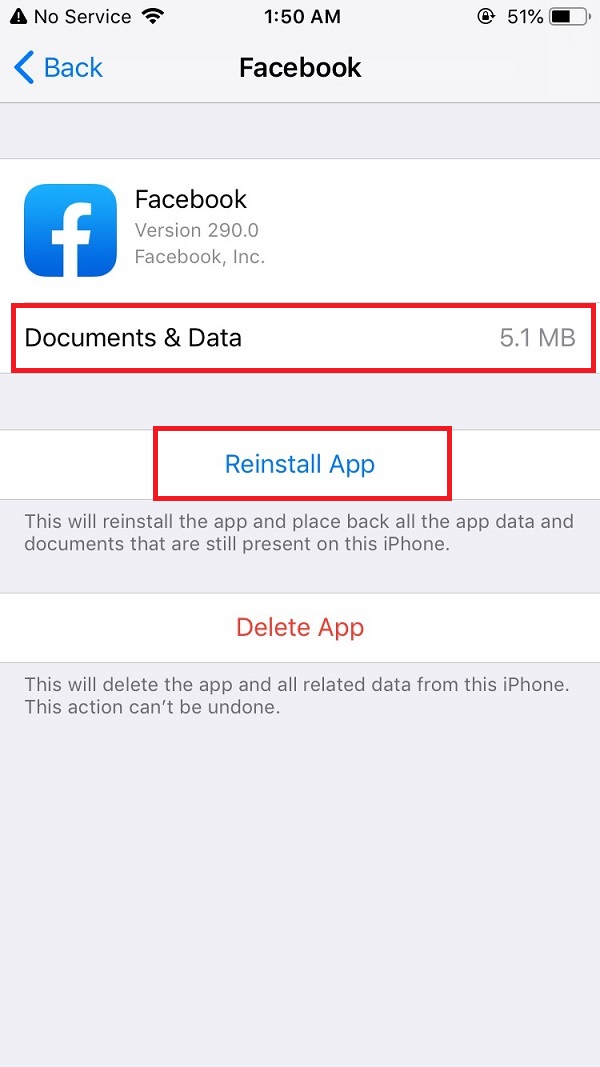
Step 6Sign in your Apple ID and reinstall the app and that’s it. You successfully cleared your iPhone from the Facebook cache. You can now enjoy using it in a fast-paced performance.
Part 3. How to Clear Facebook Cache with FoneEraser for iOS
If you are looking for easy-to-do and safe-to-use software to clear Facebook cache on your iPhone, we strongly recommend you to use FoneEraser for iOS. It is the best iOS cleaner that is excellent in cleaning files on your iPhone. It allows you to use its erasing level options depending on your needs. It also allows you to clean iPhone specific data rather than all data on device for better user-experience. Lastly, it enables you to erase junk files or cache, uninstall apps, delete large files and clean up photos. Besides, it erases data on your iPhone smoothly and completely. With that, written below are the steps to follow on how to use it for clearing Facebook cache on your iPhone:
FoneEraser for iOS is the best iOS data cleaner which can easily erase all contents and settings on iPhone, iPad or iPod completely and permanently.
- Clean unwanted data from iPhone, iPad or iPod touch.
- Erase data quickly with one-time overwriting, which can save you time for plenty of data files.
Step 1Download FoneEraser for iOS and install it on your computer.
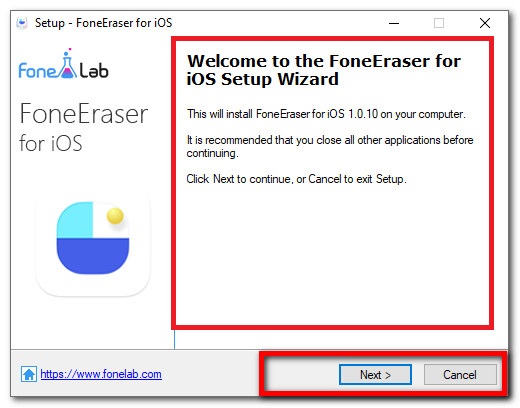
Step 2The program will be launched automatically after installing. If not, just double-click the icon on your desktop to open the software and see its interface. After that, connect your iPhone to the computer via a USB charging cable.
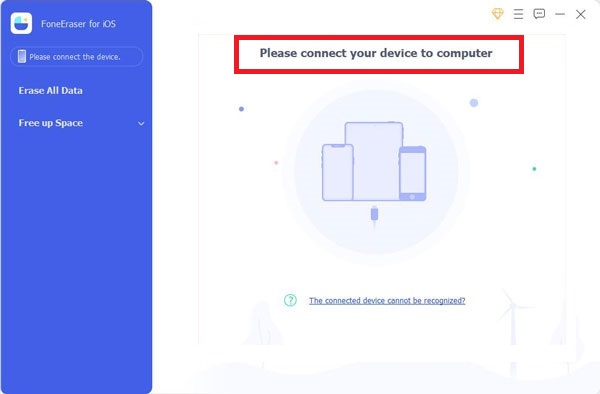
Step 3Make sure that your iPhone is compatible and connected to the computer. After that click Free Up Space, click the Erase button then proceed to Erase Junk Files.
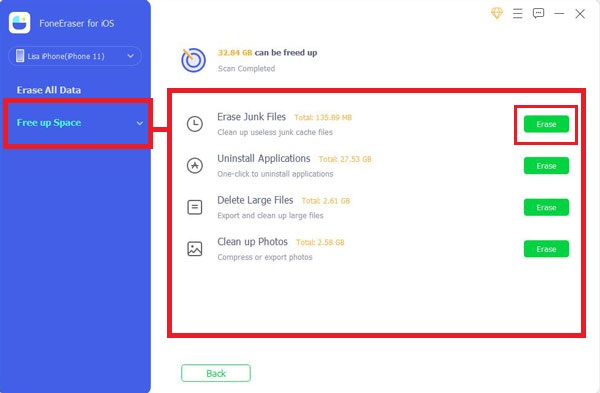
Step 4In this case, you will scroll down and see your Facebook app cache. Then check the boxes to delete it.
Step 5Before proceeding, make sure and double check the item you’ll delete then click the Erase button. That’s it, your iPhone is now clear from Facebook cache.

Part 4. FAQs about Clearing Facebook Cache
1. Is it safe to clear the Facebook cache on my iPhone?
If you are worrying about clearing your Facebook cache on your iPhone. Worry no more. It's a guarantee and safe. Since the Facebook cache are not essential files, it is safe to clear them. Besides, they are not causing any help on your device, rather they are corrupting your phone storage, which is why you need to delete them.
2. What does clearing cache do to Facebook app?
Basically, clearing the cache of your Facebook app helps you remove all the temporary stored and unnecessary files the application uses when you clicked the links, visited pages and activity within the Facebook app. It helps the Facebook app to optimize the data usage for a faster app performance.
3. How often should I clear my Facebook caches on my iPhone?
The biggest disadvantage of the Facebook Caches is that sometimes files get corrupted and can cause problems with your Facebook browser and eventually on your iPhone. So it's a good idea to frequently clear them at least every couple of weeks or so no matter how much space it is taking up. You should always consider checking your iPhone and Facebook app status for a better user experience.
FoneEraser for iOS is the best iOS data cleaner which can easily erase all contents and settings on iPhone, iPad or iPod completely and permanently.
- Clean unwanted data from iPhone, iPad or iPod touch.
- Erase data quickly with one-time overwriting, which can save you time for plenty of data files.
Spending a day or week browsing and scrolling on Facebook can produce sufficient Facebook caches that can affect your iPhone, that is why you need a solution to clear them. Moreover, this article offers and proves to you that there are varieties of tools and techniques that will surely suit your needs. Using the solutions mentioned above, you can excellently clear them with ease.