How to Record on MacBook in 4 Proven and Tested Ways
 Updated by
 Our devices, such as the Mac, are commonly used to record ourselves or other things using their built-in camera. On the other hand, can you screen record on a MacBook to capture its screen activities? Definitely, yes! This technique is used to capture video tutorials, gameplays, and other activities that appear on your MacBook screen.
Are you looking for the best ways to record your MacBook screen? This post has your back! It introduces the 4 proven and tested methods for recording your screen on a MacBook. You will see their list as you continue scrolling below.

Guide List
Part 1. How to Screen Record on MacBook with Toolbar
How do you screen record on a MacBook? Let us introduce the easiest way to screen record your MacBook screen. This technique uses the Screenshot Toolbar! This is classified as the quickest method because it can be accessed using a key shortcut combination. In fact, all of its procedures can be done using these shortcut keys. The best feature of this tool is that it allows you to record your voice or other audio during the screen recording.
Furthermore, it allows you to perform screen activities using the cursor. It also allows you to set a recording timer to let you prepare your MacBook screen. How to screen record on a MacBook using Screenshot Toolbar? The steps are provided below.
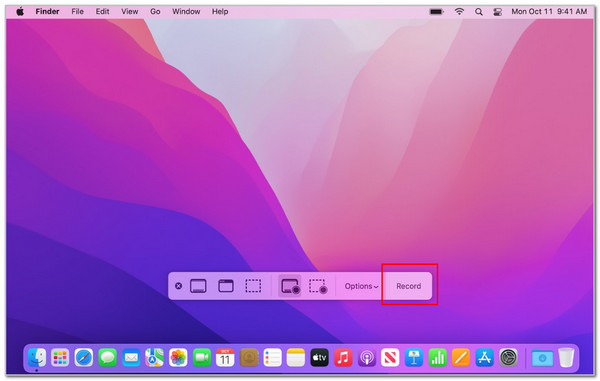
Step 1Open your MacBook and go to the screen you want to record. Then, press the Shift + Command + 5 key combination. Then, the Screenshot Toolbar will appear on the screen. You can select the Record Entire Screen or Record Selected Portion button.
Step 2If you are required to select the MacBook screen section, use the cursor to select it. Then, click the Record button on the right side of the Screenshot Toolbar. The screen recording will start immediately afterward. Finally, please click the Stop button on your screen to stop and save the screen recording.
Part 2. How to Screen Record MacBook with Mac FoneLab Screen Recorder
Mac FoneLab Screen Recorder is a third-party tool that is designed to record your MacBook screen. This software can also be used to record your Windows screen because it supports this operating system. Besides screen recording, this tool also allows you to take a snapshot of your computer screen. It is convenient when you want to screenshot a portion of the video while the screen recording is ongoing, or you can screenshot a specific area on your Mac. This tool does not cause lag on your MacBook screen, making it ideal for gaming.
FoneLab Screen Recorder allows you to capture video, audio, online tutorial, etc on Windows/Mac, and you can easily customize size, edit the video or audio, and more.
- Record video, audio, webcam and take screenshots on Windows/Mac.
- Preview data before saving.
- It is safe and easy to use.
Furthermore, this tool also supports hotkeys for screen recording. You can set your desired shortcut keys by customizing them through settings. How to screen record MacBook using this tool? The steps are provided below.
Step 1Go to the official website of Mac FoneLab Screen Recorder. After that, click the Free Download button for MacBook. Then, wait for the downloading procedure to be completed. Set up, install, and launch the tool afterward.

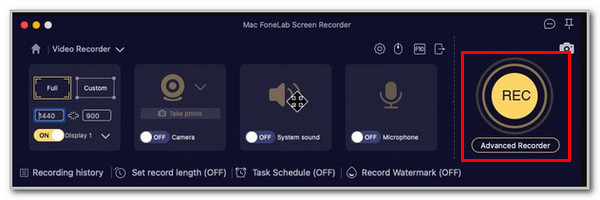
Step 2The full features of the mentioned tool will appear on the screen. Click the Full button on the left side if you want to screen record the entire screen of your MacBook. You can also choose a portion of your MacBook screen for the screen recording. You only need to use the Custom button on the left. Then, click the REC option on the right to start the screen recording.
Step 3Keep the screen recording ongoing until you record your desired video length. Then, click the Box button from the small toolbar that is included in the tool’s interface. This way, the screen recording will stop. Save the video on your MacBook afterward.

Part 3. How to Screen Record on a MacBook with QuickTime Player
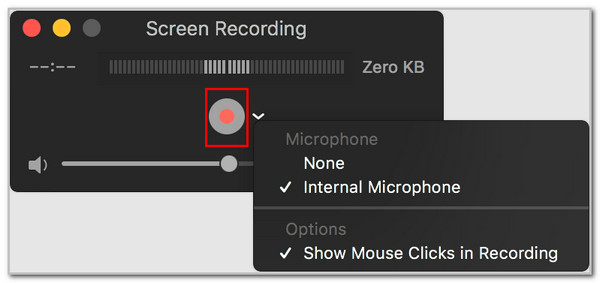
QuickTime Player is a powerful built-in media player that enables you to play a wide range of media files. The best thing about it is that it allows you to record your MacBook screen, too. This program will enable you to capture the internal microphone that your MacBook contains. Additionally, you have the choice of whether to capture the mouse clicks on the recording or not. How to record screen on MacBook with QuickTime? The steps are posted below as your guide.
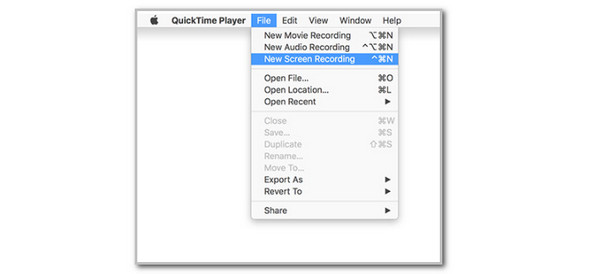
Step 1Open QuickTime on your MacBook. After that, please click the File option at the top of the main interface. Then, drop-down options will appear on the screen. Please click the New Screen Recording button from the list. You may also press the Control + Command + N keys for quick access.
Step 2Click the Arrow button on the side of the Record button. This way, edit the settings for the screen recording. Next, click the Record section to start the screen recording immediately.
Part 4. How to Record Screen on MacBook Online
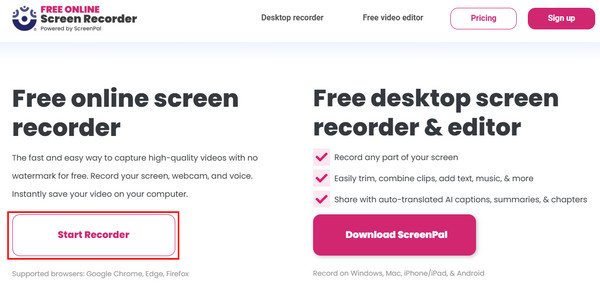
Besides the downloadable or built-in screen recorders, you can also record your MacBook screen with an online tool, like Free Online Screen Recorder. This online tool’s procedure is fast and easy. It captures your MacBook screen without a watermark and in high quality. However, this tool has drawbacks that you need to be aware of before using it. You need a strong internet connection to function correctly and avoid lag.
Additionally, it does not work on some programs that your MacBook supports. Additionally, it does not support an editing feature that can enhance your screen recording after the procedure. How to record video on MacBook online? The steps are your guide below.
Step 1Visit the official web page of the said online program. Then, click the Start Recorder button on the left.
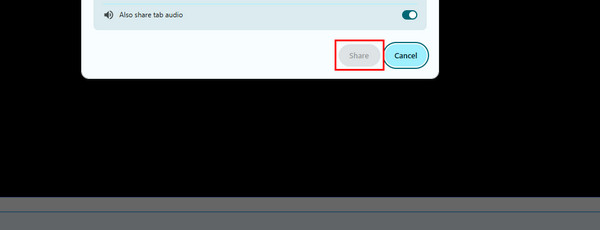
Step 2The interface will be replaced afterward. Please select the screen you want to record. Finally, click the Share option at the bottom right of the screen to start the screen recording.
Part 5. FAQs about MacBook Screen Record
How to record yourself on MacBook?
You only need to use tools that support a recording feature intended for capturing the front or back camera. QuickTime Player and FoneLab Screen Recorder are some of the tools that can help you with this procedure.
Why is my Mac not screen recording?
The Mac that is not screen recording is most likely experiencing restricted permissions. Additionally, it can be caused by not enough storage space on the MacBook. An outdated tool that is used for screen recording is also a possible reason.
This article shows the screen record on MacBook. It teaches you how to do it in 4 simple ways, including Mac FoneLab Screen Recorder. It is indeed inconvenient to capture your MacBook screen using another device, as it may result in shaky footage. Capture your MacBook screen with these tools to avoid lower quality!