- Convert AVCHD to MP4
- Convert MP4 to WAV
- Convert MP4 to WebM
- Convert MPG to MP4
- Convert SWF to MP4
- Convert MP4 to OGG
- Convert VOB to MP4
- Convert M3U8 to MP4
- Convert MP4 to MPEG
- Embed Subtitles into MP4
- MP4 Splitters
- Remove Audio from MP4
- Convert 3GP Videos to MP4
- Edit MP4 Files
- Convert AVI to MP4
- Convert MOD to MP4
- Convert MP4 to MKV
- Convert WMA to MP4
- Convert MP4 to WMV
How to Remove Background Noise from Video: 3 Best Tools
 Posted by Lisa Ou / April 26, 2023 16:30
You cannot avoid excess noises in the background when recording. Your screen recorder may record the people talking or other unnecessary sounds. And that's irritating. These extra noises are out of control. Even though you are alone, you may still record unknown or unwanted noises. It may be because of the other accessories you use on your computer or phone. It concludes headphones, microphones, etc.

Do not allow excess noises to exist on your video. But how to remove noise from video recording? You may remove them from your video using methods in this post. Move on for more details.

Guide List
Part 1. How to Remove Noise from Video with FoneLab Video Converter Ultimate
FoneLab Video Converter Ultimate is a powerful tool that allows you to remove noise from videos easily. This software provides a comprehensive solution for users to enhance the quality of their videos by removing any unwanted background noise.
The noise removal feature of FoneLab Video Converter Ultimate uses advanced algorithms to identify and remove unwanted noise from the video. You can choose to remove noise from the entire video or just a specific section of it. This feature is especially useful when you have recorded a video in a noisy environment or with a low-quality microphone.
Video Converter Ultimate is the best video and audio converting software which can convert MPG/MPEG to MP4 with fast speed and high output image/sound quality.
- Convert any video/audio like MPG, MP4, MOV, AVI, FLV, MP3, etc.
- Support 1080p/720p HD and 4K UHD video converting.
- Powerful editing features like Trim, Crop, Rotate, Effects, Enhance, 3D and more.
To remove noise from a video using FoneLab Video Converter Ultimate, simply follow these steps:
Step 1Download and install it from the official site, then run it.
Step 2Click Toolbox on the top menu bar > Video Enhancer to access more features.
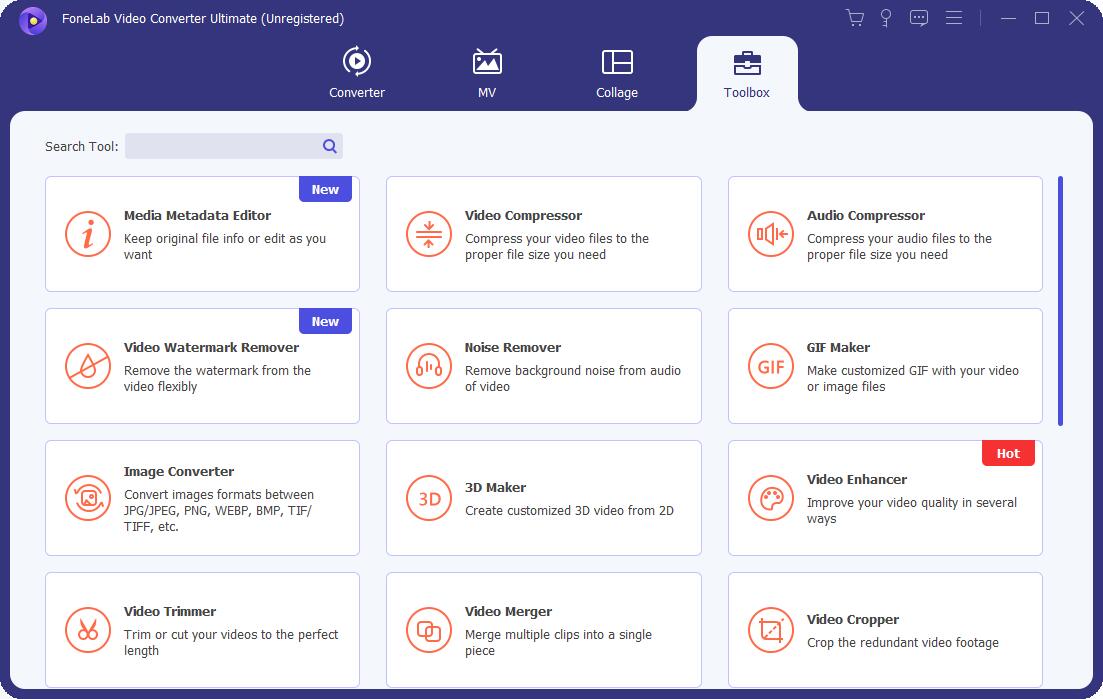
Alternatiavely, you can choose Noise Remover directly in this steps if you don’t need further editing.
Step 3Select your video from the computer folder, and check the boxes of Remove Video Noise and others accordingly.
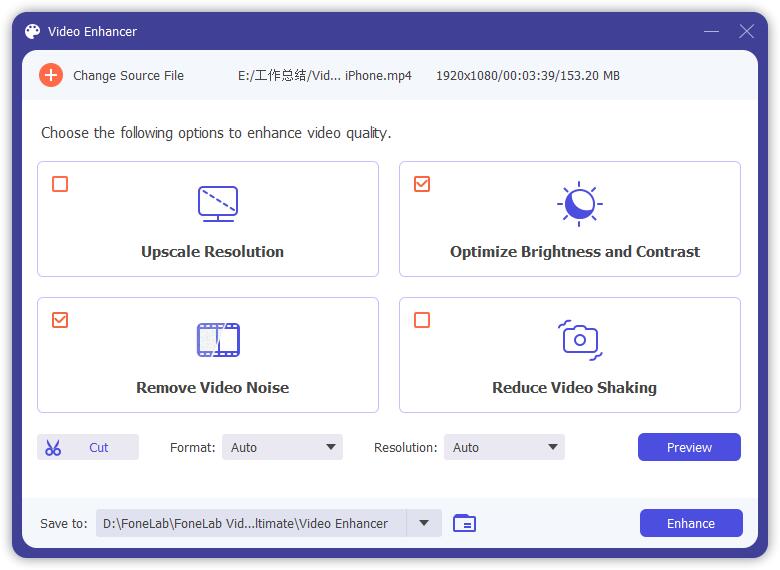
Step 4You can click the Preview button to confirm the result.
Step 5Click Enhance button and wait until it finishes.
Once you have completed these steps, FoneLab Video Converter Ultimate will remove the noise from your video and enhance its overall quality. You can then export the edited video in the format of your choice.
Video Converter Ultimate is the best video and audio converting software which can convert MPG/MPEG to MP4 with fast speed and high output image/sound quality.
- Convert any video/audio like MPG, MP4, MOV, AVI, FLV, MP3, etc.
- Support 1080p/720p HD and 4K UHD video converting.
- Powerful editing features like Trim, Crop, Rotate, Effects, Enhance, 3D and more.
In addition to noise removal, FoneLab Video Converter Ultimate offers a wide range of other video editing tools, including video cropping, trimming, merging, and adding special effects. With this software, you can transform your videos into professional-looking creations with just a few clicks.
Part 2. How to Remove Noise from Video via Premiere Pro
Adobe Premiere Pro helps you remove noise from videos. It has features beyond your expectations because you can do whatever you want with the professional tools efficiently. This software has excellent stabilization tools, many organizational tools, and unlimited multi-cam angles. Regardless of its advantages, you will have difficulty using it if you are a beginner. It has a broad and intimidating interface, you will have countless buttons without labels. You will know their functions unless you try them on your own.
How to remove noise from video in Premiere Pro with ease? The guide you are looking for is available below.
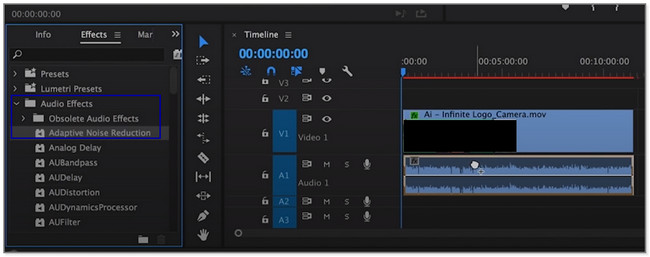
Step 1Download Premiere Pro on your computer. After that, set it up and launch it on your computer. After that, upload the video and click the Arrow-Right button on the left side of the tool. Click the Effects button.
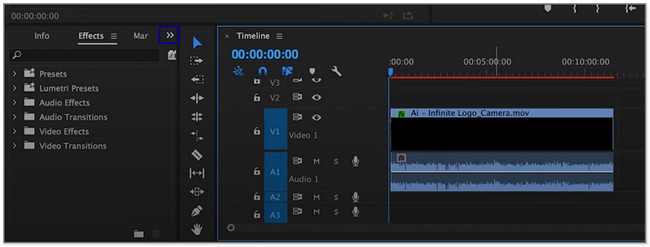
Step 2On the left side of the tool, choose the Audio Effects section. On its drop-down options, select the Obsolete Audio Effects button. Later, right-click and hold the Adaptive Audio Effects button, then drop it on the video.
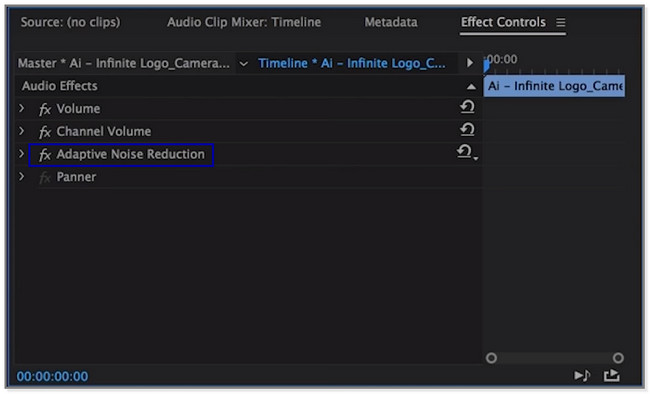
Step 3The software will add the Adaptive Audio Effects button at the top. Please customize it depending on your preference and save the video afterward.
If you prefer using an online tool, please proceed below.
Part 3. How to Remove Noise from Video Online
Use the Media.io tool to remove background noise from videos online. It allows you to get rid of some types of unwanted noises from your video. It includes sounds of wind, rain, traffic, and more. Aside from that, this platform also uses advanced AI technology to mute other noises. In addition, the Media.io tool supports all the video file types, like MOV, MP4, VOB, and more.
Moreover, it also allows you to edit your video like compressing, adding subtitle, converting, adding an audio background, and more. But the removing noises process will take more than 30 minutes. It also depends on your internet connection. Remove noise from video online using this platform. Move on to its steps.
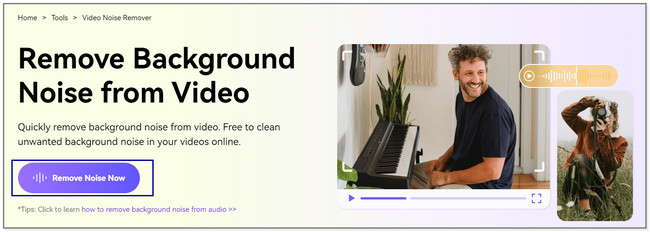
Step 1Search for the Media.io tool online. After that, go to its official website. You will see its descriptions and features. Locate the Remove Noise Now button by scrolling down on the screen.
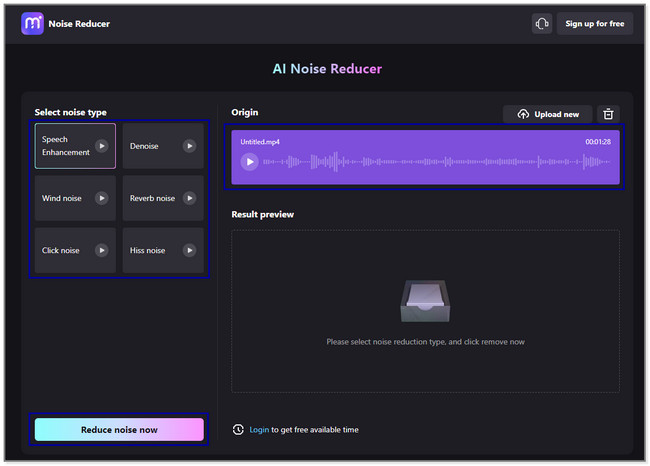
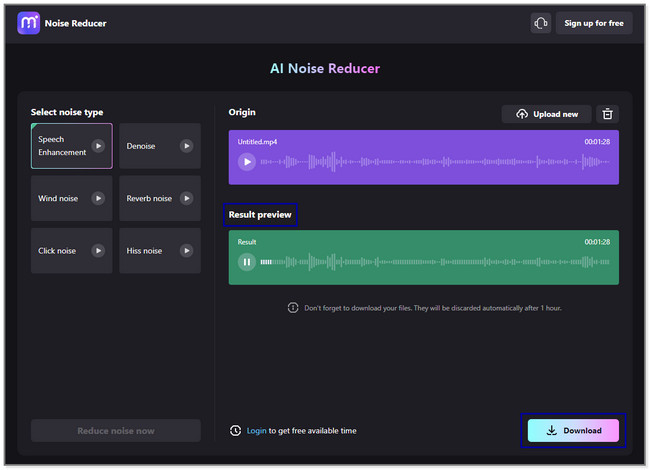
Step 2You will see the AI Noise Reducer screen. Click the Upload button and import the video you want to remove noises.

Step 3You will see the video at the top of the screen. After that, choose the Noise Type you want for your video. After that, please click the Reduce Noise Now button to start the process. Please wait for it to end for at least a few minutes.
Step 4After removing the noises, you can see its preview in the Result Preview section. Please click the button on the right side of the tool. Later, save it on one of the computer albums.
Part 4. Recommended Tool to Remove Noise from Video While Recording
The best tool that you must use for recording is FoneLab Screen Recorder. While recording, it allows you to capture the microphone without recording any noise. It supports a microphone and system sound noise cancellation. It will not record any unwanted or excess noises in the background. Also, this software will capture your screen in high-quality. Aside from that, you can add text, arrows, and lines to the video by using its editing tools.
FoneLab Screen Recorder allows you to capture video, audio, online tutorial, etc on Windows/Mac, and you can easily customize size, edit the video or audio, and more.
- Record video, audio, webcam and take screenshots on Windows/Mac.
- Preview data before saving.
- It is safe and easy to use.
Moreover, the tool can still function offline. Its users can use it without access to Wi-Fi or other internet connections. There’s more to discover in this third-party tool. Please scroll down.
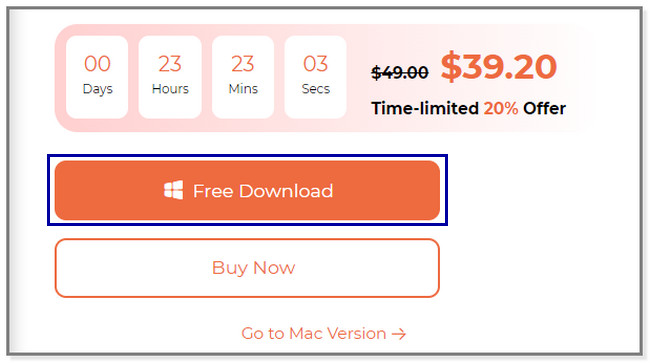
Step 1Please click the Free Download button on the left side of the main interface. The computer will download the software for a few seconds. Later, set it up and launch it.
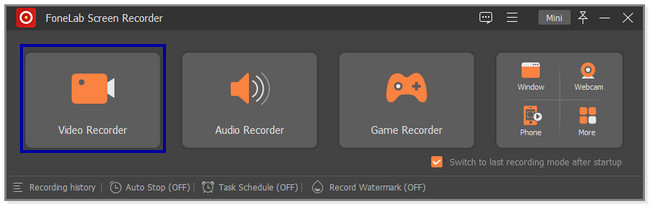
Step 2The recording and other features of this tool will appear on your screen. Choose the Video Recorder icon on the left side of the software.
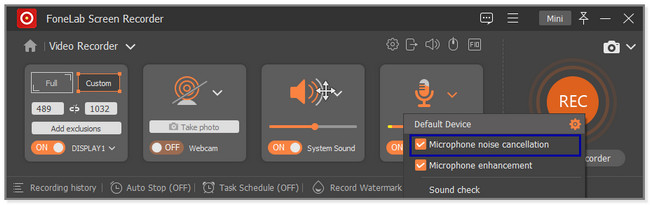
Step 3You will see the Microphone and System Sound features on the right side. To use them without recording the background noises, click the Arrow button of the Microphone icon. After that, click the Microphone Noise Cancellation button. Later, use the Adjustable Frame to locate the screen you want to record. Click the REC icon or button to start recording the screen.
Step 4Before keeping the video on your computer, you may edit it. Use the editing tool of the software. After that, click the Done button at the bottom right side of the software.
The software above is the quickest tool for removing noises from video while recording. It is because of its easy-to-use features. But if you want to explore more tools, scroll down below.
FoneLab Screen Recorder allows you to capture video, audio, online tutorial, etc on Windows/Mac, and you can easily customize size, edit the video or audio, and more.
- Record video, audio, webcam and take screenshots on Windows/Mac.
- Preview data before saving.
- It is safe and easy to use.
Part 5. FAQ about How to Remove Noise from Video
1. How to remove noise from video in Audacity?
Frankly, this software does not allow you to remove noises from a video. Audacity only supports limited audio formats for your computer. It includes WAV, AIFF, and MP3. You can remove noises if the file is in audio format. To do that:
- Upload the audio on the software.
- Click the Effect icon at the top and choose the Noise Removal and Effect button.
- Select the Noise Reduction button on another option and save the video afterward.
2. How do I stop background noise when recording a video?
Ensure that appliances or other causes of unwanted sounds are turned off or not functioning. It is to lessen the background noise in your video. Aside from that, avoid using computer accessories like microphones. But a microphone designed to reject excess noises is recommended if you prefer using one. Finally, FoneLab Screen Recorder is one of the most recommended tools to record your video without background noise.
Many ways to remove noise from a video exist. You may use a third-party,online tool, and more. But FoneLab Video Converter Ultimate is the most recommended. While recording, it directly removes the excess noises in the background with the help of its noise cancellation feature. It is like all in one! If you want to experience this tool, download it on your Mac or Windows computer.
Video Converter Ultimate is the best video and audio converting software which can convert MPG/MPEG to MP4 with fast speed and high output image/sound quality.
- Convert any video/audio like MPG, MP4, MOV, AVI, FLV, MP3, etc.
- Support 1080p/720p HD and 4K UHD video converting.
- Powerful editing features like Trim, Crop, Rotate, Effects, Enhance, 3D and more.