
 iPhone Data Recovery
 iOS System Recovery
 iOS Data Backup & Restore
 iOS Unlocker
 iPhone Password Manager
 Location Changer
 Android Data Recovery
 Broken Android Data Extraction
 Android Data Backup & Restore
 Android Unlocker
 FoneTrans for iOS
 iPhone Data Eraser
 iPhone Cleaner
 HEIC Converter
 HyperTrans
 WhatsApp Transfer for iOS
 Mac Sweep
 Data Retriever
 Mac Data Retriever
 Video Converter Ultimate
 Screen Recorder
 Phone Mirror
- Part 1: iPhone Stuck in Recovery Mode? Understand the Data Risk
- Part 2: Try to Exit Recovery Mode Without Restoring
- Part 3: Restore Data from iCloud Backup After a Restore
- Part 4: Restore from Finder or Apple Devices Backup
- Part 5: Recover Data Directly with FoneLab iPhone Data Recovery
- Part 6: Which Recovery Method Should You Use?
- Part 7: FAQs About iPhone Recovery Mode and Data
Recover Data from iPhone in Recovery Mode: Complete Guide
 Posted by Lisa Ou / Aug 28, 2026 16:00
Your iPhone is stuck on the 'Connect to computer' screen — recovery mode. Is your data gone? Not necessarily: recovery mode itself doesn't erase data, but restoring does. Recovering data after an iOS update is covered separately.

This guide covers why iPhones get stuck in recovery mode, how to exit without restoring, restoring from iCloud or computer backups, and using FoneLab iPhone Data Recovery directly. Note iTunes is now Finder on Mac and the Apple Devices app on Windows.

Guide List
- Part 1: iPhone Stuck in Recovery Mode? Understand the Data Risk
- Part 2: Try to Exit Recovery Mode Without Restoring
- Part 3: Restore Data from iCloud Backup After a Restore
- Part 4: Restore from Finder or Apple Devices Backup
- Part 5: Recover Data Directly with FoneLab iPhone Data Recovery
- Part 6: Which Recovery Method Should You Use?
- Part 7: FAQs About iPhone Recovery Mode and Data
Part 1: iPhone Stuck in Recovery Mode? Understand the Data Risk
Recovery mode is a diagnostic state iOS enters when it can't start normally — designed to let you restore or update with a computer. Here's what you need to know:
What causes an iPhone to enter or get stuck in recovery mode?
- A dead battery or dropped connection mid-update lands the iPhone in recovery mode.
- A botched jailbreak can leave iOS unable to boot normally.
- Restoring an incompatible or corrupted backup fails and loops to recovery mode.
- Faulty logic boards or storage chips can trigger it, though rarely.
- You may enter it deliberately to fix a software problem.
What does recovery mode mean for your data?
- Sitting on the recovery screen doesn't delete anything.
- Choosing Restore wipes the device; Update keeps data.
- Backups (iCloud, Finder, Apple Devices) restore most data afterward.
- Don't restore until you've tried to recover or back up first.
First try exiting recovery mode without restoring (Part 2) — data stays untouched. If that fails, restore and recover from a backup (Parts 3-4) or directly from the device (Part 5).
The whole process is calmer when you know exactly what each option does with your data.
Part 2: Try to Exit Recovery Mode Without Restoring
The best outcome is exiting recovery mode without restoring — data untouched, phone boots normally. This works for temporary glitches or minor software issues.
Step 1Force restart: iPhone 8+ — press Volume Up, then Volume Down, then hold the Side button until the Apple logo. iPhone 7 — hold Side + Volume Down. iPhone 6s and earlier — hold Home + Top/Side. Keep holding 15-20 seconds.
Step 2If that fails, use a tool like FoneLab iOS System Recovery's Exit Recovery Mode (one click, no data loss).
Step 3If the iPhone keeps returning to recovery mode, restore it — try Update first (keeps data), then Restore (erases) if Update fails.
If you can, back up first — check if the iPhone appears in Finder (Mac) or the Apple Devices app (Windows). If not, your existing iCloud or computer backups are the path; without backups, FoneLab iPhone Data Recovery may still recover directly.
If your iPhone is looping between the recovery screen and the Apple logo, don't keep forcing restarts — each one risks making things worse. Unplug it, let it sit for a minute, then try the exit methods in this section. Patience here genuinely matters.
Part 3: Restore Data from iCloud Backup After a Restore
If you had to restore and have an iCloud backup, restoring from it is the most straightforward way back — it includes photos, messages, contacts, app data, and settings.
Step 1After the restore, set up to the Apps & Data screen and tap Restore from iCloud Backup.
Step 2Sign in with your Apple ID and pick the backup to restore (usually the most recent).
Step 3Wait for the backup to download — keep the iPhone on Wi-Fi and power.
Step 4When done, check your data is back and sign in to apps again as needed.
iCloud backups don't include everything — iCloud-synced content, Apple Pay, Touch ID, and health data need an encrypted computer backup instead. See Part 4 for encrypted backups.
Part 4: Restore from Finder or Apple Devices Backup
Computer backups restore faster, can be encrypted (health data, passwords, Apple Pay), and don't count against iCloud storage. The process depends on Mac or Windows — iTunes is no longer the tool on modern systems.
On Mac (macOS Catalina 10.15 or later): iTunes has been replaced by Finder for iPhone backup and restore. Here's the process:
Step 1Connect the iPhone to your Mac, open Finder, and click your iPhone under Locations.
Step 2In the General tab click Restore Backup, pick the backup, and enter the backup password if it's encrypted.
Step 3Click Restore and wait 5-30 minutes, keeping the iPhone connected.
On Windows 10+, iTunes is replaced by the Apple Devices app for backup and restore. Here's the process:
Step 1Install the Apple Devices app from the Microsoft Store, connect your iPhone, and open it.
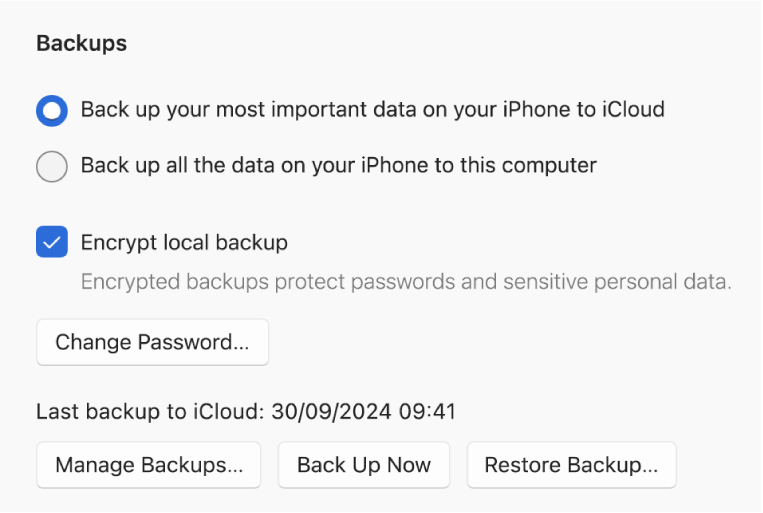
Step 2Select your iPhone, click Restore Backup, pick the backup, and enter the password if asked.
On older Windows, iTunes still works — open it, click the iPhone icon, Summary tab, Restore Backup. Apple is phasing iTunes out, so use Apple Devices on new PCs.
Encrypted backups include more data (passwords, health, Apple Pay, Wi-Fi passwords) but need a backup password. Without one, that data may not restore — though FoneLab iPhone Data Recovery may recover some directly. Always use encrypted backups going forward.
Finder on modern Macs handles iPhone backups the same way iTunes used to — plug in, click the device in the sidebar, and the backup options are right there. On Windows, the Apple Devices app took over that job, so make sure it's up to date before you plug in. Both are straightforward once you know where to look.
Part 5: Recover Data Directly with FoneLab iPhone Data Recovery
If you have no backup, or it's missing specific data, FoneLab iPhone Data Recovery scans the phone's storage for recoverable data — including data deleted before the restore. Text message recovery is covered in my iPhone guide.
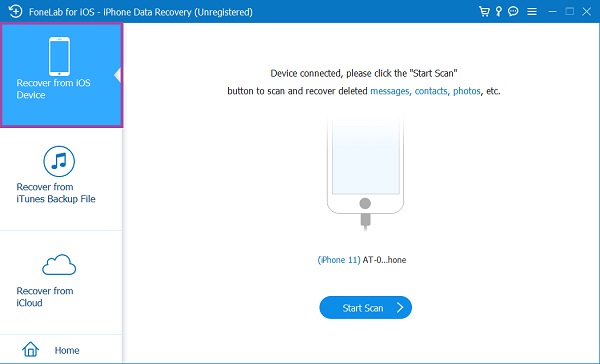
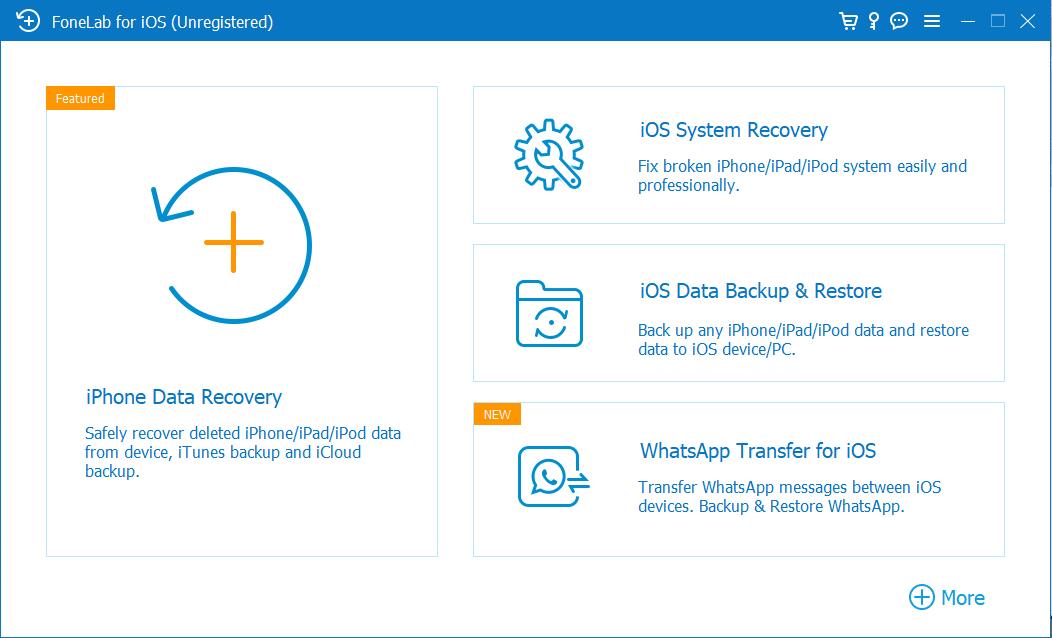
Success depends on how long ago the data was deleted and how much the phone has been used. Run recovery ASAP after the restore and minimize iPhone use before the scan.

With FoneLab for iOS, you will recover the lost/deleted iPhone data including photos, contacts, videos, files, WhatsApp, Kik, Snapchat, WeChat and more data from your iCloud or iTunes backup or device.
- Recover photos, videos, contacts, WhatsApp, and more data with ease.
- Preview data before recovery.
- iPhone, iPad and iPod touch are available.
- Recover photos, videos, contacts, WhatsApp, and more with ease.
- iPhone, iPad, and iPod touch available.
Step 1Install and launch FoneLab iPhone Data Recovery and select Recover from iOS Device.
Step 2Connect your iPhone and tap Trust. If it's still in recovery mode, exit it first or use the iCloud/iTunes modes.
Step 3Check the data types you want (Photos, Messages, etc.) and click Scan.
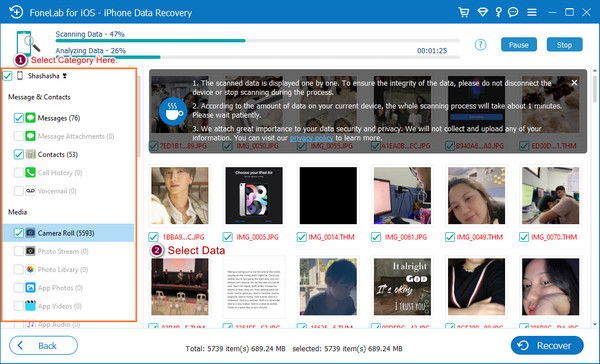
Step 4Browse results by type; red items are deleted. Use the 'Only display the deleted item(s)' toggle.

Step 5Select the items and click Recover, saving to a folder on your computer.
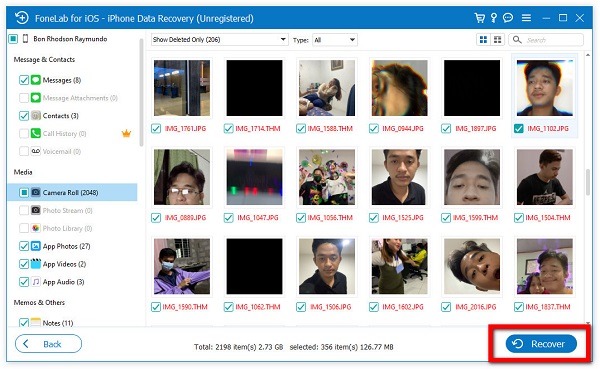
Step 6If the scan misses data, try Recover from iCloud Backup or Recover from iTunes Backup File.
It's not magic — overwritten data can't be recovered — but it often finds data you thought was gone. Run it early and minimize usage.
The recovery scan reads the raw storage underneath the phone's file system, which is why it can sometimes find data that never made it into any backup. It's a last resort, but for people with no backup at all, it's often the only option left.
Part 6: Which Recovery Method Should You Use?
Here's a comparison of each recovery method, what it requires, and when to use it.
| Method | Backup Needed? | Computer Needed? | Data Erased? | Best For |
|---|---|---|---|---|
| Exit Recovery Mode (force restart) | No | No | No | iPhone stuck in recovery mode due to temporary glitch |
| Update (not Restore) in recovery mode | No | Yes | No (preserves data) | iOS corruption that can be fixed by reinstalling iOS |
| Restore + iCloud Backup restore | Yes (iCloud) | No (Wi-Fi only) | Yes (then restored from backup) | Have iCloud backup, no computer available |
| Restore + Finder/Apple Devices backup | Yes (computer) | Yes | Yes (then restored from backup) | Have computer backup, want faster restore + encrypted data |
| FoneLab iPhone Data Recovery (direct) | No | Yes | No (scans existing data) | No backup, need to recover specific deleted data |
| FoneLab (from iCloud/computer backup) | Yes | Yes | No (extracts from backup) | Have backup but only need specific items, no full restore |
Try to exit recovery mode first; then Update; if that fails, Restore and recover from backup; no backup? Use FoneLab iPhone Data Recovery. Act quickly — the sooner you start, the better your chances.
Whatever method you end up using, the order matters. Exiting recovery mode without a restore keeps your data untouched, so it's always worth trying first. Only if that fails should you move to restoring from a backup, and only then to a direct recovery scan.
Part 7: FAQs About iPhone Recovery Mode and Data
Will recovery mode erase everything on my iPhone?
No. Recovery mode itself keeps your data — only choosing Restore wipes the phone (Update doesn't). Try exiting recovery mode with a force restart first, or scan with FoneLab iPhone Data Recovery before restoring.
How long can an iPhone stay in recovery mode?
Indefinitely, as long as it has battery. There's no time limit and no data is lost by leaving it in recovery mode.
What's the difference between recovery mode and DFU mode?
Recovery mode uses a limited iOS bootloader and shows the "Connect to computer" screen; DFU works deeper, with a black screen, and is mainly for advanced fixes. Most users only need recovery mode.
I don't have a backup — can I still recover my photos and messages after a restore?
Possibly. After a restore, your old data may still sit on the storage chip until overwritten, so run FoneLab iPhone Data Recovery right away. No guarantees, so set up backups going forward.
Conclusion
Stuck in recovery mode is stressful but rarely means lost data. Try a force restart, then Update, then restore and recover from iCloud or a computer backup (Finder on Mac, Apple Devices on Windows). No backup? FoneLab iPhone Data Recovery scans the device directly. Restoring in recovery mode with or without iTunes is compared separately. Set up regular backups to prevent this.
With FoneLab for iOS, you will recover the lost/deleted iPhone data including photos, contacts, videos, files, WhatsApp, Kik, Snapchat, WeChat and more data from your iCloud or iTunes backup or device.
- Recover photos, videos, contacts, WhatsApp, and more data with ease.
- Preview data before recovery.
- iPhone, iPad and iPod touch are available.
- Recover photos, videos, contacts, WhatsApp, and more with ease.
- iPhone, iPad, and iPod touch available.



