- Part 1. Causes Why iPhone is Not Ringing
- Part 2. How to Fix iPhone Not Ringing by Restarting
- Part 3. How to Fix iPhone Does Not Ring by Turning Off Silent Mode
- Part 4. How to Fix iPhone is Not Ringing by Turning Off DND
- Part 5. How to Fix iPhone Does Not Ring with FoneLab iOS System Recovery
- Part 6. FAQs about How to Fix iPhone Does Not Ring
How to Fix iPhone Does Not Ring in 4 Effective Approaches
 Updated by
 Good day! Why is my iPhone not ringing? I noticed this issue on my iPhone when my mom told me that she kept calling me multiple times. I was busy watching my favorite series when this incident occurred. I don't know what's happening. Please help me fix it. Thank you!
We can receive a phone call at any time from an iPhone. It's better to have a ringtone to know when someone is calling you. You can answer it immediately, even if you're not using your iPhone. However, a good ringtone will be useless if the iPhone is not ringing. Resolve the issue using the 4 leading methods outlined below.

Guide List
- Part 1. Causes Why iPhone is Not Ringing
- Part 2. How to Fix iPhone Not Ringing by Restarting
- Part 3. How to Fix iPhone Does Not Ring by Turning Off Silent Mode
- Part 4. How to Fix iPhone is Not Ringing by Turning Off DND
- Part 5. How to Fix iPhone Does Not Ring with FoneLab iOS System Recovery
- Part 6. FAQs about How to Fix iPhone Does Not Ring
Part 1. Causes Why iPhone is Not Ringing
You mentioned, 'My iPhone is not ringing.' This issue is caused by various factors that may be related to the iPhone's activated features, bugs, glitches, or other underlying system problems.
The Silent and Do Not Disturb features restrict the iPhone from producing sound when someone is calling or playing a text message tone. They are commonly used in meetings, schools, libraries, and other places where you need to focus on what's going on inside. The issue when the iPhone not ringing when called happens mostly when the mentioned features are enabled.
Part 2. How to Fix iPhone Not Ringing by Restarting
The iPhone system often experiences unwanted or unexpected issues while in operation. It will cause inconvenience afterwards because there will be some errors with your iPhone's functionalities. These simple issues can be resolved by restarting your iPhone. On the other hand, the iPhone has different models and versions. They have various ways for the restart process. Don't worry. We have each of the processes. Let's resolve the issue where iPhone calls not ringing by restarting your device using the instructions below.
iPhone Without A Home Button:
• Grab your iPhone and press the Side or Volume button. Wait for the Power-off slider to appear and toggle it off. This action will turn off the iPhone, and it will only need to be turned on again by pressing the Side button.
iPhone With The Home Button and Top Button:
• Press the Top button of your iPhone until the Power Off screen is displayed. Slide the switch to the off position to turn off your iPhone. Turn it on again by pressing and holding the Top button.
iPhone With The Home Button and Side Button:
• Turn on your iPhone screen and press the Side button until the Power Off interface appears. After that, slide the mentioned slider to turn off your iPhone. You can turn it on afterwards by pressing the Side button.
Part 3. How to Fix iPhone Does Not Ring by Turning Off Silent Mode
The iPhone can be brought to different important locations that we visit every day. It could be in school, at work, and in other essential places in our daily lives. The Silent mode on your iPhone must be used frequently. It is to prevent incoming notifications, such as calls, texts, messages, and other app notifications, from creating a tone or any other sound. This feature answers your question: Why is my iPhone not ringing when I get a call or text?
There are several ways to turn off Silent mode on your iPhone. We have listed the 2 main processes that will be easy to operate.
Turn Off Silent Mode with Ringer
You can turn off the Silent mode on your iPhone with one step. You only need to press the Ringer button located on the side of your iPhone. You can use your thumb for this process. You must notice that the Silent button on the iPhone screen must be disabled.

Turn Off Silent Mode on Control Center
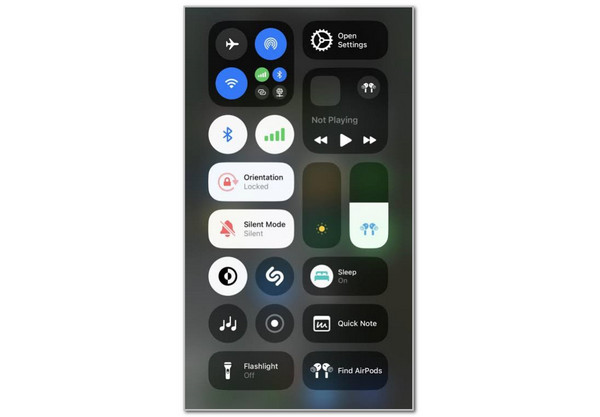
What if the iPhone Ringer not working? You can use the Control Center to disable Silent mode on your iPhone. This process is also quick for disabling the dimension iPhone feature.
To access the Control Center, simply swipe down from the top right of the main interface. After that, the active tiles will be shown on the screen. Please locate the Silent button and tap it. Ensure it is in grey.
Part 4. How to Fix iPhone is Not Ringing by Turning Off DND
Suppose you have already turned off the Silent mode on your iPhone using the previous section. What if the iPhone does not produce sound when someone is calling? You will indeed ask: Why does my iPhone not ring after turning off the Silent mode?
Besides the Silent mode, iPhone has another feature that can restrict the sounds or tones from coming out when a call is received. It is called Do Not Disturb.
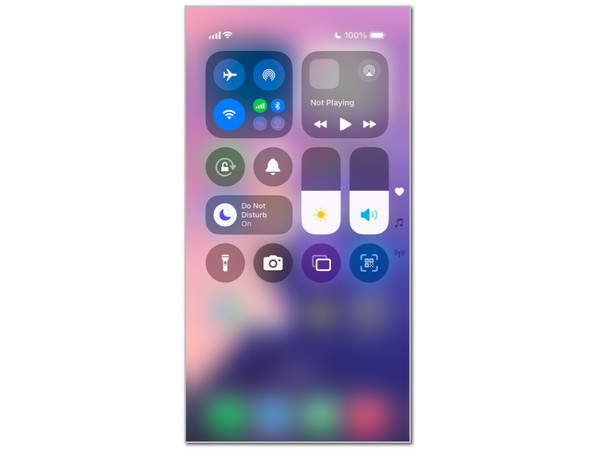
You can also disable the Do Not Disturb feature from the iPhone Control Center. To access the active tiles, simply swipe down from the top right corner of the iPhone screen. Please tap the Moon button from the list, and options will be shown. Tap the Do Not Disturb button to turn it off.
Part 5. How to Fix iPhone Does Not Ring with FoneLab iOS System Recovery
It is correct that the iPhone will not ring if the Silent and Do Not Disturb modes are enabled. However, there are more serious issues that your iPhone might be facing if the features are already turned off, and you are still experiencing the iPhone not producing tones while the call is ongoing. It may be a system crash, an outdated iOS version, faulty settings, or another issue. FoneLab iOS System Recovery is here to help you with this issue. It has an intuitive interface that users will love using.
FoneLab enables you to fix iPhone/iPad/iPod from DFU mode, recovery mode, Apple logo, headphone mode, etc. to normal state without data loss.
- Fix disabled iOS system problems.
- Extract data from disabled iOS devices without data loss.
- It is safe and easy to use.
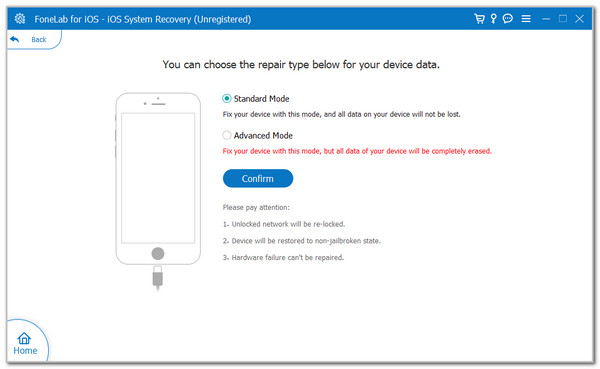
You can use its Standard Mode or Advanced Mode to fix the current issue. The steps below will guide you through utilizing the tool.
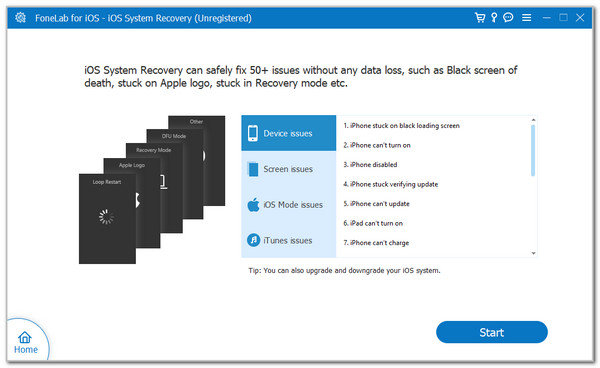
Step 1Download, set up, and launch the tool. Click iOS System Recovery afterwards at the top right.
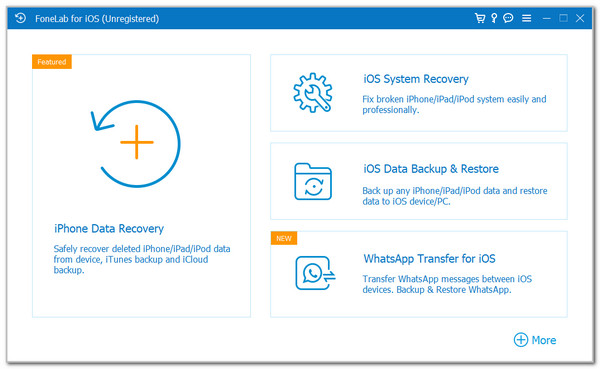
Step 2Choose Start at the bottom right of the screen interface, under the list of supported issues provided by the software. You will be directed to a new screen. Please connect the iPhone to the computer to begin the process.
Step 3Please choose one of the repair modes after reading the process. Then, click the Confirm button under their names and follow the on-screen instructions to start fixing your iPhone that does not ring when someone is calling.
Part 6. FAQs about How to Fix iPhone Does Not Ring
Why iPhone won't ring after update?
There might be issues while the iOS version update is being processed. It was probably interrupted while you updated it using an internet connection. You can update the iOS version to resolve the issue.
Why can't I hear calls from a specific person on my iPhone?
It is a rare case when only a specific person or contact causes your iPhone to ring. The recipient or caller might be blocked if this issue occurs.
This issue has answered why won't iPhone ring. Additionally, it has outlined the 4 leading methods to resolve the issue, including FoneLab iOS System Recovery.