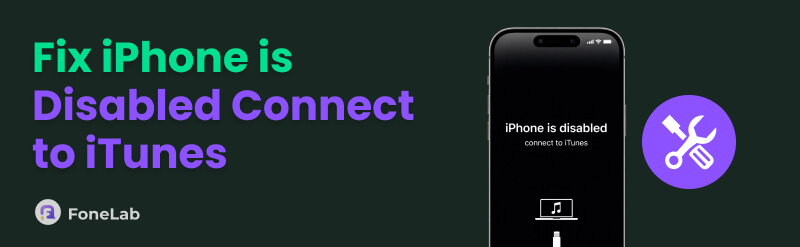
- Part 1. What Does iPhone is Disabled Connect to iTunes Mean
- Part 2. Fix A Disabled iPhone via iTunes/Apple Devices/Finder
- Part 3. Fix Disabled iPhone Using DFU Mode
- Part 4. Restore A Disabled iPhone through iCloud
- Part 5. Unlock A Disabled iPhone with FoneLab iOS Unlocker
- Part 6. FAQs about iPhone is Disabled Connect to iTunes
- Unlock Apple ID
- Bypass iCloud Activation Lock
- Doulci iCloud Unlocking Tool
- Factory Unlock iPhone
- Bypass iPhone Passcode
- Reset iPhone Passcode
- Unlock Apple ID
- Unlock iPhone 8/8Plus
- iCloud Lock Removal
- iCloud Unlock Deluxe
- iPhone Lock Screen
- Unlock iPad
- Unlock iPhone SE
- Unlock Tmobile iPhone
- Remove Apple ID Password
Eminent Guide to Fix iPhone is Disabled Connect to iTunes
 Updated by
 Hi! I just need to ask, how to connect your iPhone to iTunes when disabled? It’s been a while since I last used my iPhone after getting a new one, and when I tried to unlock it with the passcode I remembered, I realized I had already forgotten it. Despite that, I attempted a few more times until the screen said it had been disabled. What does it mean and how do I fix it?
Have you ever experienced a similar situation above where your iPhone screen indicated it had been disabled, and you had to connect to iTunes? If so, it’s probably because of too many incorrect password attempts, but you no longer have to worry. Apple prepared official solutions for this disabled issue, and we also added a professional tool to help you. From the most basic to advanced solutions, simplified steps are prepared, letting you fix the issue smoothly.

Guide List
- Part 1. What Does iPhone is Disabled Connect to iTunes Mean
- Part 2. Fix A Disabled iPhone via iTunes/Apple Devices/Finder
- Part 3. Fix Disabled iPhone Using DFU Mode
- Part 4. Restore A Disabled iPhone through iCloud
- Part 5. Unlock A Disabled iPhone with FoneLab iOS Unlocker
- Part 6. FAQs about iPhone is Disabled Connect to iTunes
Part 1. What Does iPhone is Disabled Connect to iTunes Mean
If you have experienced the disabled iPhone connect to iTunes issue, don’t be too alarmed, as there’s a proper explanation and solution for it. So, to start, the disabled message on your device is Apple’s security feature that is activated to protect the iPhone from unauthorized access. That is why when you attempt incorrect passcodes multiple times, it triggers the iOS, immediately presenting the iPhone disabled screen. It means your device has been permanently locked on the lock screen and will not accept any further passcode input, as the system now suspects an unauthorized user.
Meanwhile, the “connect to iTunes” message that comes after it is actually the primary solution. It doesn’t necessarily have to be iTunes, though. Over the years, the solution has evolved, and Apple now also offers Finder and Apple Devices. You must connect to one of these programs to fix the iPhone that has been disabled due to numerous incorrect passcode attempts. That said, kindly carry on with the information below to use your most preferred solution for the problem.
Part 2. Fix A Disabled iPhone via iTunes/Apple Devices/Finder
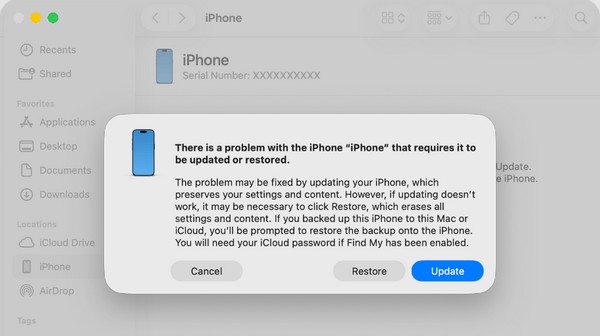
As mentioned, connecting to iTunes, Apple Devices, or Finder is the primary solution for your disabled device. To do this, you must put iPhone into Recovery mode first, and the available program that is built in or installed on your computer will give you the option to restore the device. The restoration will then erase all the iPhone’s settings and content, including the passcode you have forgotten, and cause it to be disabled. Meanwhile, when you look for a suitable program on the computer, note that Finder is on later macOS versions, iTunes is on Windows and older macOS, and Apple Devices is on both later Windows and macOS versions.
Obey the worry-free process below to learn how to connect to iTunes when iPhone is disabled to fix it:
Step 1First, launch the available tool on the computer and put your iPhone into Recovery mode.
On iPhones with no Home key: Press the device’s Volume Up key, immediately followed by the Volume Down key. Then, hold the Power key until it boots to Recovery mode.
On iPhones with Home key: At the same time, hold-press the Power and Home keys until the iPhone boots to Recovery mode.
Step 2iTunes, Finder, or Apple Devices will detect the action and give you the option to Restore on its interface. Tick it and navigate the prompts to finish.
Part 3. Fix Disabled iPhone Using DFU Mode
The DFU mode is also Apple’s troubleshooting solution, like the Recovery mode, and they work the same way. So, like before, you must also press a specific button combination and link your iPhone to your computer’s accessible program, whether iTunes, Apple Devices, or Finder.
Mind the simplified steps below to grasp how to reset iPhone with iTunes when disabled using DFU mode:
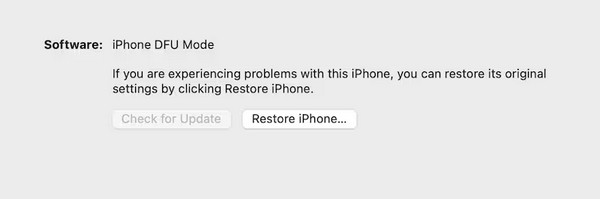
Step 1Open the available tool like the last process and put your iPhone into DFU mode.
On iPhone with no Home key: Quickly push the Volume Up key, then the Volume Down key. Next, release them and hold down the Side key. Along with it, hold down the Volume Down key once the screen turns black. After 5 seconds, release only the Side key. Shortly, you’ll be in DFU mode.
On iPhone with Home key: Simultaneously hold down the iPhone’s Power and Home keys for 8 seconds. Afterward, release only the Power key while holding Home. Later, the DFU mode will appear.
Step 2The program on your desktop will display a Restore iPhone tab. Click it to fix the issue.
Part 4. Restore A Disabled iPhone through iCloud
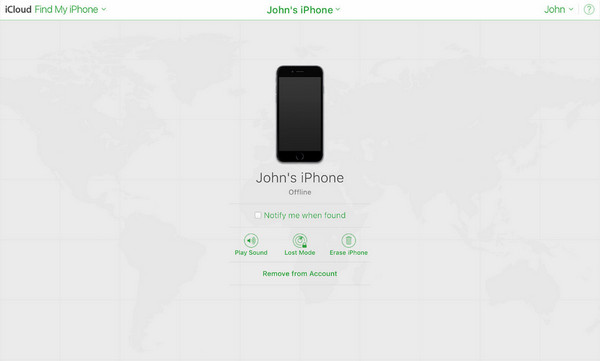
Aside from the troubleshooting modes above, iCloud is also a service developed by Apple for various device management, including those concerning iPhone issues. iCloud can be easily viewed as a cloud or storage service. Still, once you explore its capabilities, you will discover the Find My section containing multiple options for managing your devices. Among them is Erase iPhone, which, like before, deletes everything on the device. As a result, the screen passcode will also be erased, fixing the disabled issue and unlocking your iPhone.
Note the secure operation below to fix iPhone disabled connect to iTunes through iCloud:
Step 1On iCloud’s webpage, use your Apple credentials to log in and head to Find My.
Step 2Click All Devices on the upper page, then pick your disabled iPhone. When the management selections appear, opt for Erase iPhone to fix the issue.
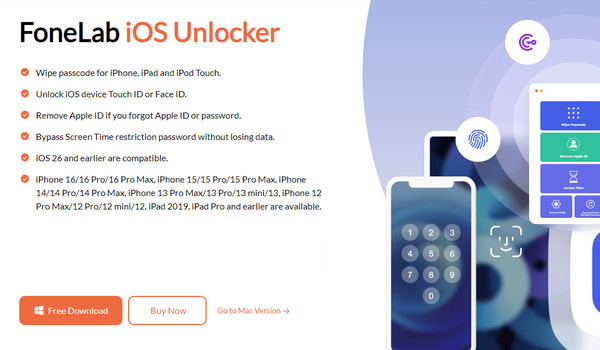
Part 5. Unlock A Disabled iPhone with FoneLab iOS Unlocker
Apart from that, relying on a competitive program will significantly help, especially if Apple’s solutions didn’t work due to limitations or unreachable requirements. In this section, FoneLab iOS Unlocker is introduced so that you’ll have a more professional yet painless option for fixing your iPhone that has been disabled. It offers multiple features for different iOS locks, and among them is the capability to unlock the device by removing the screen passcode.
FoneLab Helps you unlock iPhone screen, Removes Apple ID or its password, Remove screen time or restriction passcode in seconds.
- Helps you unlock iPhone screen.
- Removes Apple ID or its password.
- Remove screen time or restriction passcode in seconds.
It doesn’t matter if you have struggled with your Face ID, Touch ID, or passcode before, as it resulted in the disabled screen. You can depend on FoneLab iOS Unlocker to handle it, allowing you to reaccess and use the device normally again afterward. Almost, if not all, iOS versions and models are also supported, so no worries about compatibility.
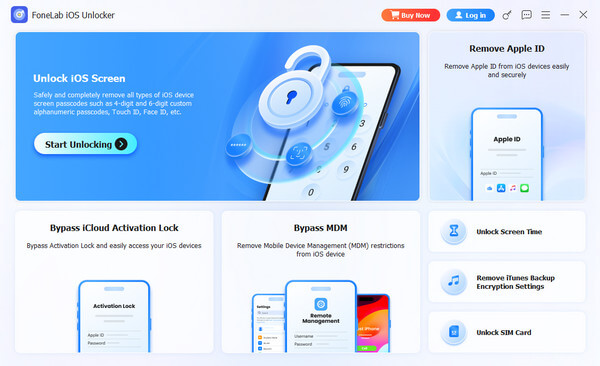
Perceive the straightforward task below to fix the iPhone is disabled connect to iTunes issues with FoneLab iOS Unlocker:
Step 1Open FoneLab iOS Unlocker’s webpage to hit Free Download when it appears. The browser will then acquire the tool’s installer, saving it to the Downloads folder. Use it for the unlocker’s installation, and when ready, run the program on your desktop.
Step 2A Start Unlocking tab will be shown in the initial interface’s upper left section. Tick it and let your disabled iPhone connect using a Lightning cable. Once detected, the program will present further instructions you can easily follow to fix your disabled iPhone screen.
Part 6. FAQs about iPhone is Disabled Connect to iTunes
What to do if my iPhone is disabled and won't connect to iTunes?
If your iPhone can’t connect to iTunes, it may be due to a faulty Lightning cable. Try replacing it with a functional one and ensure you tap Trust when the option appears on the iPhone screen.
Can you unlock a disabled iPhone without connecting to iTunes?
Yes, you can. iTunes isn’t a required solution even if the iPhone screen indicates the need to connect. You still have iCloud and FoneLab iOS Unlocker as alternatives to fix the issue.
Ease your worries and start acting to fix your disabled iPhone with the help of the solutions above. FoneLab iOS Unlocker is especially recommended if you’re struggling to pick a suitable method, as it is more flexible and can work in different scenarios.