- Part 1. Transfer Photos from iPhone to iPhone with iCloud
- Part 2. Transfer Photos from iPhone to iPhone with Airdrop
- Part 3. Transfer Photos from Phone to iPhone with FoneTrans for iOS
- Part 4. Transfer Photos from iPhone to iPhone with iTunes
- Part 5. Transfer Photos from iPhone to iPhone with Finder
- Part 6. FAQs About Transfer Photos from iPhone to iPhone
How to Transfer Photos from iPhone to iPhone with 5 Recommended Ways
 Posted by Boey Wong / Jan 18, 2022 09:00
 People often take photos to keep moments in daily life and cherish them. iPhones these days are one of the best phones that can give users high-quality pictures. Instead of using a camera, users tend to buy an iPhone because of its excellent camera. However, upon taking a lot of pictures, you suddenly notice that your iPhone storage has been taken up. That is why you considered buying a new one with a bigger storage capacity, but how can you transfer your photos from your old iPhone to the new one? Discover these recommended ways listed below and choose the best answer when you are done reading.


Guide List
- Part 1. Transfer Photos from iPhone to iPhone with iCloud
- Part 2. Transfer Photos from iPhone to iPhone with Airdrop
- Part 3. Transfer Photos from Phone to iPhone with FoneTrans for iOS
- Part 4. Transfer Photos from iPhone to iPhone with iTunes
- Part 5. Transfer Photos from iPhone to iPhone with Finder
- Part 6. FAQs About Transfer Photos from iPhone to iPhone
Part 1. Transfer Photos from iPhone to iPhone with iCloud
One way that can help you transfer photos from iPhone to iPhone wirelessly is through iCloud. It is one of the secure methods that you can use. For sure, every iPhone user has their Apple ID, along with that account is the iCloud, where you can sync any data from your current iPhone device and access them anywhere. However, the only downside is that it can only offer 5GB of free storage. If you have many pictures that need to be saved or to sync on your iCloud, you might need to buy additional storage. However, here’s how you can use iCloud to transfer your photos from your old iPhone to a new iPhone.
With FoneTrans for iOS, you will enjoy freedom to transfer your data from iPhone to computer. You can not only transfer iPhone text messages to computer, but also photos, videos and contacts can be moved to PC easily.
- Transfer photos, videos, contacts, WhatsApp, and more data with ease.
- Preview data before transferring.
- iPhone, iPad and iPod touch are available.
But, first, you need to sync or toggle on the iCloud Photos on the Settings. To do that, follow the steps below.
Steps on How to Transfer Photos from iPhone to iPhone with iCloud:
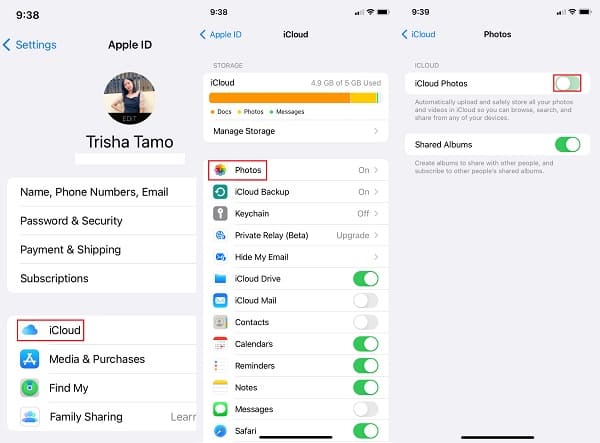
Step 1First of all, go to the Settings of your iPhone. And, tap [your name]. Then, tap iCloud.
Step 2Next, tap Photos. Then, toggle on iCloud Photos. And, it will start to sync all your photos from iPhone to iCloud.
Step 3Afterward, log in to the same Apple ID that you use to sync your photos on your new iPhone.
Step 4Do the same process. Settings > [your name] > iCloud > Photos, then toggle on iCloud Photos.
Step 5Finally, choose either Optimize iPhone Storage or Download and Keep Originals. The first choice allows you to save space in your storage.
And so, this is how you can transfer photos from your old iPhone to the new one using iCloud. When you enable iCloud Photos on both iPhones, it will help you sync all the photos you saved on your iCloud to your new iPhone.
Part 2. Transfer Photos from iPhone to iPhone with Airdrop
Apple devices have their own unique way of transferring and receiving data wirelessly, and one of them is through an Airdrop. It allows the users to transfer their data among iPads, iPhones, and Macs without requiring Wi-fi or cellular data. As a result, you can surely use this feature to share or transfer and receive from iPhone to iPhone. You must also consider that it is important that the two devices are close to each other when doing this method. See the steps below for you to know how to do this.
Steps on How to Transfer Photos from iPhone to iPhone with Airdrop:
Step 1On both devices, you must first open the Airdrop. To do that, go to the Control Center. For older iPhones, swipe up from the bottom. For the iPhone X and later, swipe down from the top-right corner.
Step 2Next, tap and hold the Network Card until it expands. Then, tap the Airdrop option. And, tap Everyone or Contacts Only. And it will automatically enable your Wi-Fi and Bluetooth.
Step 3After that, open the Photos app of your old iPhone, then select all the photos you want to transfer. When you’re done choosing, tap the Share icon, and you will see the Airdrop option, simply tap it.
Step 4Then, you will see all the iPhones and other devices whose Airdrop has been enabled. Tap on your new iPhone’s name.
Step 5Finally, a notification will display on your new iPhone, asking you if you will receive or decline. Of course, tap the Receive button. And, that’s it!

You have now successfully transferred or shared your photos from your old iPhone to a new iPhone. Note that you can also use this if you are to transfer from your iPhone to someone’s iPhone.
Part 3. Transfer Photos from Phone to iPhone with FoneTrans for iOS
Are you looking for a perfect alternative tool that will allow you to transfer your photos directly and selectively from iPhone to iPhone? Good news! FoneTrans for iOS enables you to do that. It is an alternative tool that allows users to professionally and effectively transfer their data among iOS devices. With this, you can transfer your messages, contacts, photos, and videos without much hassle. It is maybe the one that you are looking for to help you. See the steps below for you to learn how to use the program.
With FoneTrans for iOS, you will enjoy freedom to transfer your data from iPhone to computer. You can not only transfer iPhone text messages to computer, but also photos, videos and contacts can be moved to PC easily.
- Transfer photos, videos, contacts, WhatsApp, and more data with ease.
- Preview data before transferring.
- iPhone, iPad and iPod touch are available.
Steps on How to Transfer Photos from iPhone to iPhone with FoneTrans for iOS:
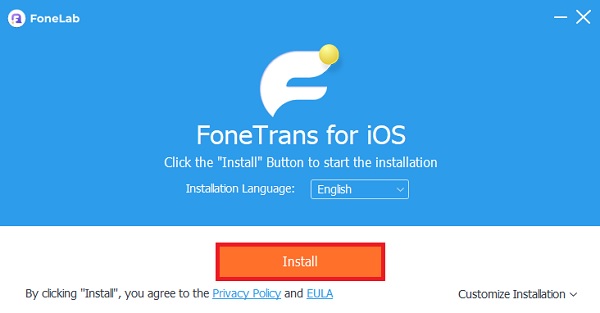
Step 1To begin with, go to the official website of FoneTrans for iOS to download and install it on your computer. It will automatically launch when the installation process is complete.
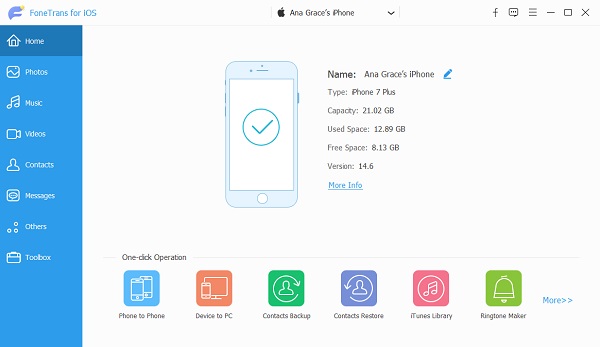
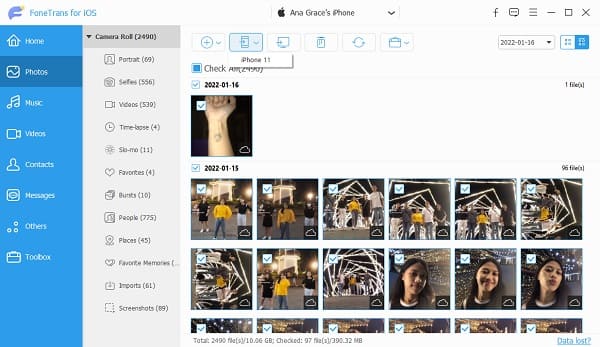
Step 2Next, simply connect the two iPhones to the computer using USB cables. Choose the iPhone or your old iPhone where the photos will come from on the main interface.
Step 3Then, select the Photos option on the left pane. And all the photos from your old iPhone or iPhone that you chose will load, then you may start choosing the pictures you want to transfer by putting a checkmark.
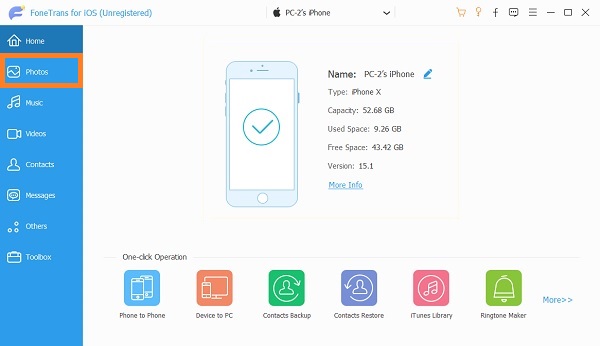
Step 4When you are done selecting, click the Export to Device. And click on your target iPhone to transfer your photos.
Step 5The transferring process will then start. Wait until it is finished. A notification will pop up, telling you that you have successfully transferred your photos. You can check it by opening the folder where you have transferred it.

That’s it! You have now successfully transferred your photos from iPhone to iPhone using one of the best ways: FoneTrans for iOS. Use this tool whenever you want to share or transfer your photos among iOS devices and computers.
With FoneTrans for iOS, you will enjoy freedom to transfer your data from iPhone to computer. You can not only transfer iPhone text messages to computer, but also photos, videos and contacts can be moved to PC easily.
- Transfer photos, videos, contacts, WhatsApp, and more data with ease.
- Preview data before transferring.
- iPhone, iPad and iPod touch are available.
Part 4. Transfer Photos from iPhone to iPhone with iTunes
Another Apple way to transfer photos from iPhone to iPhone is with iTunes. iTunes is a program that allows users to manage, play, and add to your digital content library on your computer. It also syncs it to a mobile phone. Now, if you are using Windows PC or macOS 10.1.4 (Mohave), you can definitely use iTunes to transfer your pictures from iPhone to iPhone. Learn how by following the steps below.
Steps on How to Transfer Photos from iPhone to iPhone with iTunes:
Step 1Firstly, download and install iTunes if you don’t yet have it on your computer. It will open automatically when the installation process is finished.
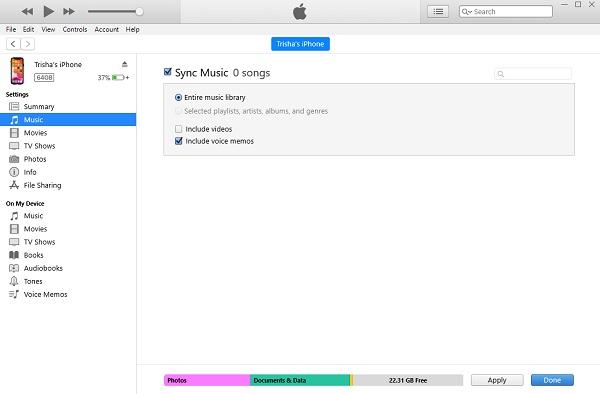
Step 2After that, plug your old iPhone into your computer. Then, on the main interface of iTunes, click the iPhone icon.
Step 3On the left pane, click the Summary option. And, click This Computer under the Backups on the right corner. Then, click Backup Now to sync all data from the iPhone, including pictures, to iTunes.
Step 4Next, unplug your old iPhone, connect your new iPhone while iTunes is still running. Click your new iPhone icon, then on the left pane, click Summary.
Step 5Then, click Restore Backup under Manually Backup and Restore to finally transfer photos from iPhone to iPhone. And, that’s it!
There you go! You have successfully transferred and synced your photo from your old iPhone to your new one using iTunes. You can now access your photos on your new iPhone.
Part 5. Transfer Photos from iPhone to iPhone with Finder
On your Mac, there is an application called Finder. It is where you can see all the contents of your Mac, iCloud Drive, other storage devices, including the device you connect to your Mac. With Finder, you can easily find and organize your files. By transferring your photos from your old iPhone to Mac, you can upload them to your new iPhone using Finder. Here’s how you can do it.
Steps on How to Transfer Photos from iPhone to iPhone with Finder:
Step 1First and foremost, connect your old iPhone to your Mac using a cable. And, you will be asked to trust your new device, which you may do by clicking on both the Mac and your old iPhone.
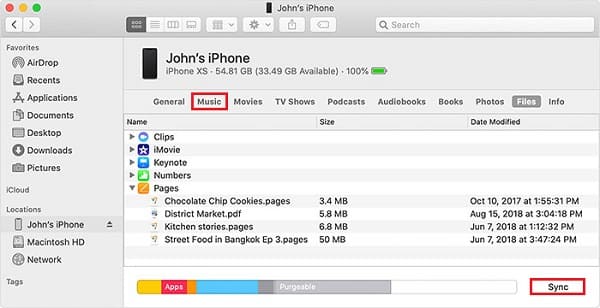
Step 2After that, launch the Finder app. Then, click the Hard Drive icon and choose your device under the Locations.
Step 3Next, select Back Up All of the Data on your iPhone to This Mac, and click Back Up Now under the Backups.
Step 4Then, unplug your old iPhone. Then, connect your new iPhone. Finally, select the Restore Backup.
And so, this is how you can transfer your photos from iPhone to iPhone using the Finder on your Mac.
Part 6. FAQs About Transfer Photos from iPhone to iPhone
1. When you use Airdrop to transfer photos from iPhone to iPhone, is there a limit on the number of pictures?
There is no limit when you want to transfer photos from iPhone to iPhone to answer this. You will be limited when your iPhone storage is also limited.
2. Can I transfer photos from iPhone to iPhone without iCloud?
Of course, yes! There are 4 ways that we have discussed from above where you will not need any iCloud. Your old and new iPhone is enough already.
3. How to Share Photo Album on iPhone?
Some people would like to know how to share a photo album on iPhone, you can go to Photos app, choose the photo, tap the share icon and choose the sharing method you like.
To sum it up, this is how you can transfer from iPhone to iPhone using the 5 recommended ways. With the assurance that they are all working and some of the best methods you can use. Yet, we highly recommend the FoneTrans for iOS on its excellent performance among the ways that we have shown. Nonetheless, you can still choose the method you want to use.
With FoneTrans for iOS, you will enjoy freedom to transfer your data from iPhone to computer. You can not only transfer iPhone text messages to computer, but also photos, videos and contacts can be moved to PC easily.
- Transfer photos, videos, contacts, WhatsApp, and more data with ease.
- Preview data before transferring.
- iPhone, iPad and iPod touch are available.