- Part 1. How to Transfer Photos from Computer to iPhone with FoneTrans for iOS
- Part 2. How to Transfer Pictures from Computer to iPhone with AirDrop
- Part 3. How to Transfer Picture from Computer to iPhone with Finder
- Part 4. How to Transfer Photo from Computer to iPhone with iTunes
- Part 5. FAQs about How to Transfer Photos from Computer to iPhone
How to Transfer Pictures from Computer to iPhone in 4 Quick Ways
 Updated by
 Some individuals prefer to transfer photos from their iPhone to their computers for backup or to free up storage space. What if you want the reverse? Some think that it is challenging to transfer picture from computer to iPhone.
Transferring photos from your Windows and Mac is easier than you expect! This reliable post will show you the 4 proven and tested ways to transfer your computer photos to your iPhone. Please scroll below to see the reliable information about this topic.


Guide List
- Part 1. How to Transfer Photos from Computer to iPhone with FoneTrans for iOS
- Part 2. How to Transfer Pictures from Computer to iPhone with AirDrop
- Part 3. How to Transfer Picture from Computer to iPhone with Finder
- Part 4. How to Transfer Photo from Computer to iPhone with iTunes
- Part 5. FAQs about How to Transfer Photos from Computer to iPhone
Part 1. How to Transfer Photos from Computer to iPhone with FoneTrans for iOS
You have various methods to choose from when it comes to transferring computer photos to your iPhone. Why not use FoneTrans for iOS? This tool can transfer pictures from your computer to various devices, including iPhone, iPod Touch, and iPad. The best thing about this tool is that it allows a one-click procedure to manage your files. Additionally, it also supports various data types besides photos. It includes contacts, videos, messages, documents, WhatsApp files, and more. You can use it to transfer photos from iPhone to computer.
With FoneTrans for iOS, you will enjoy freedom to transfer your data from iPhone to computer. You can not only transfer iPhone text messages to computer, but also photos, videos and contacts can be moved to PC easily.
- Transfer photos, videos, contacts, WhatsApp, and more data with ease.
- Preview data before transferring.
- iPhone, iPad and iPod touch are available.
Furthermore, this software will never modify, save, or erase your data before, during, or after the transfer procedure. Please follow the guide below on how to transfer picture from computer to iPhone using this tool.
Step 1Please download FoneTrans for iOS from their official website by clicking the Free Download button. Set up the downloaded file and install it afterward to let the computer launch the tool automatically.

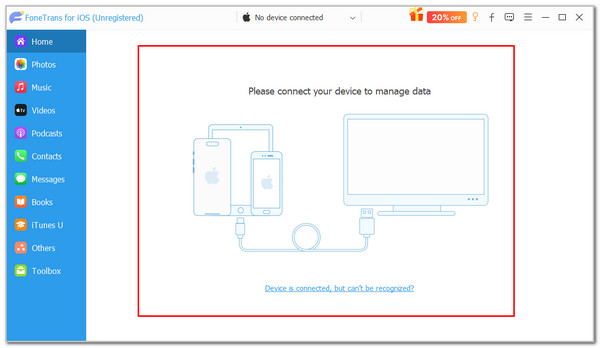
Step 2The tool will instruct you to plug your iPhone into the computer. There will be a straightforward guide on the main interface, which you can follow. All you need to do is get a USB cable to start the procedure.
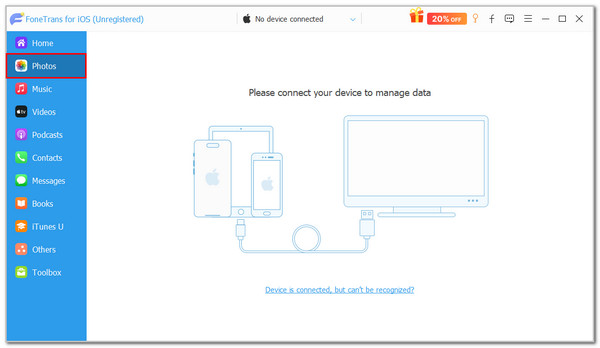
Step 3The iPhone name and other information must be seen from the tool’s interface. Then, click the Photos button at the top left of the screen. This way, the tool will scan the available photos that can be transferred from your computer to your iPhone. Later, select the images you need to transfer. Then, choose the iPhone button at the top and follow the on-screen instructions to complete the transfer procedure.
Part 2. How to Transfer Pictures from Computer to iPhone with AirDrop
Apple offers AirDrop to let its users transfer files, including photos, to different devices they offer. AirDrop is accessible to Mac and iPhone. It is not available for Windows and other non-Apple devices. This procedure is wireless, meaning it can be executed using Bluetooth and Wi-Fi connections. However, AirDrop transfers the photos at a slow speed because it manually processes them.
Additionally, there is a specific distance at which your Apple devices can be scanned with AirDrop. It is recommended to place them near each other for a quick scan. This feature is entirely free! Transfer photos from computer to iPhone free with AirDrop using the steps below.
Step 1First, you need to enable AirDrop on your iPhone and Mac. On your iPhone, swipe down at the top right of the screen to access its Control Center. After that, press and hold the Wi-Fi or Bluetooth section. Select the AirDrop feature and select the Everyone for 10 Minutes button. On your Mac, open Finder and click the AirDrop button. Then, click Everyone or Contacts Only from the Allow Me to Be Discovered By section.
Step 2Open the Photos program on your Mac and select the photos you prefer to transfer. Then, right-click the images and select the Share button on the main interface. Then, click the AirDrop and select the iPhone from the list. Alternatively, you may simply drag and drop them. Finally, tap the Accept button on the iPhone screen to start the transfer.

Part 3. How to Transfer Picture from Computer to iPhone with Finder
Finder is known for holding, backing up, and restoring your files from your Mac. Additionally, some use it to restore their iPhone to factory settings to fix major issues. What they do not know about is that Finder can also be used to move photos from your Mac to your iPhone by syncing them. How to transfer photo from computer to iPhone with Finder? The steps are provided below.
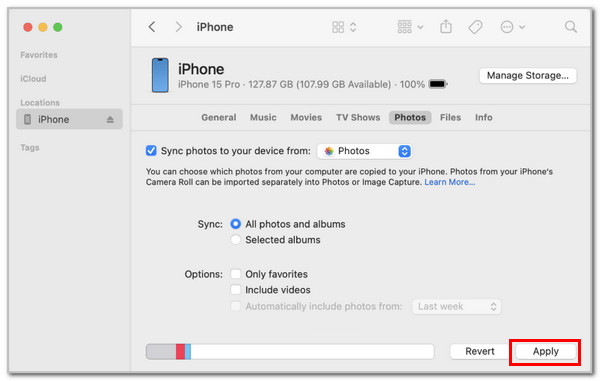
Step 1Open the Finder program on your Mac and plug the iPhone into the computer. Trust the device to grant the permissions. Later, click the iPhone name on the left side of the main interface. After that, click the Photos button under the iPhone name to proceed with the process.
Step 2Select the Photos button at the bottom. Then, tick the Sync Photos to Your Device From box. Later, go to the Sync section and select the All Photos and Albums or Selected Albums section. Finally, please click the Apply button at the bottom right corner of the screen.
Part 4. How to Transfer Photo from Computer to iPhone with iTunes
If Finder can transfer your computer photos to your iPhone, iTunes can too! Their only difference is that you cannot use Finder on Windows, and iTunes is the replacement. Let’s transfer your computer photos to your iPhone with iTunes using the steps provided below.
Step 1Open the iTunes program on your computer. After that, plug the iPhone into the computer where the tool is installed. Then, click the iPhone button at the top of the main interface. Then, the iPhone information will appear on the screen.
Step 2Please select the Photos button from the left side of the main interface. Later, click the Sync Photos button at the bottom right of the screen. Choose an album or folder from the screen. Later, please click the Apply button at the bottom right of the screen to start the sync procedure.

Part 5. FAQs about How to Transfer Photos from Computer to iPhone
Why aren't my photos transferring to my iPhone?
There might be a faulty setting, feature, or operation during the transfer procedure that is causing the photos not to be transferred to your iPhone. It could be a loss of internet connection, disabled permissions, and more.
How long does an iPhone transfer take?
The iPhone transfer procedure for your photos or any other data depends on the method used or the file size. Additionally, it also varies depending on the transfer mode you use, such as an internet connection or using a USB cable.
This post helps you transfer photos from computer to iPhone with its 4 leading ways, including the best third-party tool, FoneTrans for iOS. Whatever your reason for transferring your computer photos to your iPhone, it must be executed immediately. Transfer your computer photos to your iPhone for quick access now!