Notable Guide on How to Share A Photo Album on iPhone
 Posted by Lisa Au / June 26, 2023 09:00
 My friends and I took several pictures on vacation last week. I moved all of them into one album, and when I was at her home yesterday, she wanted me to share the album with her. However, I don't know a way. How do you share a photo album on iPhone with her device?
A typical way to share photos is to select the items individually and then transfer them simultaneously. It is common knowledge for many people since transferring individual files is a typical process on almost all devices. However, moving an entire album is not something regular people often do. Thus, you may not be as knowledgeable about it, especially since some transfer tools and methods are not often used for sharing an album.

Fortunately, you stumbled upon this post, which will enlighten you about the effective methods you should know to share your photo album successfully. From transferring a photo album through a built-in service to a third-party tool, this article will cover the most notable methods you can try. And to help you with the correct process of album transferring, step-by-step instructions will be provided in each part. Try each technique now!
With FoneTrans for iOS, you will enjoy freedom to transfer your data from iPhone to computer. You can not only transfer iPhone text messages to computer, but also photos, videos and contacts can be moved to PC easily.
- Transfer photos, videos, contacts, WhatsApp, and more data with ease.
- Preview data before transferring.
- iPhone, iPad and iPod touch are available.

Guide List
Part 1. How to Create Shared Photo Album on iPhone
iPhone has a built-in feature allowing you to create a shared photo album. As its name implies, a Shared Album lets you invite others to view the pictures you choose to share. But this requires enabling and setting up your iPhone's iCloud Photo Sharing feature beforehand. Just access Settings > your profile > Photos, then activate iCloud Photos. After that, hit Shared Library and proceed with the onscreen directions.
Go along with the hassle-free pattern below to create a Shared Photo Album on iPhone:
Step 1Launch your iPhone’s Photos app, and tap the Album button on the bottom right of the screen. Then tap the plus symbol on the top left to view the album options.
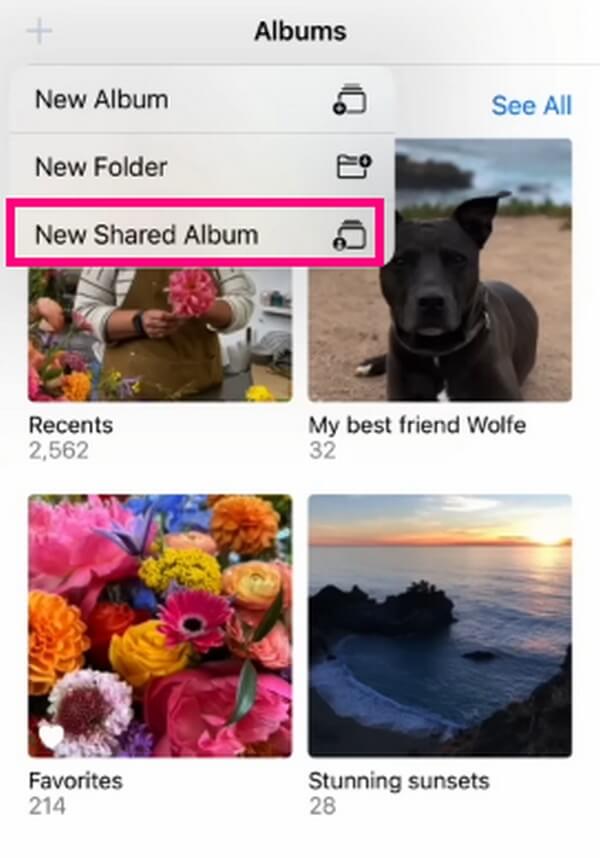
Step 2Tap New Shared Album, then name it accordingly. Afterward, hit Create to add your newly created shared album to your iCloud. From there, you can add the photos you want for the people you invited to see.

Step 3To add photos, open the shared album and tap the Add Photos option. After that, choose the images you want to add and select the Add tab on the top right.
Part 2. How to Share Photo Albums on iPhone with FoneTrans for iOS
FoneTrans for iOS is one of the leading transfer programs you may find online when transferring data across an iPhone, iPad, iPod Touch, etc. It has become notable not only because of its efficient process but also because of its advantageous features. For instance, installing it on Mac or Windows is free and can be done within only a few minutes. And unlike other large programs, FoneTrans for iOS only takes up a small portion of your storage when you install it on your computer. This plays a role in the program's operation since more space improves performance. Moreover, it can transfer other multiple formats besides photos.
With FoneTrans for iOS, you will enjoy freedom to transfer your data from iPhone to computer. You can not only transfer iPhone text messages to computer, but also photos, videos and contacts can be moved to PC easily.
- Transfer photos, videos, contacts, WhatsApp, and more data with ease.
- Preview data before transferring.
- iPhone, iPad and iPod touch are available.
Take the following directions below as a sample of how to share a photo album on iPhone with FoneTrans for iOS:
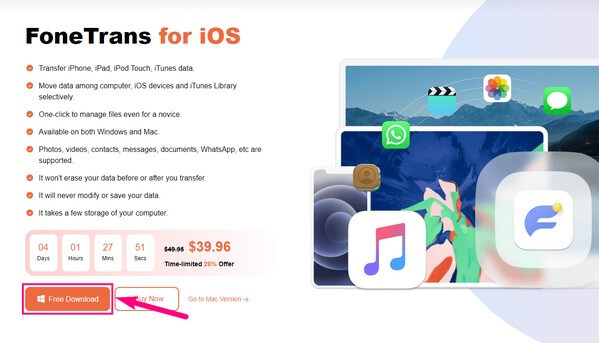
Step 1Enter the transfer program’s official site, and when you get a glimpse of the Free Download tab, click it. This way, you will save a FoneTrans for iOS file copy on your computer. But if you are running macOS, select Go to Mac Version first to access the download tab with the Apple icon. Afterward, begin the installation by allowing the program permissions, then stand by until it finishes. When done, launch the tool on your computer.
Step 2The FoneTrans for iOS main interface will automatically require connecting your iPhone and computer using a working USB cable. However, you must acknowledge the connection on your iPhone by clicking the Trust tab once it appears on the screen. Doing this will help the program recognize your device and browse all its content. The data it will read are photo albums, music files, videos, messages, contacts, and more on your iPhone.

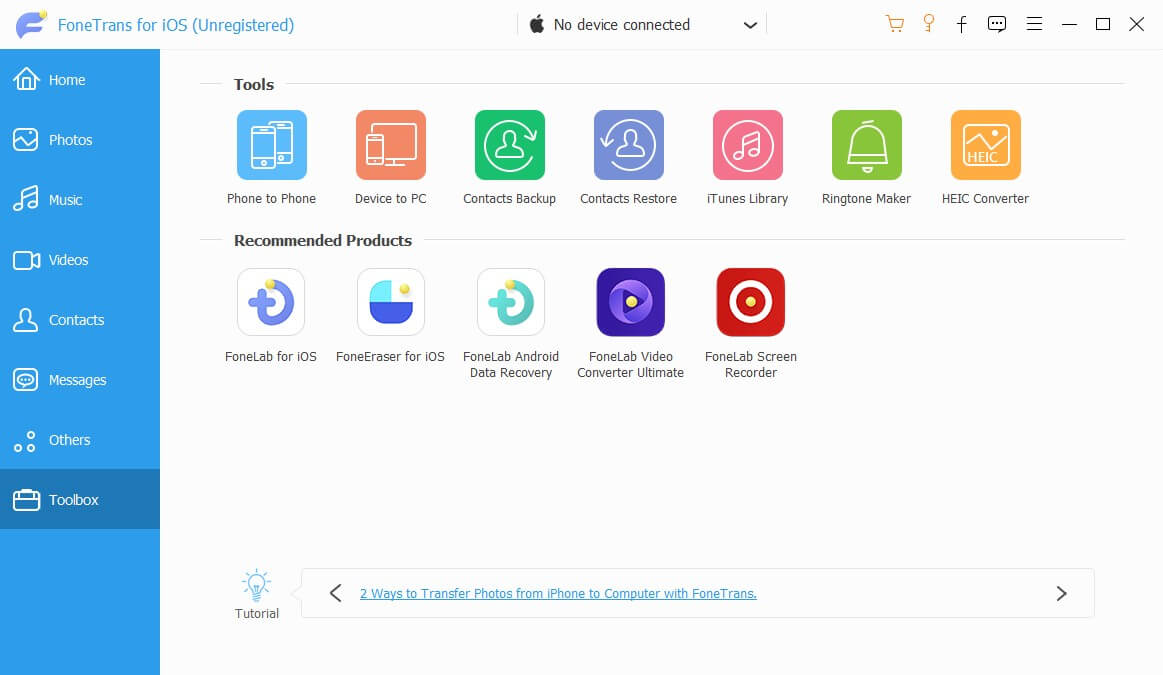
Step 3When the connection is recognized, your iPhone information will display on the interface’s Home section. Meanwhile, the supported file types will be listed in the left column. These are Photos, Music, Videos, Contacts, Messages, and Others. Aside from that, you may also select the Toolbox containing bonus functions, like Contacts Backup and Contact Restore. Also, some recommended tools can help when needed on your iPhone.
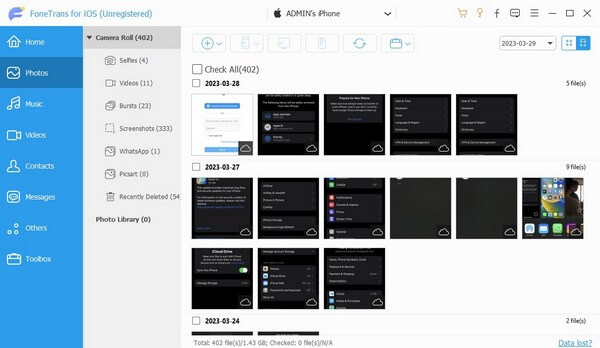
Step 4After exploring the functions, proceed to the Photos section. Your iPhone's photo albums or folders will show in the next column. Click the album where the files you desire to transfer are stored, then mark the Check All box on the upper portion to select the entire album’s content. Afterward, pick the computer or mobile phone icon above, depending on where you wish to transfer. Then proceed to share your iPhone photo album successfully.
With FoneTrans for iOS, you will enjoy freedom to transfer your data from iPhone to computer. You can not only transfer iPhone text messages to computer, but also photos, videos and contacts can be moved to PC easily.
- Transfer photos, videos, contacts, WhatsApp, and more data with ease.
- Preview data before transferring.
- iPhone, iPad and iPod touch are available.
Part 3. How to Share Photo Albums on iPhone Using iTunes
iTunes is a known transfer method for Apple product users besides being a media player and library. Because of its device management function, it is easy to operate your iPhone and manage its data on the program interface. Hence, iTunes makes sharing your iPhone photo album with the computer quick and efficient.
Imitate the easy guidelines underneath to share photo albums on iPhone using iTunes:
Step 1If iTunes is not installed, download and run its latest version on your computer. After that, use a lightning cable for your iPhone to connect to the computer and be recognized by the program.
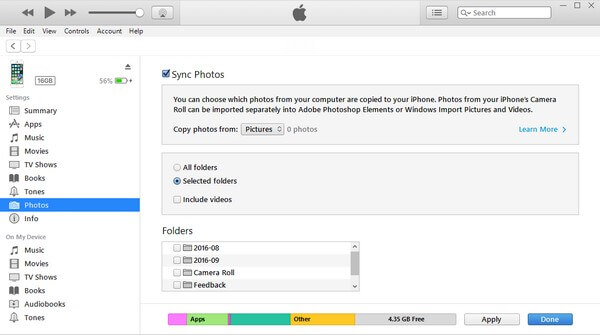
Step 2Once recognized, hit the mobile device symbol on the screen’s upper-left to view your iPhone information and content. On the interface’s left menu, choose the Photos tab, then check Sync Photos at the top.
Step 3Click the Copy photos from: pull-down menu to reveal the options. From there, choose the location of your albums. Next, click Selected folders, then select your desired photo album under the Folders section. Lastly, hit Done to sync or transfer the album to your computer.
Note that iTunes can only be found on Windows and older macOS versions. So if you are running a newer version of macOS, use the Finder program instead, as it is the official replacement for iTunes. And the process is almost the same.
With FoneTrans for iOS, you will enjoy freedom to transfer your data from iPhone to computer. You can not only transfer iPhone text messages to computer, but also photos, videos and contacts can be moved to PC easily.
- Transfer photos, videos, contacts, WhatsApp, and more data with ease.
- Preview data before transferring.
- iPhone, iPad and iPod touch are available.
Part 4. FAQs about How to Share Photo Albums on iPhone
1. Why can't I share a photo album on my iPhone?
If you have created a Shared Album but having difficulty sharing them, you may be unintentionally trying to share a private album instead. Perhaps, you thought you were using the shared album but mistakenly operating the private one. On the other hand, the Shared Album feature may not be enabled, so you can't create the Shared Album at all. As said above, you must ensure it is activated on Settings before utilizing the function.
2. How do I share a photo album from my iPhone to a computer?
There are limited choices for sharing data between an iPhone and a computer. Thus, one of the practical things you may do is use a third-party tool, like FoneTrans for iOS. This tool can move or transfer almost any data, like photo albums, between an iPhone, computer, iPad, and more.
We hope the photo albums you desire to share can transfer successfully with the notable methods gathered in the article above. Thanks for trusting the processes, and you may come back whenever.
With FoneTrans for iOS, you will enjoy freedom to transfer your data from iPhone to computer. You can not only transfer iPhone text messages to computer, but also photos, videos and contacts can be moved to PC easily.
- Transfer photos, videos, contacts, WhatsApp, and more data with ease.
- Preview data before transferring.
- iPhone, iPad and iPod touch are available.