Scan A Photo on iPhone Using Remarkable Approaches
 Posted by Lisa Ou / Jan 04, 2024 09:00
 Do you need iPhone photo-scanning strategies? If so, stick around and sit back, as this post presents everything you must learn to scan photos on your iPhone. But first, in which cases will you need to scan? Well, at least once in your life, you will probably encounter a situation where you need to scan a photo, whether an iPhone or Android user. Thankfully, an iPhone and other iOS devices provide a built-in method. Your purpose in scanning an image doesn't matter since the techniques exhibited below will cater to your scanning needs regardless.
For instance, an important document file on your iPhone has been deleted after you printed it out. However, you suddenly need it again to edit something, send it to others, etc. Instead of typing what's written on the document from the start, taking a photo and scanning it will be a much better option. It doesn't only save time and effort. The words copied from the paper will also be more accurate. Thus, we gladly present the photo-scanning methods on an iPhone in the following parts. Helpful information and directions are given in each technique.

FoneLab enables you to fix iPhone/iPad/iPod from DFU mode, recovery mode, Apple logo, headphone mode, etc. to normal state without data loss.
- Fix disabled iOS system problems.
- Extract data from disabled iOS devices without data loss.
- It is safe and easy to use.

Guide List
Part 1. How to Scan A Photo on iPhone through The Notes App
Regarding scanning photos on an iPhone, the Notes app is the primary method you can rely on. If you access it on your device, you can use its built-in photo scanner to scan the text, document, etc., you have captured. It is the strategy with the most hassle-free process, not only because it is built into the device but also because the steps are simple to navigate. Aside from that, the Notes app offers various ways of scanning pictures. You can scan photos and videos in real-time, choose them from your files, or scan documents and texts.
Stick to the convenient process below to utilize the photo scanner app for iPhone, which is Notes:
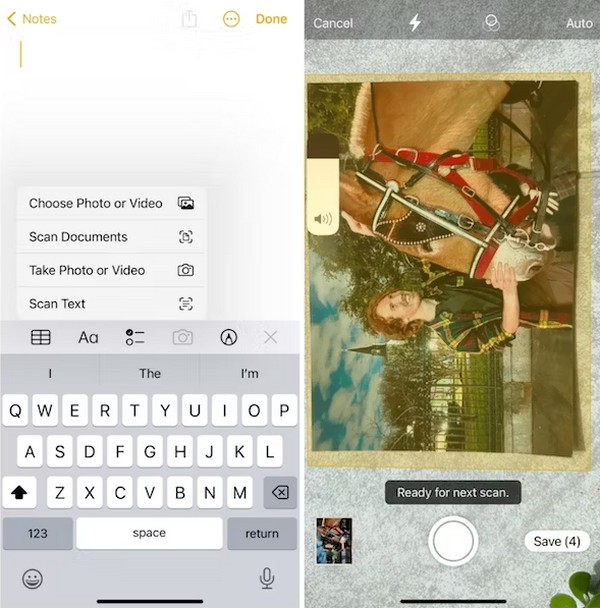
Step 1Proceed to your iPhone’s Notes app and hit the Plus icon at the bottom right of the screen. When a new note is displayed, select the Camera symbol at the top of the keyboard.
Step 2You may select Choose Photo or Video, Scan Documents, Take Photo or Video or Scan Text accordingly to open or take the photo you wish to scan. Once scanned, tap Save to store it on your Notes app.
Part 2. How to Scan A Photo on iPhone Using A Third-party App
Installing a third-party app is the second technique you may use to scan pictures on an iPhone. Various apps are on the App Store and other websites or platforms, so you have many choices if you prefer using a third-party app. In this case, we suggest trying the PhotoScan app by Google. If you have old pictures, scanning them with this app will give you their digital and enhanced version within minutes. You don’t need to worry about taking the photos with the wrong angle, as it automatically crops, rotates, and enhances them.
Follow the manageable procedure underneath to use the photo scanning app on iPhone, PhotoScan:
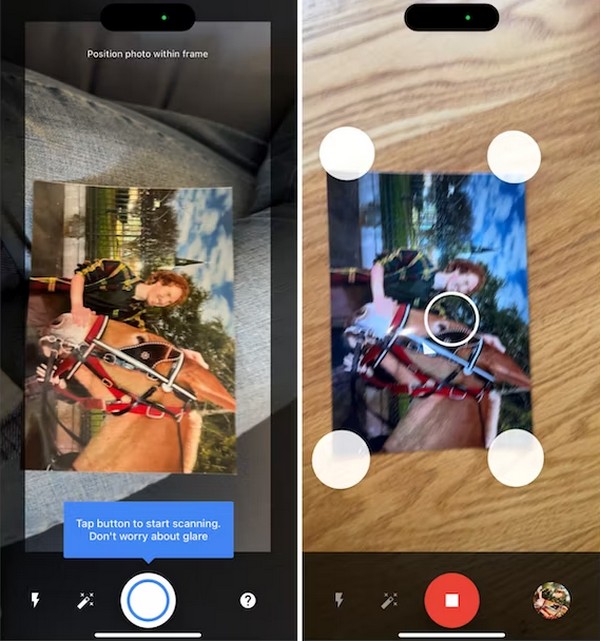
Step 1Get PhotoScan through the App Store, then manage the permissions to install the photo-scanning app successfully. Next, capture the photo on the app’s initial interface.
Step 2Circles on each corner of the photo will help you take a picture to scan it properly. Afterward, you may tap Adjust Corners if needed, then save it in your Google Photos.
Part 3. How to Scan A Photo on iPhone Online
Other effective photo scanners can be found online, and one of them is ScanDoc. With this technique, you only have to upload the photo from your iPhone to its official page, which will be scanned in no time. The process is navigated on the device browser, and you can expect it to finish quickly, especially if you have stable internet. If not, your poor connection will affect the scanning procedure, delaying everything when the internet suddenly starts acting up. Thus, ensure your internet is okay, and it can handle online processes like this.
Have regard to the user-friendly directions below to determine how to scan photo on iPhone online:
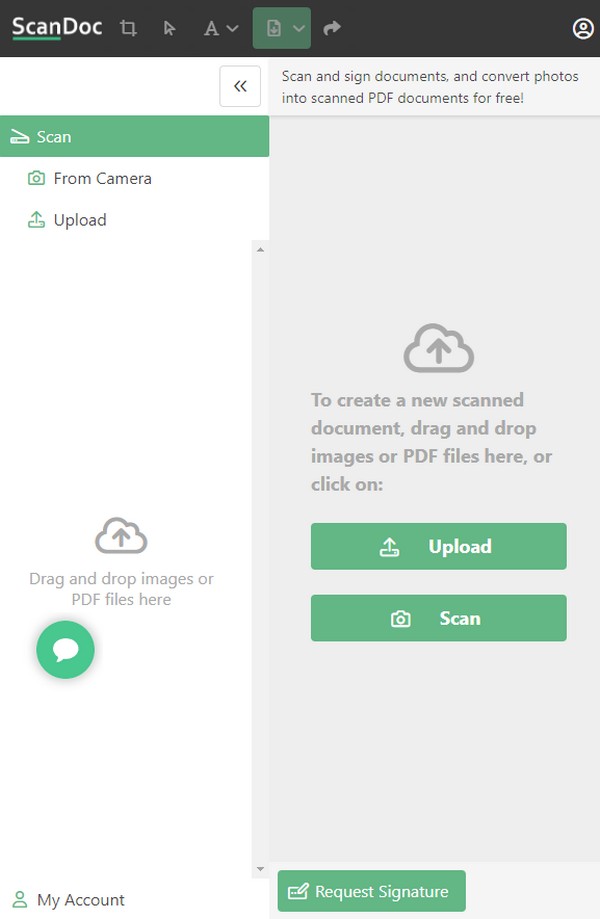
Step 1Get into a browser and go directly to the main ScanDoc website. From there, tap Scan or Upload to import the picture you intend to scan on the page.
Step 2When uploaded, tap the Check button at the page’s top left area to scan the photo and save it on your iPhone.
Part 4. Bonus Tip - iOS System Recovery Program You Must Not Miss
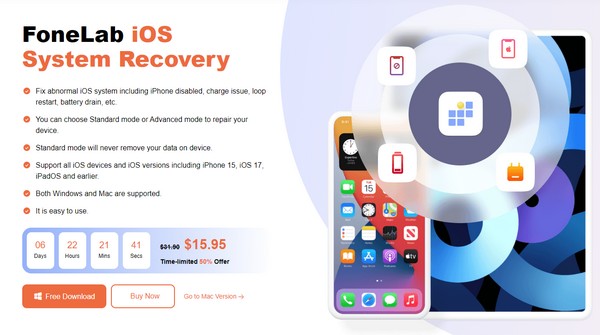
Meanwhile, here’s FoneLab iOS System Recovery as a bonus. If your device fails to function, it is the recovery program to trust. For instance, the Notes app can’t scan your photos due to an unknown error. Or the browser doesn’t run correctly, and you need to fix something in the system to function well again. This system recovery is the tool you can install to repair almost any issue or error on the device. It supports an abnormal iOS system in an iPhone, iPod Touch, and iPad, regardless of their models, making it flexible.
FoneLab enables you to fix iPhone/iPad/iPod from DFU mode, recovery mode, Apple logo, headphone mode, etc. to normal state without data loss.
- Fix disabled iOS system problems.
- Extract data from disabled iOS devices without data loss.
- It is safe and easy to use.
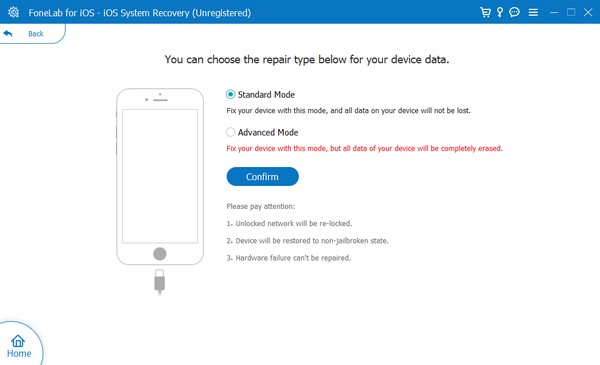
Furthermore, with FoneLab iOS System Recovery, you are free to choose whether to fix the system in Advanced or Standard mode. If you prefer the Standard mode, the system will be fixed without affecting the data stored in the iPhone. But if you pick the Advanced mode, everything, including photos, documents, messages, videos, apps, settings, and more, will be deleted, as the tool will wipe the device to ensure everything is fixed and clean.
Identify the painless steps beneath as a sample for fixing issues on an iOS device with FoneLab iOS System Recovery:
Step 1Download the FoneLab iOS System Recovery installer through its official page by clicking Free Download. When the file is saved, operate the installation and permissions. This way, you can launch the system recovery tool quickly afterward.
Step 2Click iOS System Recovery on the main interface’s top right, followed by the Start button on the next screen. Then, link your iPhone through a USB cable and pick between the Advanced and Standard modes before clicking Confirm.
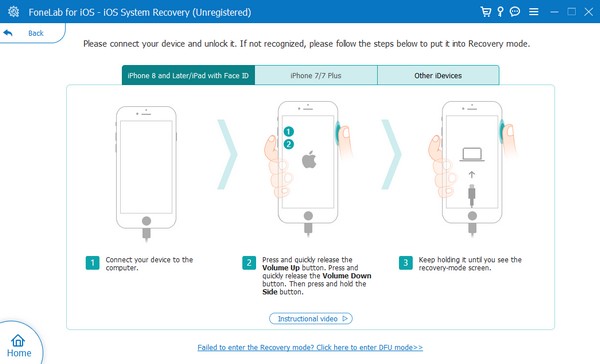
Step 3Next, go along with the following interface’s on-screen instructions. You must ensure you proceed to the section designated to your iPhone model to enter Recovery mode and get the firmware package to repair your device issue.
FoneLab enables you to fix iPhone/iPad/iPod from DFU mode, recovery mode, Apple logo, headphone mode, etc. to normal state without data loss.
- Fix disabled iOS system problems.
- Extract data from disabled iOS devices without data loss.
- It is safe and easy to use.
Part 5. FAQs about How to Scan A Photo on An iPhone
1. Which is the best photo scanner app for iPhone?
The Notes app is the best photo scanner you can use if you're an iPhone user who doesn't want to install another app on your device. As mentioned earlier, it's effective and built into the device, making the process convenient.
2. Can you scan a picture that was already taken?
Yes, you can. Scanning a picture doesn't necessarily mean you should capture the photo in real-time. You could just upload an image that was already taken from your iPhone files.
FoneLab enables you to fix iPhone/iPad/iPod from DFU mode, recovery mode, Apple logo, headphone mode, etc. to normal state without data loss.
- Fix disabled iOS system problems.
- Extract data from disabled iOS devices without data loss.
- It is safe and easy to use.
The information presented in this article is well-researched, and you can trust they are already proven. Thus, relax and rely on them to perform the scanning procedures successfully and easily.