How to Transfer Photos from iPhone to iPad Excellently
 Updated by
 Greetings! Is anyone available to help me learn how to get photos from an iPhone to iPad? I've taken some vacation pictures on my iPhone, and I'd love to view and edit them on my iPad since its screen is much larger. My only concern is that the photos might lose their original quality if I use just any transfer method. So, I'm open to suggestions that truly work. Thank you!
Would you like to access your iPhone photos on your iPad? If so, it is no longer surprising, as you can enjoy various advantages by transferring the images to the iPad. Aside from simply viewing your content on a larger display, editing the photos will also be more efficient due to some iPad offerings, such as pencil support and desktop-class editing apps or features.
However, with the numerous options for transferring images, you may find it challenging to choose the most suitable one for your comfort. Below are the most effective approaches to ensure a smooth and effortless transfer process. Whether you like a wired or wireless connection, it's not a problem because both are available in the following sections.

Guide List
Part 1. How to Transfer Photos from iPhone to iPad
Whether trying to free up space on your iPhone, organize your photo library, or enjoy your images on a larger screen, transferring them to your iPad will be effortless with the outlined strategies below. Each method has advantages and disadvantages, so use the one you find most efficient and comfortable for moving your photos seamlessly.
Way 1. Transfer Photos from iPhone to iPad through AirDrop
AirDrop is Apple's primary and native wireless sharing feature, so it's unsurprisingly the initial method we suggest for transferring your iPhone photos to your iPad. If you have already tried this feature to transfer other data, such as documents, between Apple devices, you must know how straightforward the process is. It no longer requires a wired connection and only needs Bluetooth and WiFi to be enabled. Hence, it is an ideal transfer function for many users since it instantly transfers photos without complications. The only reminder to note is to keep your iPhone and iPad close during the transfer. If not, delivering your chosen images can easily fail.
Mimic the uncomplicated directions below to master how to send photos from iPhone to iPad through AirDrop:
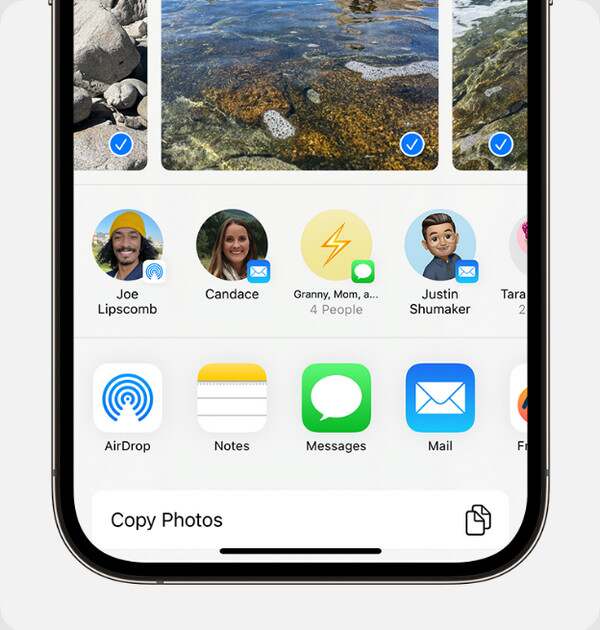
Step 1Initially, ensure you enable your WiFi and Bluetooth features on your devices. Then, when ready, head to the Photos app on the iPhone to view all the available image files.
Step 2Afterward, tap the Select option at the top left, then locate and mark the pictures you want to transfer. Once selected, select the Share button below and pick AirDrop from the sharing options. Once the receiving iPad's name appears, select it to transfer your images.
We understand if you find this transfer method convenient, and would also like to use it on other devices besides Apple. If so, we regret to inform you that it won't be possible because of the feature's limitations. Unfortunately, AirDrop is exclusive to Apple devices, including the iPhone, iPad, Mac, etc., making it impossible for people using other operating systems to access it.
Way 2. Transfer Photos from iPhone to iPad Using FoneTrans for iOS
Besides Apple's built-in transfer features, professional strategies like FoneTrans for iOS are reliable options for transferring photos between an iPhone and an iPad. It doesn't matter if you're new to iPhone or Apple devices, because this tool is user-friendly enough to cater to all users. Apart from that, you can expect this program to give you complete control over your data. It allows you to transfer your photos by group or individually, making the process more efficient.
Another attribute that makes FoneTrans for iOS stand out is its internet-free procedure. Unlike the others, it works smoothly offline and doesn't require your WiFi to be enabled, as the transfer occurs directly through a USB cable. Moreover, aside from photos, this transfer tool lets you move other data types, such as documents, videos, messages, contacts, and more, across your iOS and iPadOS devices later. It will also keep the quality of your files, even after you transfer.
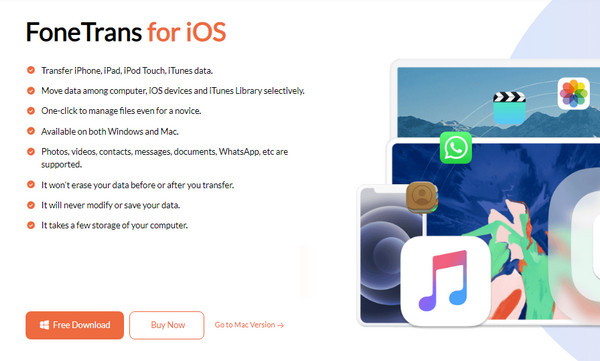
With FoneTrans for iOS, you will enjoy freedom to transfer your data from iPhone to computer. You can not only transfer iPhone text messages to computer, but also photos, videos and contacts can be moved to PC easily.
- Transfer photos, videos, contacts, WhatsApp, and more data with ease.
- Preview data before transferring.
- iPhone, iPad and iPod touch are available.
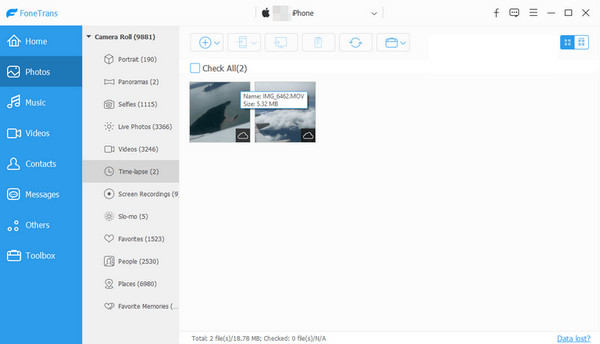
Perceive the worry-free instructions below as a pattern of how to move photos from iPhone to iPad using FoneTrans for iOS:
Step 1Navigate to the FoneTrans for iOS website using your preferred browser, and then click the Free Download button once it appears. This move will save and store the tool's installer in your Downloads section. Hence, launch the file once it's ready to start setting up the program. Soon, your desktop will display the Start tab, allowing you to initiate the transfer tool.
Step 2Once the interface launches, you must attach your iPhone and iPad to the program with Lightning cables. Then, once recognized, click the tab on the uppermost section and choose your iPhone's name. This way, the tool can display its content.
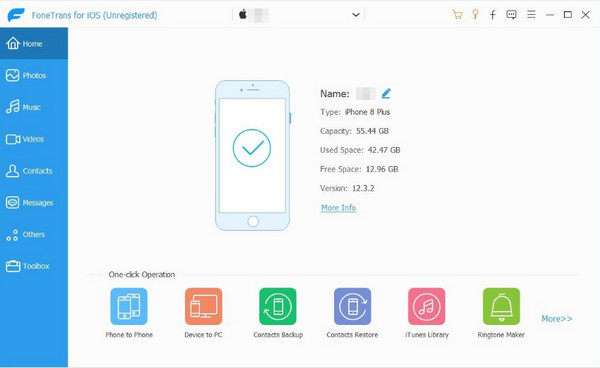
Step 3After that, enter the Photos section by clicking the designated tab in the left column. Once your iPhone images appear, find and mark the ones you intend to transfer. Finally, hit the Device button at the top and click your iPad's name from the options.
Part 2. How to Sync Photos from iPhone to iPad
Besides transferring, you can also access your iPhone photos on the iPad by syncing the devices to your Apple or iCloud account. If you enable the designated feature, the pictures you want to transfer from your iPhone will be automatically accessible on your iPad. Thus, it is a good option if you prefer automatic transfer whenever you acquire new photos on your devices. This feature saves you from manual transfers and keeps your data up-to-date without requiring additional procedures each time. Meanwhile, data syncing is one of Apple's built-in functions, so expect a user-friendly process, especially since it will be accessible directly in the Settings app.
Bear in mind the comfortable operation below to determine how to sync photos from iPhone to iPad:
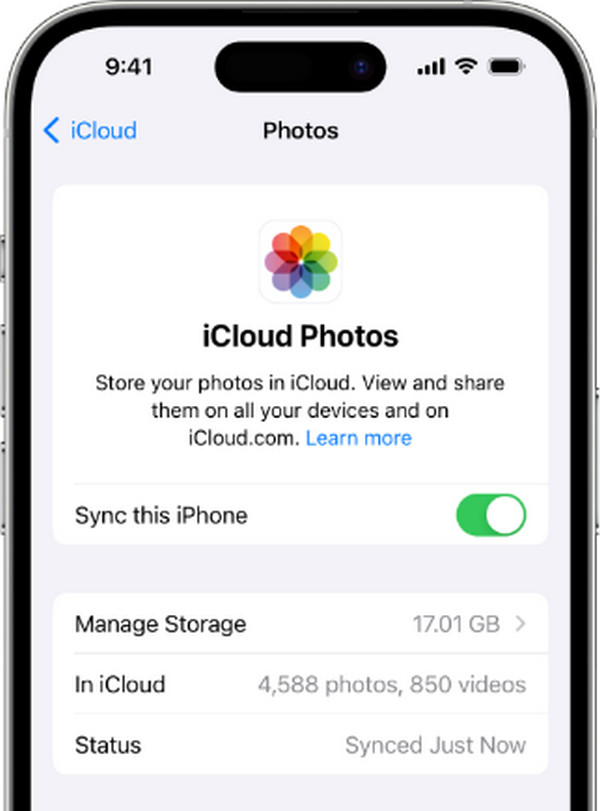
Step 1Log in to the same Apple ID on your iPhone and iPad and proceed to the Settings interface. Your name or profile will be displayed at the top of the primary screen, so tap it.
Step 2Next, choose the iCloud tab from the menu. Your iPhone content categorized by data types will appear on the following display. Thus, tap the Photos selection and toggle the Sync this iPhone to sync the device images to your account. Finally, do the same on your iPad.
Although this method is convenient, consider remembering its disadvantage: iCloud's limited storage. Once the free space it offers is used up, your device's content, including photos, will stop syncing since iCloud no longer has a place for new data. So, it won't be surprising if you'd prefer the prior methods, especially FoneTrans for iOS, as we assure you of their advantages.
Part 3. FAQs about How to Transfer Photos from iPhone to iPad
If I delete photos from an iPad is it deleted from iPhone?
It depends on the transfer process you choose. If you use FoneTrans for iOS or AirDrop, your photos will remain on the iPad, even after being deleted from the iPhone. However, the syncing method will also delete them on your iPad.
Can I transfer numerous photos simultaneously?
Yes, you can. All the techniques recommended above can transfer numerous photos simultaneously, so don't be reluctant to rely on them.
After testing several transfer strategies, these methods, especially FoneTrans for iOS, have become the top for transferring photos and other data between iOS and iPadOS devices.