Transfer Data From iPhone, Android, iOS, Computer to Anywhere without Any Loss.
- Transfer Data from One Micro SD Card to Another Android
- How to Transfer Pictures from One Phone to Another
- How to Transfer Photos from Old LG Phone to Computer
- How to Transfer Photos from an Old Samsung to Another Samsung
- Transfer Contacts from Samsung to iPhone
- Transfer Data from LG to Samsung
- Transfer Data from Old Tablet to New
- Transfer Files from Android to Android
- Transfer iCloud Photos to Android
- Transfer iPhone Notes to Android
- Transfer iTunes Music to Android
Article Title: How to Transfer Google Photos to An External Hard Drive Smoothly
 Updated by
 Hello! Can anyone help me determine how to transfer photos from Google Photos to an external hard drive? I always ensure that I save my image files to Google Photos for safety, in case I accidentally delete them. However, its storage is now full, which forces me to use an external drive instead. I just don't know how to transfer them, so I hope somebody can help.
Google Photos is one of the many services Google created for its users. As its name suggests, this service allows you to save and store your image files online, making it more convenient to back up, organize, and manage them. The problem is that Google Photos, along with Gmail and Google Drive's free storage, only has a 15 GB capacity, which is insufficient for some users.
Hence, if you have already reached its limit, you will have to rely on an external drive to free up space on your Google Photos and manage your pictures further. That said, you may wonder how to transfer the image files to your external drive safely. If so, worry no more, because the following sections will provide the proper procedures with helpful details and stress-free steps.

Guide List
Part 1. How to Save Google Photos to A Computer
Before proceeding, please note that it's not possible to transfer images directly from your Google Photos to an external drive. Instead, you must first save the pictures to your computer. Then, that's when you can transfer them from the computer to your external drive. So, prioritize this part as it is necessary. After all, the procedure is painless, and it can be completed within a few minutes, especially if you only need to save or transfer a few photos. You must only access the designated website on your Chrome browser, and its straightforward page will be enough to help you save your chosen photos effortlessly. Also, your internet connection must be stable.
Follow the accurate directions below to understand how to download photos from Google Photos to external hard drive by saving them to the computer first:
Step 1In your Chrome browser, select the Google Apps button on the upper right, then click the Photos option. Afterward, enter your account credentials if prompted, and the succeeding page will show your photos.
Step 2From there, check the pictures you'd like to transfer. The options on the upper right will then appear; click the three-dotted button and select Download to save your chosen photos to your computer.

Please note that you can only view your Google Photos image files if you use your Google account that contains them. Hence, ensure you log in first so that the photos will be available once you enter the designated Google Photos section on your Chrome website.
Part 2. How to Transfer Google Photos to An External Hard Drive
Now that you have successfully saved your chosen files from the Google Photos page to your computer, it's time to transfer them to the external drive. Don't worry about the process, though. Like the last part, this won't need technical expertise or advanced knowledge. It only requires connecting your external drive and managing the straightforward steps on your computer's File Explorer. As you know, this program's design is beginner-friendly, allowing you to grasp and perform the photo transfer effortlessly. Meanwhile, the time this method will take will depend on the number of files you plan to transfer, although it typically finishes quickly regardless.
Bear in mind the stress-free directions below to determine how to move photos from Google Photos to an external hard drive:
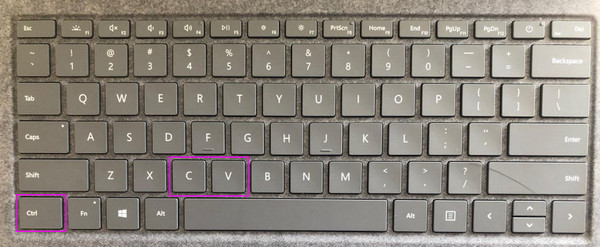
Step 1First, link your external hard drive to the computer using a cable, and then open File Explorer. Next, navigate to the folder containing your photos and pick the ones you want to transfer. You can then copy them by pressing Ctrl+C.
Step 2Once copied, open your external hard drive in File Explorer. You will immediately see its name in the left column. Then, enter or create a folder where you want to transfer and store your pictures. Finally, open the folder and press Ctrl+V to move the images successfully.
In addition to external drives, you can also use your mobile device to store pictures from your other devices. It is an excellent temporary alternative if you still don't have an external drive, but already need to back up media files. Hence, don't miss the suggested program in the upcoming section, as it will allow you to move your chosen media files without any issues.
Part 3. Bonus Tip - Transfer Photos to A Mobile Device
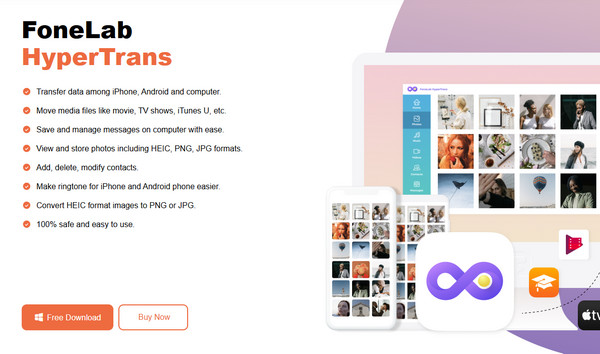
As mentioned, transferring your photos to another mobile device is advantageous in specific situations, such as backing up your data. But besides using the phone as a backup device, it will also let you conveniently manage, edit, send, and more, your photos using another OS. Thus, if you need to transfer data later, let FoneLab HyperTrans assist you, as it is known to be one of the safest and most reliable tools for transferring data between computers and mobile devices.
Is this your first time hearing about it? If so, you will be pleased to know that FoneLab HyperTrans is a professional solution for transferring various data types between a computer and your mobile device, whether Android or iOS. After all, this transfer program supports a wide range of devices, data types, and formats. With the proper steps, you can easily transfer your desired photos, videos, music files, contacts, and other files to another device with ease.
Transfer Data From iPhone, Android, iOS, Computer to Anywhere without Any Loss.
- Move Files between iPhone, iPad, iPod touch and Android.
- Import Files from iOS to iOS or from Android to Android.
- Move Files from iPhone/iPad/iPod/Android to Computer.
- Save Files from Computer to iPhone/iPad/iPod/Android.
Distinguish the correct guidelines below as a model to transfer photos from your mobile to another with FoneLab HyperTrans:
Step 1Head straight to FoneLab HyperTrans' website, where you'll spot the Free Download button. Click it to save the installer instantly, then launch the installation once ready, which will take around a minute. Afterward, the Start button will appear, allowing you to click it and initiate the transfer program.
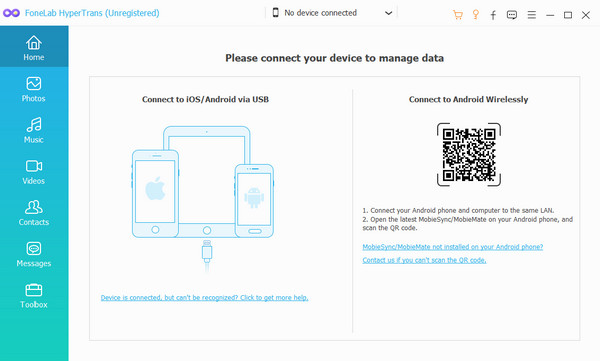
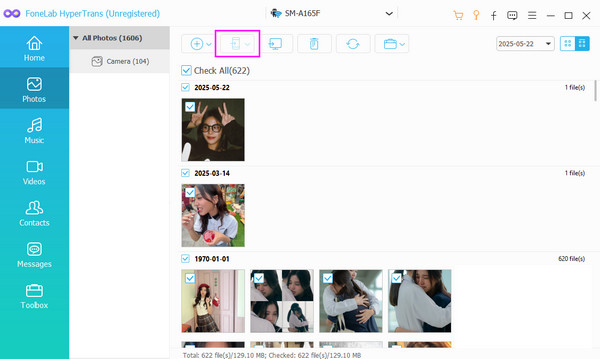
Step 2Attach your phones to the computer as soon as FoneLab HyperTrans launches. Next, simply plug in a USB cable or connect wirelessly via Wi-Fi for convenience. Once your devices are successfully linked, select the drop-down menu at the top to view all available devices. Then, choose your sender phone to access and view all its contents instantly.
Step 3Select Photos from the left panel and choose the folder containing your images. They will appear instantly on the right. Thus, pick your desired photos individually or all at once, then click the Phone tab at the top to view connected devices. Finally, choose your receiver device, and the transfer begins immediately. Soon, you will enjoy all your photos on your new device.
Part 4. FAQs about How to Transfer Google Photos to External Hard Drive
Can I transfer Google Photos to an external hard drive without an internet connection?
Unfortunately, you can't. To retrieve your images from the Google Photos page, you will need an internet connection. Therefore, you must link to a stable network.
Will the quality of my images remain after transferring?
Yes, they will. If you download and transfer your Google images without compressing them, their quality will remain.
Guarantee the overall performance of the methods above by maneuvering their procedures correctly. Thus, try them, including the bonus tool, to enjoy a seamless transfer.