Exceptional Guide on How to Transfer App from iPhone to iPad
 Posted by Lisa Ou / March 31, 2023 09:00
 Do you want to uncover the best ways on how to transfer app from iPhone to iPad? If you do so, we are glad to say you have come upon the right article. It is easy to transfer when talking about files like photos, music files, documents, and more. However, this is not the case with applications. Only a few methods are available to transfer this particular data type from your iPhone to your iPad, or between several devices, in general.

Thankfully, we found the most effective ways after browsing various websites. Hence, this article will outline step-by-step methods for transferring applications from an iPhone to your iPad. Manual, third-party, and services for transfer are accessible below to help you. You can expect that after reading this article, you will be able to transfer your apps and many data types between your devices. Start reading the following parts to begin the process.

Guide List
With FoneTrans for iOS, you will enjoy freedom to transfer your data from iPhone to computer. You can not only transfer iPhone text messages to computer, but also photos, videos and contacts can be moved to PC easily.
- Transfer photos, videos, contacts, WhatsApp, and more data with ease.
- Preview data before transferring.
- iPhone, iPad and iPod touch are available.
Part 1. How to Transfer App from iPhone to iPad on Settings
Transferring apps through Settings might be the best choice if you prefer not to use or install a third-party tool. This method will work successfully as long as you are signed in to the same iCloud account on your iPhone and iPad. It only requires a few taps on your iPhone to sync its apps on your iPad, letting you use them on both devices.
Pay attention to the unchallenging directions below to become aware of how to transfer app from iPhone to iPad on Settings:
Step 1Find the Settings icon and launch it on your iPhone. From the list of options, scroll down until you see the iTunes & App Store tab, then tap it.
Step 2On the following screen, see the Automatic Downloads section. A couple of data types can be found under it, including Apps, Music, Books & Audiobooks, and Updates.
Step 3Toggle on the slider that aligns with the Apps option. After a few moments, the apps on your iPhone will be present on your iPad as well. But you must ensure both of your devices are connected to a stable internet connection to sync the apps successfully.

But since iCloud is the storage used in this method, you must keep in mind that it only offers 5 GB of free storage. Hence, the apps you can store or sync are limited.
Part 2. How to Transfer App from iPhone to iPad via Finder
Meanwhile, if you connect your iPhone and iPad to your Mac, you can use Finder to transfer your apps. It only requires USB cables and a few simple steps for the transfer to be successful. In addition, you can also use iTunes if you use a Windows computer.
Pay attention to the unchallenging directions below to become aware of how to transfer app from iPhone to iPad via Finder:
Step 1Attach your iPhone and iPad to your Mac with the use of USB cables. Then open the Finder window to see your devices connected.
Step 2Click your iPhone device and then the Files tab to see your data. After that, select the installer files of the apps you wish to transfer to your iPad.
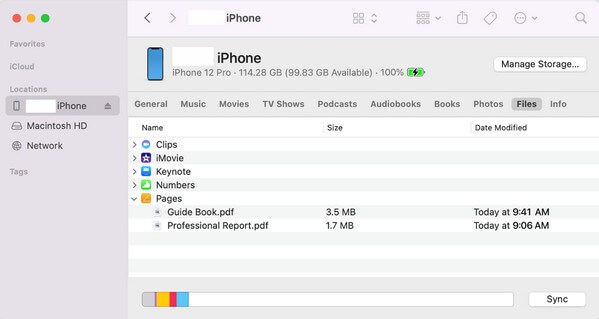
Step 3Once you have chosen, open your iPad device on Finder and drag the data you selected on it. Finder will then start copying the iPhone data to your iPad. When done copying, you can install the apps on your device.
Part 3. Bonus Tip - FoneTrans for iOS
If you need a tool for transferring iPhone or iPad data, FoneTrans for iOS is the highly-recommended one. This program lets you enjoy moving data between various devices, like iPhone, iPad, computer, and more. Thus, it doesn’t restrict you from enjoying your photos, videos, audio, messages, contacts, documents, call logs, contact, and more on most of your iOS or iPadOS devices. Besides, FoneTrans for iOS works on both Windows and Mac, so you don’t have to worry if you will install it on a non-macOS computer. Its efficient performance will be the same regardless. Also, you can enjoy its additional features after installation.
Pay attention to the unchallenging example below to become aware of how to transfer files from iPhone with FoneTrans for iOS:
With FoneTrans for iOS, you will enjoy freedom to transfer your data from iPhone to computer. You can not only transfer iPhone text messages to computer, but also photos, videos and contacts can be moved to PC easily.
- Transfer photos, videos, contacts, WhatsApp, and more data with ease.
- Preview data before transferring.
- iPhone, iPad and iPod touch are available.
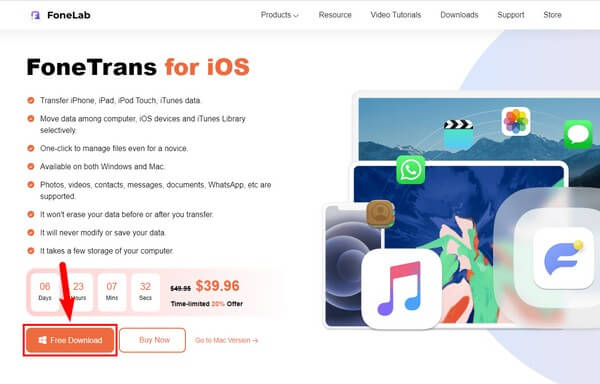
Step 1Visit the webpage for the FoneTrans for iOS program to see and click the Free Download button on the left. The installer file will then be downloaded. Open it to install the tool, which will last around a minute. Once it’s ready to start, launch the transfer tool on your computer to begin using it.
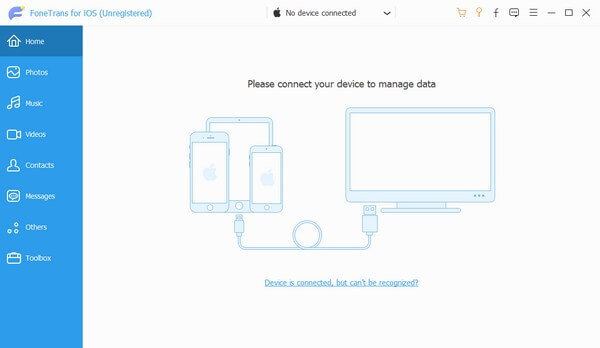
Step 2The FoneTrans for iOS primary interface will welcome you with the requirement to connect your devices. Use a USB cable to connect the iPhone to your computer where the program is installed. If you tried to connect it, but can’t be recognized, click the option below. It will show you the methods to connect successfully.
Step 3After your device is connected, click the tab with the down arrow at the top of the interface. A list of connected devices will then appear. Choose your iPhone from there. After that, click the Others data type on the left column. Your iPhone data will be displayed in the right area. Mark everything you want to transfer to your iPad.
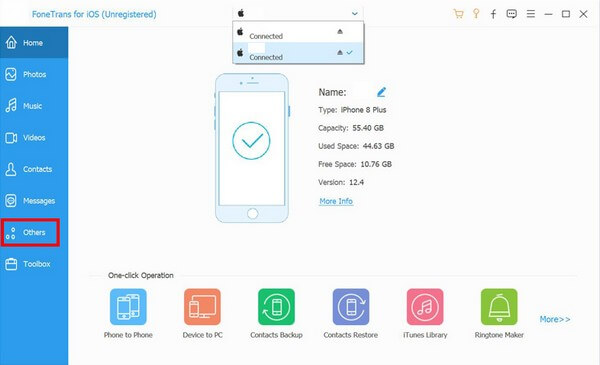
Step 4Once you have selected all your chosen data, click the iOS device icon on the upper portion of the interface. Then select your iPad from the connected devices to let the data move into it. The transfer time will depend on the size and number of data you transfer to the device. After that, you can finally enjoy them on your iPad.
Part 4. FAQs about How to Transfer Apps from iPhone to iPad
1. How to transfer apps from iPhone to iPhone without iCloud?
If you don't have an iCloud, you can also use the methods in this article for transferring apps from iPhone to iPad on transferring apps from iPhone to iPhone. Most of them only use the same steps, so you won't get lost in operating the methods. You can trust that you will be able to transfer your apps even without iCloud.
2. Why won't my apps transfer to my new iPad?
Some issues may have interrupted the apps from transferring. If you're using iCloud to transfer, this may be due to the lack of storage. Or a disruption may have caused your apps not to move to your iPad. Like a poor internet connection, unexpected shutdown due to low battery, and more. You can try checking these to see what went wrong.
That is all for transferring apps from your iPhone to your iPad. If you need to transfer more tools with various iOS devices, you can rely on FoneTrans for iOS anytime.
With FoneTrans for iOS, you will enjoy freedom to transfer your data from iPhone to computer. You can not only transfer iPhone text messages to computer, but also photos, videos and contacts can be moved to PC easily.
- Transfer photos, videos, contacts, WhatsApp, and more data with ease.
- Preview data before transferring.
- iPhone, iPad and iPod touch are available.