Transferring Playlists from iPhone to iTunes: 3 Best Proven Techniques
 Posted by Somei Liam / Feb 23, 2022 16:00
Listening to music has been part of people's daily lives for various reasons. We even have a playlist for our favorite songs. And one of the well-known media players that serve as a library, where we also play our music, is iTunes by Apple. However, if you have accidentally deleted your song playlist on iTunes yet, you still have them on your iPhone. Can you copy or transfer the playlist to iTunes? Definitely, yes. Now, you don't need to get panicked or worried, for here we will show you how to transfer playlist from iPhone to iTunes.

With FoneTrans for iOS, you will enjoy freedom to transfer your data from iPhone to computer. You can not only transfer iPhone text messages to computer, but also photos, videos and contacts can be moved to PC easily.
- Transfer photos, videos, contacts, WhatsApp, and more data with ease.
- Preview data before transferring.
- iPhone, iPad and iPod touch are available.

Guide List
1. Transfer Playlist from iPhone to iTunes via USB cable Manually
USB Cable is one of the most common yet helpful connectors today. One great example is that it bridges peripheral devices to computers. Mobile devices like iPhone are included in the list of peripheral devices. And so, with the help of a USB cable, you can connect your iPhone to a computer and assist you in transferring your files. More importantly, you can now transfer your playlist from iPhone to iTunes with it. Follow the given steps below.
Steps on How Transfer Playlist from iPhone to iTunes via USB Cable:
Step 1First of all, launch the iTunes app is installed on your computer. Then, connect your iPhone to the computer using a USB cable.
Step 2After that, on the main interface of iTunes, click the Apple Device icon. And select the playlist you wish to transfer or export to iTunes.
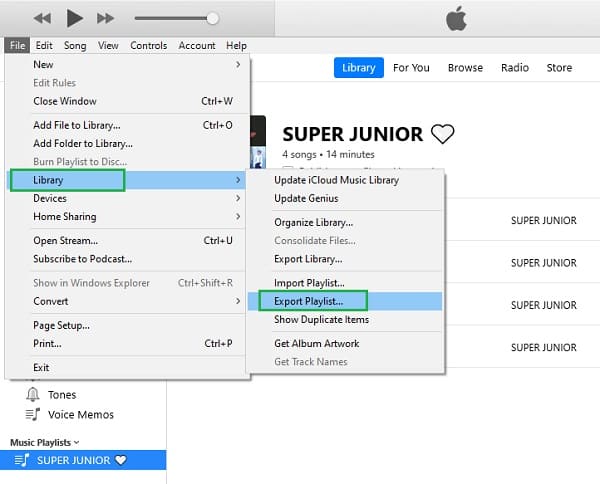
Step 3Then, click the File button on the menu bar, next Library, and choose the Export Playlist... on the drop-down menu. And save it as type XML File, then save or export it on your computer.
Step 4Next, back to the main interface, click the Songs option on the left pane under the Library.
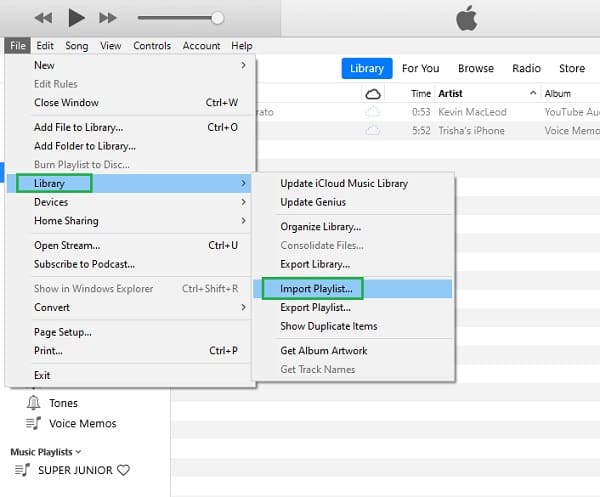
Step 5Finally, select File > Library > Import Playlist... and choose the XML file or the created text file. And that’s it!
Now, you have successfully added a playlist from your iPhone device to iTunes on computer by importing iPhone playlists with a USB cable. However, you may find lots of processes to be done before you can transfer your playlist finally.
Yet, in the following part of this post, we are glad to introduce to you one of the highly suggested tools today for transferring necessities.
2. Transfer Playlist from iPhone to iTunes with FoneTrans for iOS
FoneTrans for iOS is a perfect partner for your transferring needs. You have all the freedom to transfer your data and files such as messages, photos, videos, and more from your iPhone to the computer with it. Not just that, you can also transfer items that you purchased from iTunes Store or music from your Apple Music. But, can you also move or transfer the playlist from iPhone to iTunes using this program? Of course, yes. What’s more, is that you can move data files selectively. If that makes you excited, please check and follow the detailed steps below.
With FoneTrans for iOS, you will enjoy freedom to transfer your data from iPhone to computer. You can not only transfer iPhone text messages to computer, but also photos, videos and contacts can be moved to PC easily.
- Transfer photos, videos, contacts, WhatsApp, and more data with ease.
- Preview data before transferring.
- iPhone, iPad and iPod touch are available.
Steps on How to Transfer Playlist from iPhone to iTunes with FoneTrans for iOS:
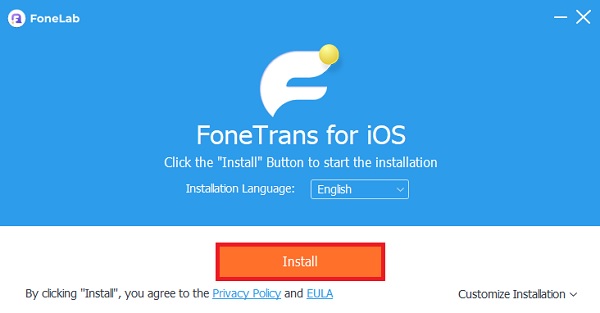
Step 1To begin with, download and install the FoneTrans for iOS on your computer. And it will launch immediately after the installation process.
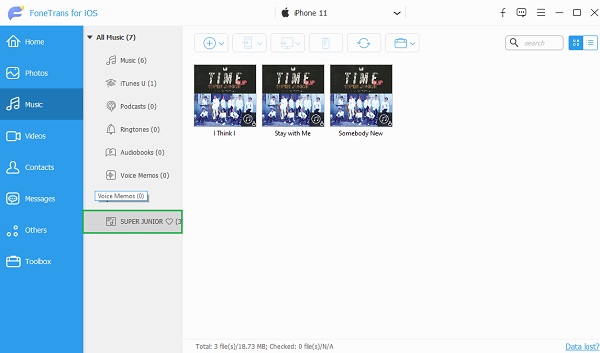
Step 2On the left pane of the main interface, click the Music option. Then, in the second left column, you will see all the music or songs on your iPhone and the playlists.
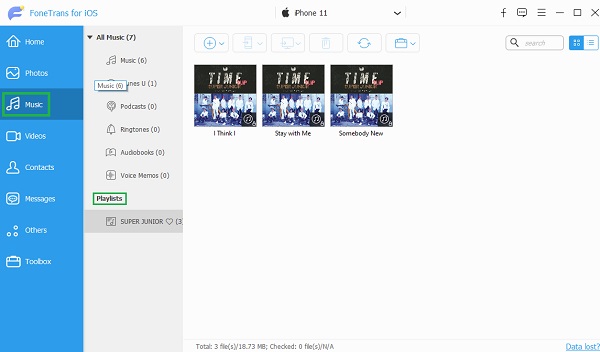
Step 3Next, click the playlists you want to transfer to iTunes under the Playlists section.
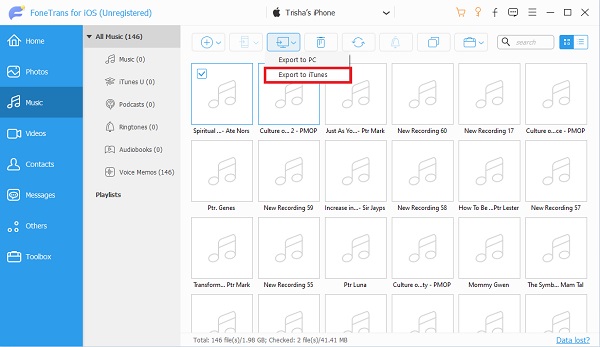
Step 4Then, right-click your chosen playlist. And on the drop-down menu, select and click the Export to iTunes. Finally, it will automatically start the exportation process.
By opening the folder, you can see and check the transferred playlist. And try playing the playlist on your iTunes app. That is how you can quickly export playlists from iPhone to iTunes even transfer music from iTunes to iPhone with FoneTrans for iOS. It is an easy-to-use, and comprehensive tool that makes your burden lighter and your problem vanish. Do not worry. Even if you are still a beginner, you can utilize this tool.
With FoneTrans for iOS, you will enjoy freedom to transfer your data from iPhone to computer. You can not only transfer iPhone text messages to computer, but also photos, videos and contacts can be moved to PC easily.
- Transfer photos, videos, contacts, WhatsApp, and more data with ease.
- Preview data before transferring.
- iPhone, iPad and iPod touch are available.
3. Transfer Playlist from iPhone to iTunes via Sync Library
Another way to transfer your playlist from iPhone to iTunes is by turning on the Sync Library. When Sync Library is turned on, it will be easier to access it on your iTunes app when connecting your device to the computer. Although it is toggled on by default, you can turn it back on on the Settings when you turn it off. You can follow the steps below.
How to Transfer Playlist from iPhone to iTunes via Sync Library:
Step 1Firstly, go to the Settings app on your iPhone.
Step 2Next, search and scroll down until you see the Music option. Then tap it.
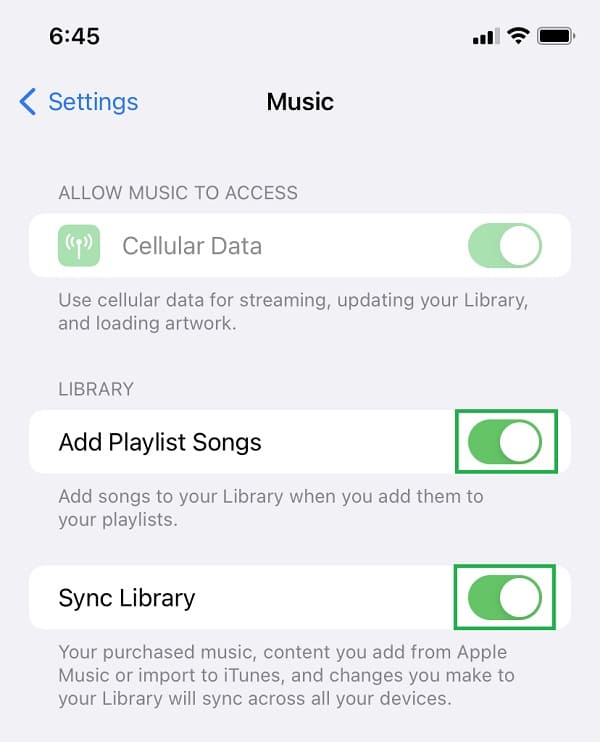
Step 3After that, toggle on the Sync Library.
Step 4Finally, you will see Add Playlist Songs under the Library, toggle it on to sync, including your playlists.
Now, if you connect your phone to the computer and launch iTunes, the playlist will be automatically synced. But, unlike FoneTrans for iOS, you cannot selectively transfer your playlist by turning on the Sync Library.
4. FAQs About Transfer Playlist from iPhone to iTunes
With FoneTrans for iOS, you will enjoy freedom to transfer your data from iPhone to computer. You can not only transfer iPhone text messages to computer, but also photos, videos and contacts can be moved to PC easily.
- Transfer photos, videos, contacts, WhatsApp, and more data with ease.
- Preview data before transferring.
- iPhone, iPad and iPod touch are available.
1. How to export iTunes playlist to USB?
To export the iTunes playlist to USB, launch iTunes. Then, select the playlist you want to copy or export. Then, right-click and select the Copy. Lastly, paste it on your USB Drive. And that's it!
2. After transferring a playlist from iPhone to iTunes, does the metadata included?
The good thing is yes. In that metadata, you'll see the Artist, Album name, and Genre, which is a piece of helpful information to know about a song.
All in all, you have learned how to transfer playlists from iPhone to iTunes. As you can see, the process is simple yet effective and works even at this time. In addition, it could also be handled even if you're not pro. Still, we highly recommend the FoneTrans for iOS to transfer your playlist or other data to iTunes or computer. With it as well, you can do the transferring, moving, or exporting files easily and quickly on whatever data types you wish to transfer. Indeed a dependable program you'll ever use. Hence, it will be your choice on what method to use.