- 1. How to Transfer Photos from Android to PC via FoneLab HyperTrans
- 2. How to Transfer Photos from Android to PC via USB
- 3. How to Transfer Photos from Android to PC via Cloud Service
- 4. How to Transfer Photos from Android to PC via Bluetooth
- 5. How to Transfer Photos from Android to PC Using Third-Party Application
- 6. FAQs about Transfer Pictures from Android to PC
Transfer Data From iPhone, Android, iOS, Computer to Anywhere without Any Loss.
- Transfer Data from One Micro SD Card to Another Android
- How to Transfer Pictures from One Phone to Another
- How to Transfer Photos from Old LG Phone to Computer
- How to Transfer Photos from an Old Samsung to Another Samsung
- Transfer Contacts from Samsung to iPhone
- Transfer Data from LG to Samsung
- Transfer Data from Old Tablet to New
- Transfer Files from Android to Android
- Transfer iCloud Photos to Android
- Transfer iPhone Notes to Android
- Transfer iTunes Music to Android
Top 5 Methods on How to Transfer Photos from Android to PC
 Posted by Lisa Ou / Nov 01, 2021 09:00
 Perhaps you want to backup, share, or simply move photos from your Android phone to a computer device. There are moments when you would want or be obliged to transfer pictures from Android to PC, perhaps for personal reasons like you want to keep all your memories together and organized, share them among your friends or relatives, free up memory space on your phone, or others. You may also have to do it for professional purposes like doing school or work-related projects. Nonetheless, you can do so and it is quick and easy to do.
Have you asked yourself, how do I transfer photos from Android to PC? Continue reading and learn about the various methods and tools you can choose from.


Guide List
- 1. How to Transfer Photos from Android to PC via FoneLab HyperTrans
- 2. How to Transfer Photos from Android to PC via USB
- 3. How to Transfer Photos from Android to PC via Cloud Service
- 4. How to Transfer Photos from Android to PC via Bluetooth
- 5. How to Transfer Photos from Android to PC Using Third-Party Application
- 6. FAQs about Transfer Pictures from Android to PC
Transfer Data From iPhone, Android, iOS, Computer to Anywhere without Any Loss.
- Move Files between iPhone, iPad, iPod touch and Android.
- Import Files from iOS to iOS or from Android to Android.
- Move Files from iPhone/iPad/iPod/Android to Computer.
- Save Files from Computer to iPhone/iPad/iPod/Android.
Part 1: How to Transfer Photos from Android to PC via FoneLab HyperTrans
FoneLab HyperTrans is a sophisticated and versatile computer tool for transferring photographs, videos, music, messages, contacts, and nearly any other sort of data from Android. This program is the quickest way to transfer photos from Android to PC, another Android device, as well as iPhone and vice versa.
Steps to Transfer Pictures from Android to PC with FoneLab HyperTrans:
Step 1To begin, download and install FoneLab HyperTrans on your computer. Open it afterward.
Step 2At the same time, connect your Android phone to the PC using a USB cable. On the other hand, allow File Transfer on your phone.

Step 3Next, go to the left side of the panel and simply pick Photos, then mark all the photos you want to transfer in the right panel where previews are located.
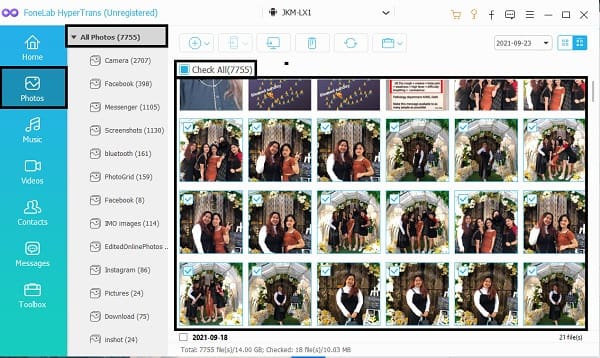
Step 4Lastly, when you've marked all of the photos you want to transfer, click the Computer icon to export them to your PC. Set the target folder after that, and the transfer operation will start.

Part 2. How to Transfer Photos from Android to PC via USB
Alternatively, Android also allows users to transfer files straight to their PC with the use of a USB cable as well. This is among the most straightforward methods for transferring Android files.
Steps to Transfer Pictures from Android to PC with USB:
Step 1Firstly, use USB cables to connect your Android phone to your PC. Permit the transfer of images on your phone by simply allowing Transfer File or Transfer Photos.
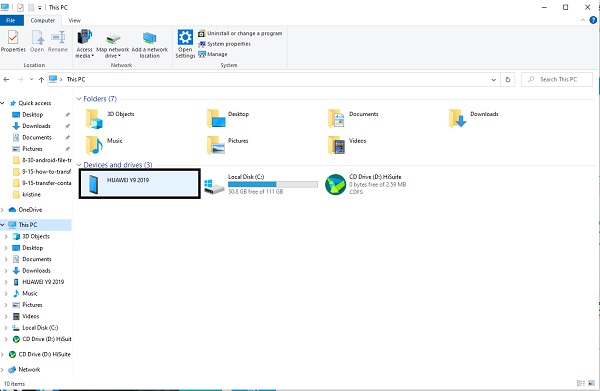
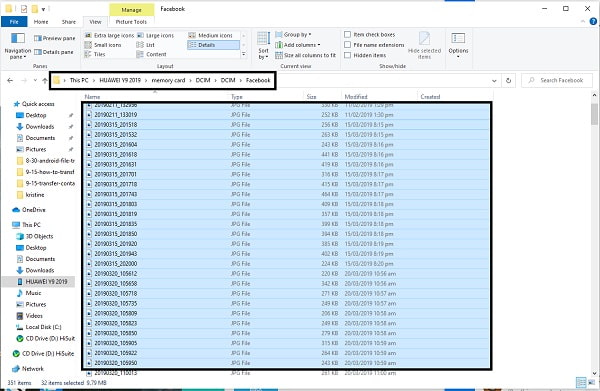
Step 2Secondly, navigate and open the Android device from the Computer panel. Then go through your images and choose all of the ones you would like to transfer. Hold down the Ctrl key when clicking numerous photos to manually choose them. To select all, either pick the folder or open the folder and simultaneously press Ctrl + A.
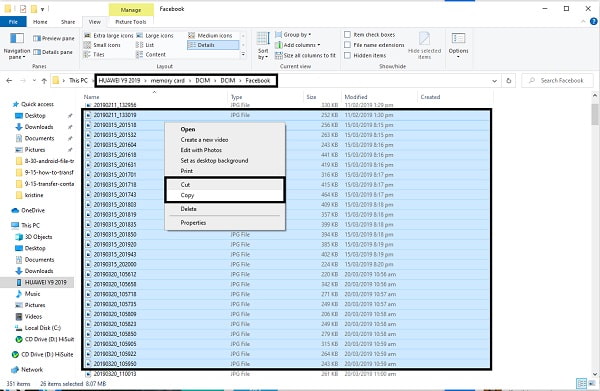
Step 3Thirdly, once you have marked or picked the photos you want to transfer, copy or cut (move) them. By right-clicking your mouse, you can select cut or copy. Yet another method is to cut or copy with Ctrl + X or Ctrl + C respectively.
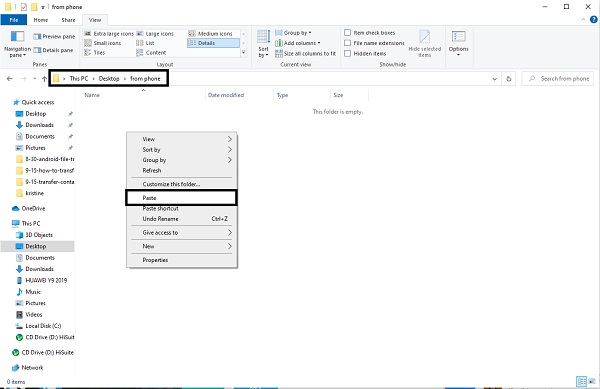
Step 4Now that you've picked the photos you want to transfer, find and open the destination folder for your photos. Once the location where you want to save the photos is open, paste the photos there. You can paste by pressing Ctrl + V or right-clicking your mouse and selecting Paste. The photographs will begin to transfer after that.
Step 5Lastly, Eject the Android phone from the PC once the transfer is complete.
However, if you want to transfer pics from Android to PC wirelessly, follow the alternative solutions.
Part 3. How to Transfer Photos from Android to PC via Cloud Service
You may also share images from your phone with Google Drive and then access them from any of your devices, your PC for instance. Google Drive is cloud-based storage, which means your data is stored on the Internet by a cloud computing provider. On that note, if you want to sync images along with other Android files between your devices, this method is really useful.
Steps to Transfer Pictures from Android to PC with Cloud Service:
On your Android Device:
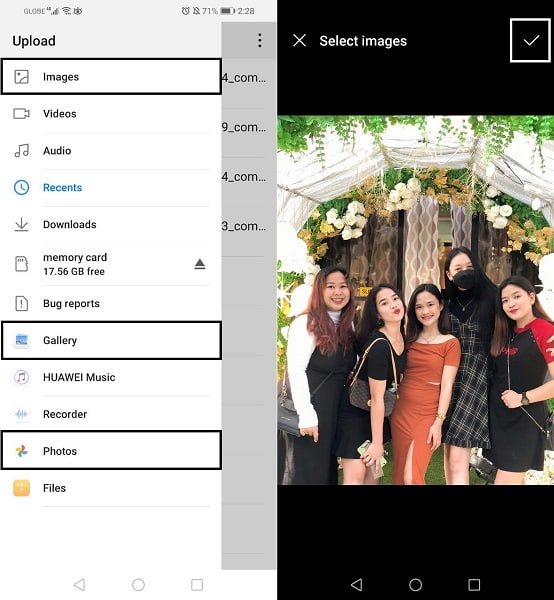
Step 1To begin, open the Google Drive app on your phone. Tap the Plus icon then select Upload.
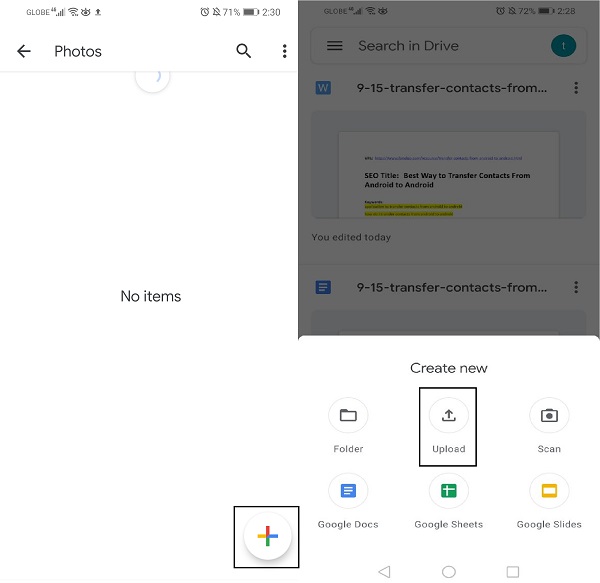
Step 2Browse and tick the photos you want to transfer. Your photos will be uploaded automatically.
On your PC:
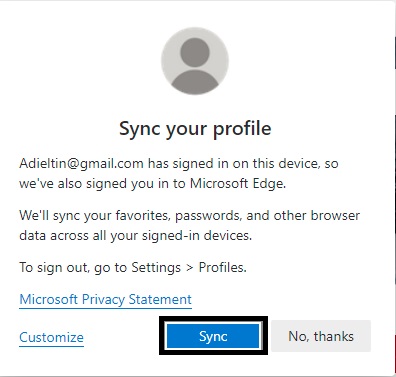
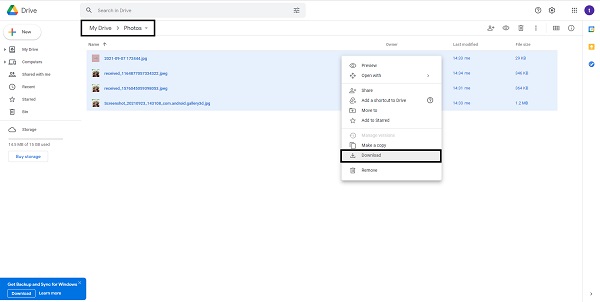
Step 1Open your internet browser and go to Google Drive. Make sure you are logged in with the same Google Drive account with your Android phone. Click Sync.
Step 2Lastly, go to the folder where your images were saved. Select Download with the use of right-clicking on your PC. These images will be saved to your PC’s local storage.
Transfer Data From iPhone, Android, iOS, Computer to Anywhere without Any Loss.
- Move Files between iPhone, iPad, iPod touch and Android.
- Import Files from iOS to iOS or from Android to Android.
- Move Files from iPhone/iPad/iPod/Android to Computer.
- Save Files from Computer to iPhone/iPad/iPod/Android.
Part 4. How to Transfer Photos from Android to PC via Bluetooth
Bluetooth is a handy way and classic method of transferring images from an Android phone to a PC wirelessly.
Steps to Transfer Pictures from Android to PC with Bluetooth:
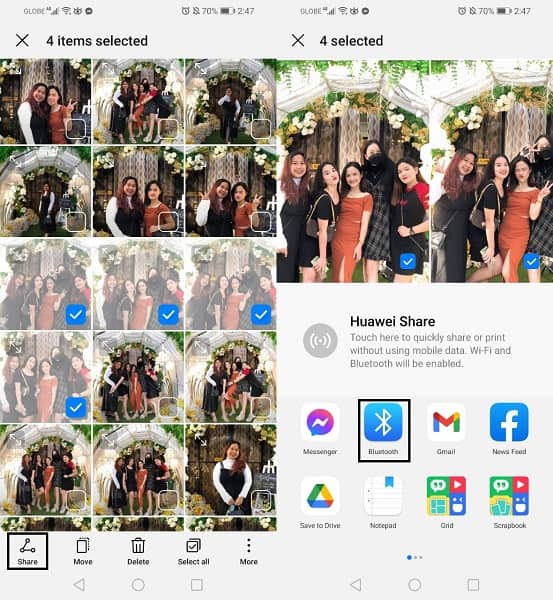
Step 1Begin by opening the Gallery app on your Android phone and picking the photos to be transferred.
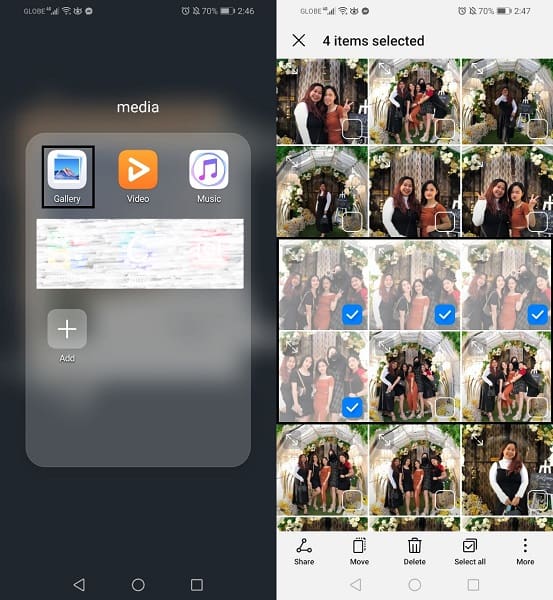
Step 2Next, tap Share then choose Bluetooth. Make sure Bluetooth is enabled and paired on both devices.
Step 3In the meantime, click Receive Files on your computer. After that, the procedure will then commence.
Part 5. How to Transfer Photos from Android to PC Using Third-Party Application
The AirDroid is a mobile application that allows you to wirelessly transfer many types of files between your PC and mobile device.This is how to transfer photos from Android to PC using WIFI, specifically through an app.
Steps to Transfer Pictures from Android to PC with AirDroid:
Step 1Download and install AirDroid on your Android phone. Sign up for an account or register your Android. Also, make sure both devices are connected to the same WiFi network.
Step 2Once you have received two web addresses, access the second one on your computer. On your phone, press the Accept button.
Step 3On your PC, select the folder or photographs you want to transfer. Drag and drop the files to your computer.
Part 6. FAQs about Transfer Pictures from Android to PC
How do I permanently store photos?
You can store your photos through: Backup on a hard drive, images burned on CDs/DVDs, online storage or printed photos on an album.
Why won't my phone connect to my PC?
There are various reasons why your Android can’t connect to a PC with the use of USB. Here are some of the most common reasons why.
- Cable is broken.
- Phone is on charge mode not on Transfer File mode.
- Outdated Operating System.
To conclude, it is easy and requires minimal effort to transfer pictures from Android to PC. Moreover, FoneLab HyperTrans is the most recommended tool, as it allows you to transfer not only photos but all Android data as well. With this, transferring data from Android or iPhone to a PC is much faster and effective. Nevertheless, transfer pictures from Android to PC now and utilize them as much as you intend to.