Transfer Data From iPhone, Android, iOS, Computer to Anywhere without Any Loss.
- Transfer Data from One Micro SD Card to Another Android
- How to Transfer Pictures from One Phone to Another
- How to Transfer Photos from Old LG Phone to Computer
- How to Transfer Photos from an Old Samsung to Another Samsung
- Transfer Contacts from Samsung to iPhone
- Transfer Data from LG to Samsung
- Transfer Data from Old Tablet to New
- Transfer Files from Android to Android
- Transfer iCloud Photos to Android
- Transfer iPhone Notes to Android
- Transfer iTunes Music to Android
How to Transfer Photos to SD Card on Samsung in Most Prominent Ways
 Posted by Lisa Ou / Jan 17, 2022 09:00
 Are your photos consuming the majority of your Samsung device's memory space? Or perhaps you are switching a device, and you want to plan to use the same SD card, plus you want to bring your photos on your new device. In that case, transferring photos from Samsung device's internal storage onto SD card is the best thing to do. However, the first thing you must consider is, do you know how to transfer photos from a Samsung tablet to micro SD card? If not, then this post will show you how. If yes, it is time to learn the best and most efficient way.

The importance of having the best solution at hand will affect the whole transferring process and outcome. Nonetheless, you can stop the search because this is already the best you have reached. Discover now the 3 straightforward methods that you cannot miss.

Guide List
Transfer Data From iPhone, Android, iOS, Computer to Anywhere without Any Loss.
- Move Files between iPhone, iPad, iPod touch and Android.
- Import Files from iOS to iOS or from Android to Android.
- Move Files from iPhone/iPad/iPod/Android to Computer.
- Save Files from Computer to iPhone/iPad/iPod/Android.
Part 1. How to Transfer Photos to SD Card on Samsung with Samsung My Files App
Samsung's My Files app is the default built-in data manager for all Samsung devices. Through the proper knowledge and Samsung's high technology, you can transfer photos from internal storage to an SD card on your device directly. The best thing about this method is that you will not need anything besides your Samsung device. With that, it is the first method you can utilize.
Steps on How to Transfer Photos to SD Card on Samsung with Samsung My Files App:
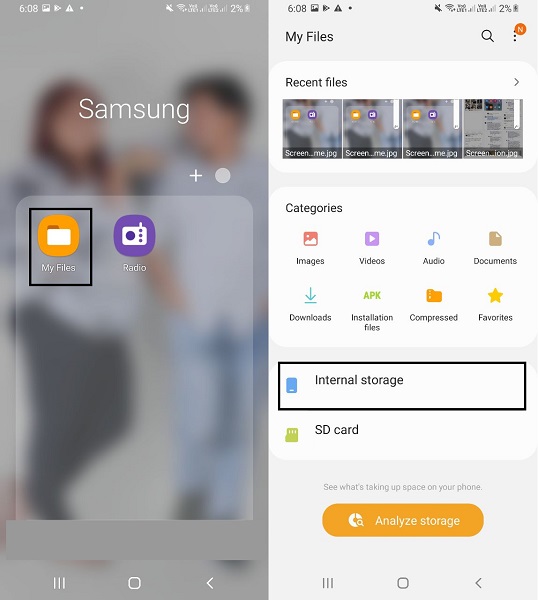
Step 1Begin by opening the My Files app on your Samsung device and selecting Internal Storage.
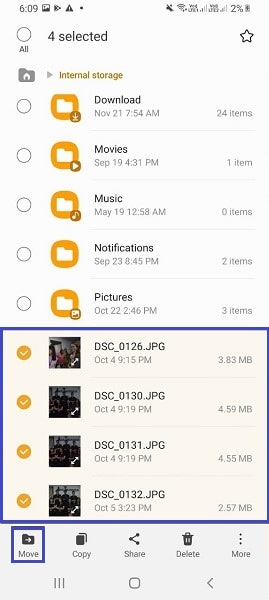
Step 2Eventually, open DCIM or the folder containing the photos you want to transfer. After that, select each photo intended to be transferred and tap Copy or Move.
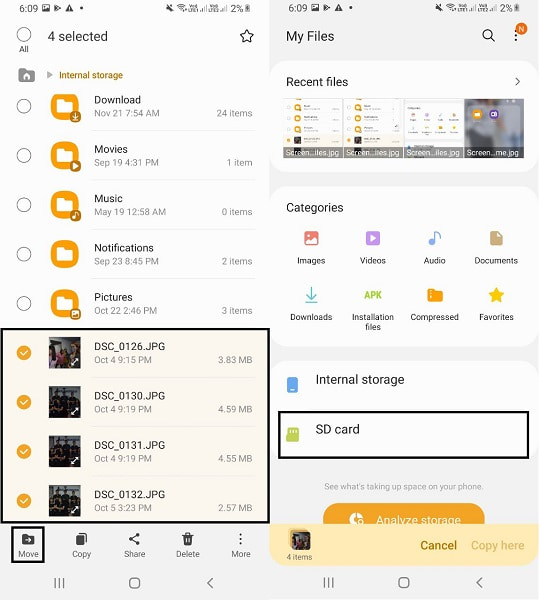
Step 3Right away, your screen will return to the main menu of the My Files app. From there, select SD Card and navigate to the folder in which you want to save your photos. Once the destination folder is opened, tap Copy Here or Move Here.
This method will most likely be successful and effective. Yet, if this method seems a little unconventional for you, and you might prefer transferring on a computer, that is not a problem at all. Your wish is our command. Keep reading to see a computer-based solution just as you want.
Transfer Data From iPhone, Android, iOS, Computer to Anywhere without Any Loss.
- Move Files between iPhone, iPad, iPod touch and Android.
- Import Files from iOS to iOS or from Android to Android.
- Move Files from iPhone/iPad/iPod/Android to Computer.
- Save Files from Computer to iPhone/iPad/iPod/Android.
Part 2. How to Transfer Photos to SD Card on Samsung with File Explorer
File Explorer is a default file manager application for Windows computers that you can use at your disposal. You can use File Explorer to transfer data between Samsung and other devices and between computers. This method is also a direct way of transferring photos from Samsung to an SD card, and a quick is a simple procedure.
Steps on How to Transfer Photos to SD Card on Samsung with File Explorer:
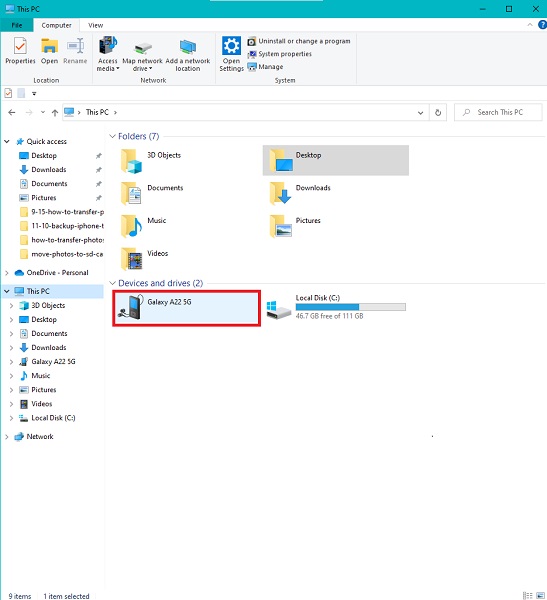
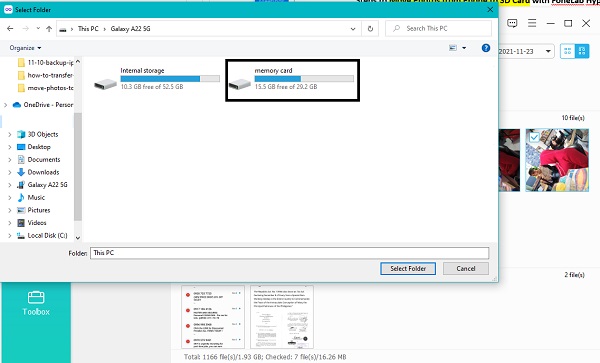
Step 1Firstly, connect your Samsung device to your computer using a USB cord. Straightaway, open File Explorer and navigate to your Samsung phone, and open Internal Storage.
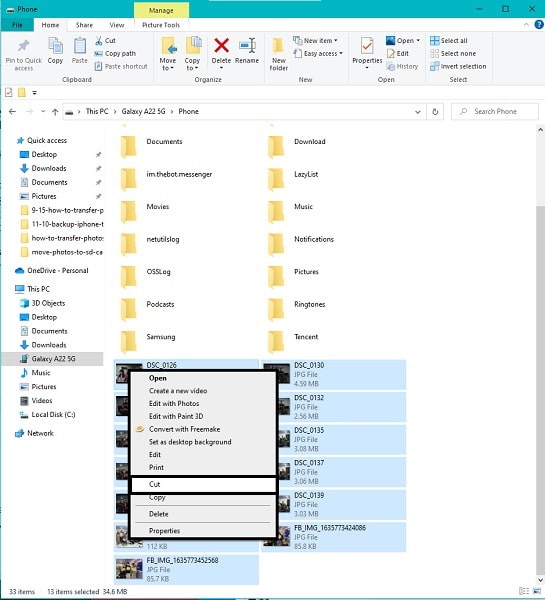
Step 2Second, open DCIM or the folder with the photos to be transferred. Subsequently, press the Ctrl key while selectively choosing photos or press Ctrl + A to select all. After selecting, you can now copy or move your photos by right-clicking your mouse or pressing Ctrl + C or Ctrl + X, respectively.
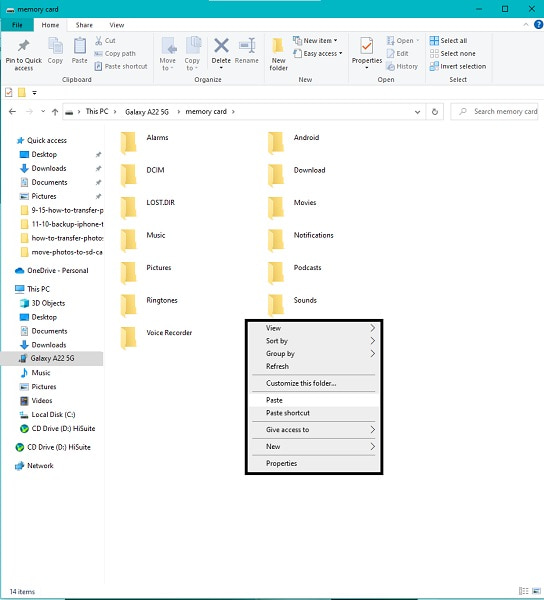
Step 3Thirdly, return to your Samsung phone's main menu and, this time, select SD Card. From there, set the destination folder of your photos, then paste them. To do so, right-click your mouse and select paste or press the Ctrl + V keys simultaneously.
Note that you must tap Allow when a notification pops up on your Samsung screen to permit your computer to access your device's data. Moreover, keep your Samsung devices connected to your computer for the whole transfer duration. Otherwise, the transfer will be interrupted, and a stressful error and repeated process.
On that note, you want the best and most effective solution from the very beginning. Thus it is recommended to use a third-party app that will never lead you to disappointments or failed transfers.
Part 3. How to Transfer Photos to SD Card on Samsung with FoneLab HyperTrans
FoneLab HyperTrans is an excellent tool for viewing, storing, managing, and transferring media files, including HEIC, PNG, JPG, and other formats. It is a transfer tool meant for Windows, iOS, and Android, which you can use anytime, anywhere. The greatest thing about this tool is it makes transferring a lot easier, more effective, faster, and convenient. You don't have to wait long, no matter how much data you transfer. You can also transfer data selectively on top of having a preview of all your data. It is indeed a great tool.
Steps on How to Transfer Photos to SD Card on Samsung with FoneLab HyperTrans:
Transfer Data From iPhone, Android, iOS, Computer to Anywhere without Any Loss.
- Move Files between iPhone, iPad, iPod touch and Android.
- Import Files from iOS to iOS or from Android to Android.
- Move Files from iPhone/iPad/iPod/Android to Computer.
- Save Files from Computer to iPhone/iPad/iPod/Android.
Step 1To begin, install and run FoneLab HyperTrans on your computer. Meanwhile, connect your Samsung Galaxy device to your computer using a USB cable. Follow the on-screen procedure on successfully connecting your device to the program.
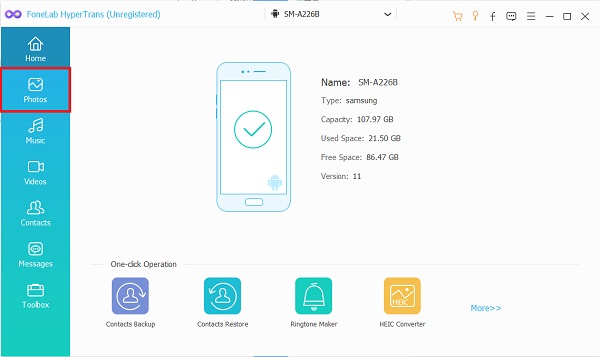
Step 2Without further ado, click Photos from the left sidebar and mark all the photos that you intend to transfer your SD Card, and click the Export icon right away.
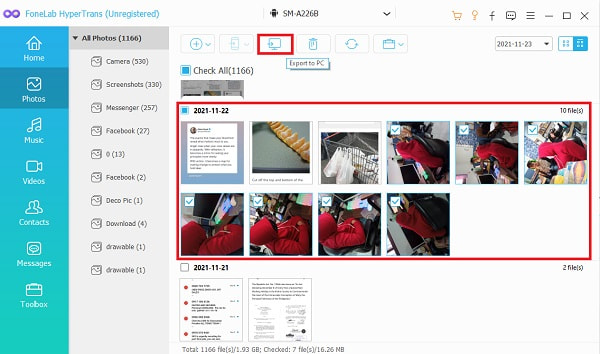
Step 3Lastly, set your SD Card as the destination folder of the photos.
Additionally, it rests assured that there will be no quality depletion through this method. A special note to make you more confident in FoneLab HyperTrans.
Transfer Data From iPhone, Android, iOS, Computer to Anywhere without Any Loss.
- Move Files between iPhone, iPad, iPod touch and Android.
- Import Files from iOS to iOS or from Android to Android.
- Move Files from iPhone/iPad/iPod/Android to Computer.
- Save Files from Computer to iPhone/iPad/iPod/Android.
Part 4: FAQs About How to Transfer Photos to SD Card on Samsung
How do I make SD card default storage on Samsung tablets?
To switch the default memory storage on a Samsung tablet, you have to go to the Settings and then head to Storage. From there, select SD Card and tap the ellipsis menu. Subsequently, select Format as Internal, then tap Erase and Format. After that, restart your Samsung device, and your SD card is finally the default storage on your Samsung.
How big of an SD card can I put in a Samsung Galaxy Tab A?
Technically, Samsung Galaxy devices work with any micro SD memory cards, and they support up to 256 GB SD cards. In short, you will not have problems having a considerable memory-spaced SD card on your Samsung Galaxy tab A or other Samsung Galaxy devices.
How do I free up space on my Android tablet without deleting anything?
Clearing your device's cached data from all apps is the most effective way of reducing memory space consumption without deleting any data on all devices. Clearing cached data removes information on each app and website that is primarily unnecessary. Hence, this must be effective for you, too, so try to minimize your data consumption. To clear cached data on a Samsung device, go to the Settings app and head to Applications. From there, tap Application Manager, then select an app that you want to free up space. After that, tap Storage, then tap Clear Cache. If you do this with all your apps, your device will undoubtedly free up much space.
All in all, transferring photos from Samsung’s internal storage to an SD card is an effortless task to do. No need to complicate the situation, nor does it require professional skills. All you need is the right tool and the right solutions at hand. Likewise, rest assured that the methods above are simplified and guaranteed effective at all costs. Above all, FoneLab HyperTrans is the most recommended way to go because it offers the best effectiveness, efficiency, and convenience. Imagine transferring your photos with a few clicks that are not prone to failure. In addition to that, the fast loading technology and preview feature make your FoneLab HyperTrans experience even more remarkable. Transfer now and minimize your Samsung device's memory consumption.