- Empty Trash
- Delete Mail App
- Clear Cache on Mac
- Get More Storage on Mac
- Make Chrome Use Less RAM
- Where is Disk Utility on Mac
- Check History on Mac
- Control + Alt + Delete on Mac
- Check Memory on Mac
- Check History on Mac
- Delete An App on Mac
- Clear Cache Chrome on Mac
- Check Storage on Mac
- Clear Browser Cache on Mac
- Delete Favorite on Mac
- Check RAM on Mac
- Delete Browsing History on Mac
Reliable Guide to Zip Folder on Mac with Easy Methods
 Updated by Lisa Ou / Oct 23, 2023 09:15
Greetings! I want to back up my files, but I no longer have storage on my Mac. I need more space to download new data, but the lack of storage prevents me from doing so. Thus, one of my friends advised me to zip a folder on Mac, which would reduce my file folder size and give me storage. But the thing is, I have no idea how, so please help. Thanks for the response!
Does your Mac contain a folder with too much file size? Well, don't worry, as we have got good news for you! Solving such an issue on your Mac is hassle-free with the reliable strategies you will encounter in the article below. You can quickly reduce your file folders' size by compressing or zipping them on the Mac.
You will enjoy several benefits, such as freeing up space, sending folders faster, backing them up better, and more. But after you zip folders, the time will come when you will need to unzip them again. Hence, we also added a special program in the later parts to help you with the processes later.


Guide List
Part 1. How to Zip A Folder on Mac
From the methods available online, we picked out the most efficient ones and listed them below to help you zip folders on your Mac successfully. They also have the highest success rate, so we guarantee your files will be zipped efficiently as long as the instructions are followed correctly.

With FoneLab Mac Sweep, you will Clear system, email, photo, iTunes junk files to free up space on Mac.
- Manage similar photos and dulplicate files.
- Show you the detailed status of Mac with ease.
- Empty trash bin to get more storage.
Option 1. Zip A Folder on Mac on Finder
The most hassle-free technique to zip a folder is on Finder. If you select and view the options to navigate for your file, you will see the compress tab, which allows you to zip or compress the file or folder you have selected. You only have to click a few selections to finish the process, so you can trust your folder to be zipped within minutes or even seconds if you are attentive and follow the directions smoothly.
Bear in mind the worry-free procedure below to understand how to create a zip folder on Mac on Finder:
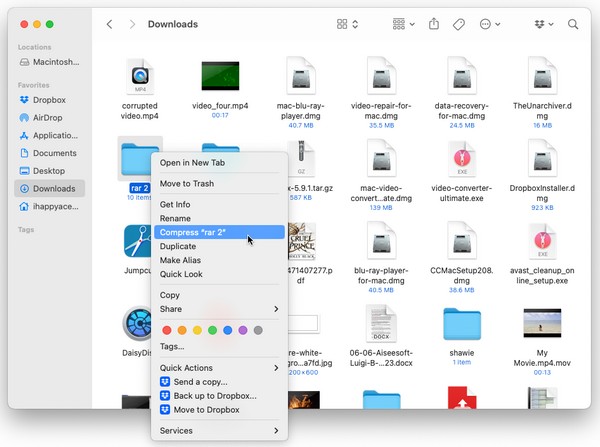
Step 1View the Finder interface on your Mac desktop by pressing its icon on the Dock. Some of your files will automatically display, but if you don’t see the items you wish to zip, open the other folders and locate your folder.
Step 2Once the folder is presented on your Finder screen, right-click it for the shortcut menu to be put on view. Among the options listed on it is the Compress tab. Click it to zip the folder, and its extension will change to .zip.
Option 2. Zip A Folder on Mac with Archive Utility
Meanwhile, Apple also offers Archive Utility that specializes in compressing and decompressing your chosen files or folders. However, the app won’t be as easy to find as it’s hidden in an obscure folder. But once you find it, the zipping process will be as easy as possible since you only need multiple clicks afterward. Besides, a shortcut is available to find Archive Utility faster on your Mac.
Be guided by the undemanding directions underneath to learn how to zip a folder Mac with Archive Utility:
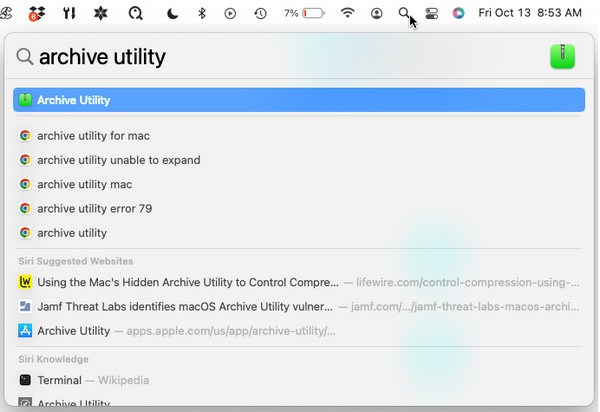
Step 1The Archive Utility app cannot be easily found, so use the spotlight search icon on your desktop’s top right section. Then, type and enter Archive Utility once it shows up on the results list.
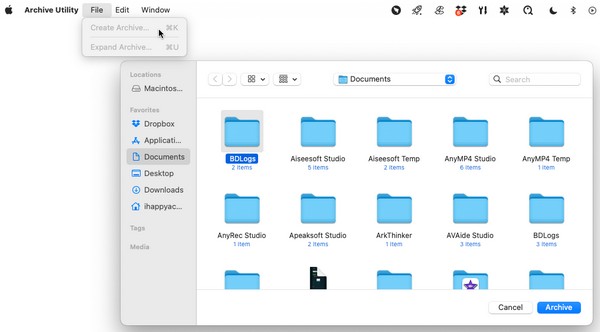
Step 2Once you see the Archive Utility tab on the topmost left of the desktop, hit the File button and choose Create Archive from the selections. A window containing your folders will then appear. Click the folder you will zip, then click Archive to finish.
Part 2. How to Unzip A Folder on Mac
Zipping a folder is one thing, and unzipping it is another. You may have zipped your folders now due to a certain reason, but there will always come a time when you need to view your folders again. Keeping them zipped will not let you access them; thus, you must also learn to unzip them using a tool like FoneLab Mac Sweep. This program is a third-party tool with several functions, including decompressing or unzipping files and folders.
With FoneLab Mac Sweep, you will Clear system, email, photo, iTunes junk files to free up space on Mac.
- Manage similar photos and dulplicate files.
- Show you the detailed status of Mac with ease.
- Empty trash bin to get more storage.
Underneath are the sample instructions for unzipping a folder after the Mac zip folder process with FoneLab Mac Sweep:
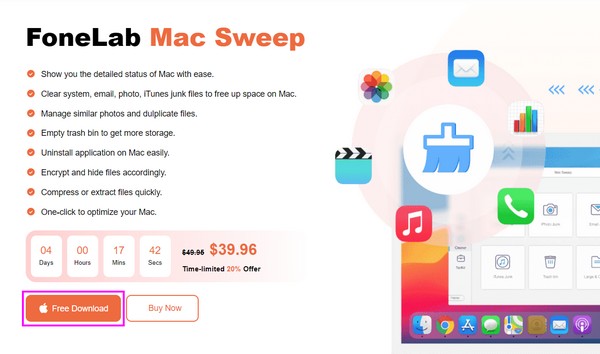
Step 1Step into the FoneLab Mac Sweep site using one of your browsers, and once you have a sight of the Free Download tab, click it. It will help you save the program installer, and then you can explore the descriptions on the page while the download is ongoing. When done, get it into the Applications folder and run the tool on your Mac.
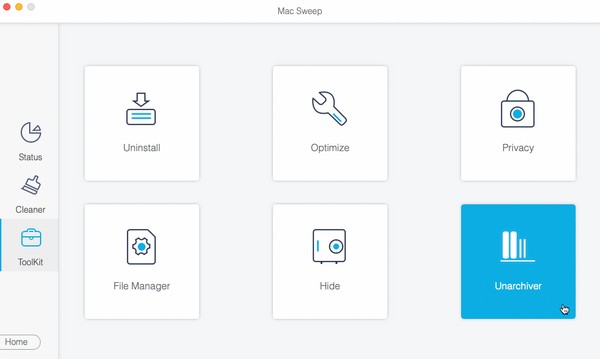
Step 2The first button you must click once you’re on the primary interface is the ToolKit box. It will show you the helpful functions on the following screen, including the Unarchiver, so hit it to move ahead on the main decompression feature.
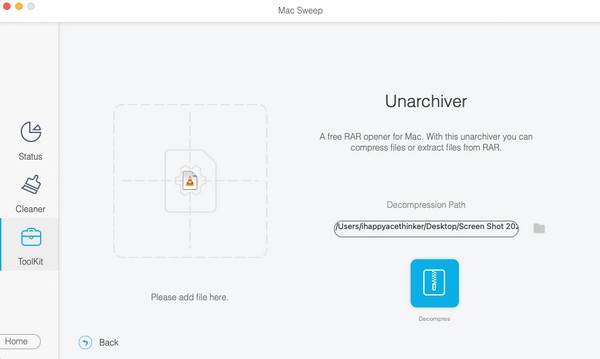
Step 3Inside the box on the interface’s left, drag the folder or file you desire to unzip or uncompress. After that, hit the Decompress button on the right to unzip your chosen folder.
Part 3. How to Clear Space on Mac with FoneLab Mac Sweep
Since you now have the FoneLab Mac Sweep on your Mac, you might as well try its other features, especially the Cleaner. This tool lets you quickly clear unneeded files on your Mac for more storage space. It supports various data deletions, such as system junk, iTunes junk, iPhoto junk, large and old files, and more. Aside from that, you can freely check your Mac storage condition by accessing the tool’s Status section.
With FoneLab Mac Sweep, you will Clear system, email, photo, iTunes junk files to free up space on Mac.
- Manage similar photos and dulplicate files.
- Show you the detailed status of Mac with ease.
- Empty trash bin to get more storage.
Refer to the safe process below as a pattern of how to clear data on Mac with FoneLab Mac Sweep:
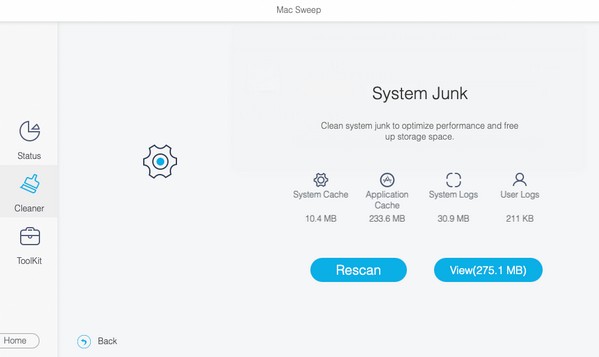
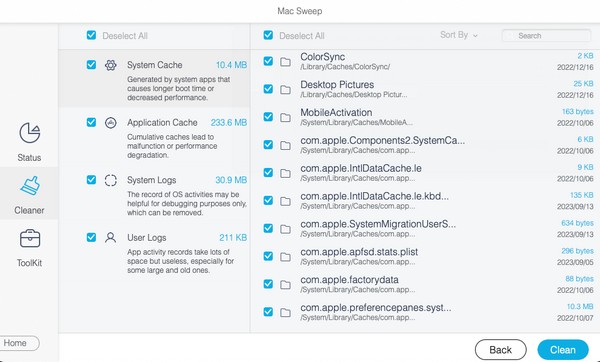
Step 1Reopen FoneLab Mac Sweep to view its prime interface again and select the Cleaner tab. As mentioned, this tool has various data deletion options, which will be displayed on the following interface. Click the data or junk you wish to clear, then hit Scan. Let the scanning process finish before you click View to proceed to the next screen.
Step 2Check the items you will delete once your chosen data type's content is shown. The file categories are on the left, so check them for a faster selection process. On the other hand, the individual or specific items will be on the right. Once chosen, hit the Clean tab beneath the interface content to clear your data and obtain more storage.
Part 4. FAQs about How to Zip A Folder on Mac
1. How do I attach a zip folder to an email on my Mac?
If you have zipped a folder on your Mac, you can attach them to an email like you are attaching the regular files. Simply open the folder when the zip folder is stored, then drag it into your email. After that, enter the recipient, and you may also add a subject before hitting the send icon on the Mail interface.
2. Can my Mac handle zip files?
Yes, it can. Zip files are universal data, so whether your computer is running macOS or Windows, it will be able to handle them with no problem.
We hope you can trust more of our method suggestions for Mac concerns by visiting the FoneLab Mac Sweep site. Explore it, and you'll see more solutions like the ones above.
With FoneLab Mac Sweep, you will Clear system, email, photo, iTunes junk files to free up space on Mac.
- Manage similar photos and dulplicate files.
- Show you the detailed status of Mac with ease.
- Empty trash bin to get more storage.