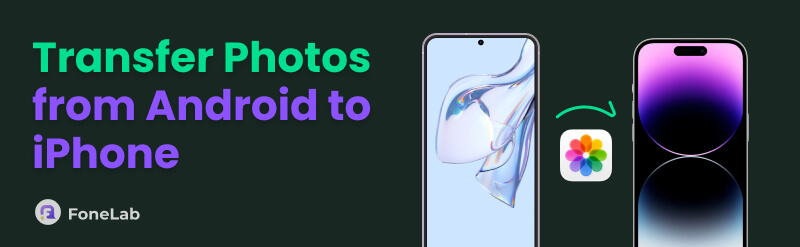
- Part 1: Transfer Photos from Android to iPhone through USB & Lightning Cables
- Part 2: Transfer Photos from Android to iPhone with FoneLab HyperTrans
- Part 3: Transfer Photos from Android to iPhone by Move to iOS
- Part 4: Transfer Photos from Android to iPhone Using iCloud Photos
- Part 5: Transfer Photos from Android to iPhone via Google Photos
- Part 6: FAQs about How to Transfer Photos from Android to iPhone
Transfer Data From iPhone, Android, iOS, Computer to Anywhere without Any Loss.
- Transfer Data from One Micro SD Card to Another Android
- How to Transfer Pictures from One Phone to Another
- How to Transfer Photos from Old LG Phone to Computer
- How to Transfer Photos from an Old Samsung to Another Samsung
- Transfer Contacts from Samsung to iPhone
- Transfer Data from LG to Samsung
- Transfer Data from Old Tablet to New
- Transfer Files from Android to Android
- Transfer iCloud Photos to Android
- Transfer iPhone Notes to Android
- Transfer iTunes Music to Android
Remarkable Ways to Transfer Photos from Android to iPhone
 Updated by
 Do you have to transfer pictures from Android to iPhone? If so, it’s completely understandable to be confused about which method to perform. As you may know, the Apple ecosystem prevents various processes on the iPhone that relate to other devices with operating systems. Among them is data transfer; thus, you may have difficulty finding the proper method to move Android files to your iPhone.
Fortunately, many workarounds are available, so even if there are no official convenient strategies, we guarantee you will still successfully transfer your chosen photos from your Android to your iPhone. Browse the post below, and the information and guidelines we provided on each method will help you complete the transfer processes between Android and iPhone without a problem.

Guide List
- Part 1: Transfer Photos from Android to iPhone through USB & Lightning Cables
- Part 2: Transfer Photos from Android to iPhone with FoneLab HyperTrans
- Part 3: Transfer Photos from Android to iPhone by Move to iOS
- Part 4: Transfer Photos from Android to iPhone Using iCloud Photos
- Part 5: Transfer Photos from Android to iPhone via Google Photos
- Part 6: FAQs about How to Transfer Photos from Android to iPhone
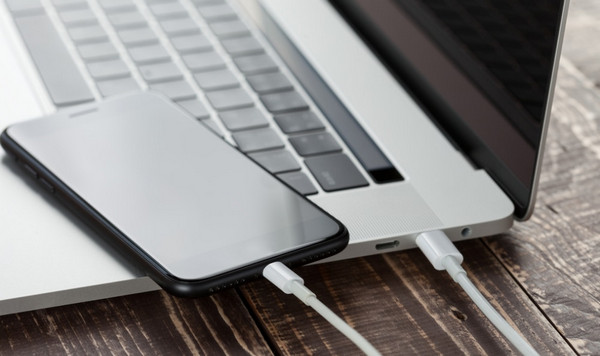
Part 1: Transfer Photos from Android to iPhone through USB & Lightning Cables
Since Apple only supports limited features for transferring data between Android and iPhone, the most basic option to use would be a USB cable. By manually linking your devices through it, their content will be detected and displayed by the computer, giving you the chance to transfer or copy and paste your Android images to the iPhone. The transfer may take more time because the photos won’t be automatically categorized, but it is a decent and simple way to transfer your desired data without complications.
Yield to the painless procedure below to determine how to move photos from Android to iPhone through USB:
Step 1Attach both the Android and iPhone to the computer with the USB cable, and allow the connection on the devices when prompted. Afterward, view your Android content first. Enter the folder containing the pictures you wish to transfer, then select them accordingly.
Step 2Once ready, right-click and choose Copy. Then, view your iPhone content next to view and pick your desired destination folder. Finally, right-click again and choose Paste this time to transfer the image files to your iPhone.
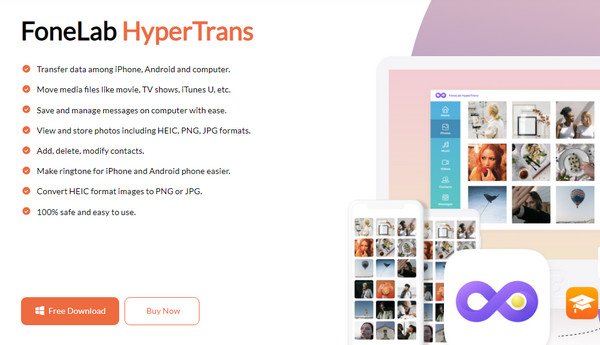
Part 2: Transfer Photos from Android to iPhone with FoneLab HyperTrans
FoneLab HyperTrans is the way to go if you prefer a professional yet convenient procedure to transfer. Since there is no official method for moving photos from your Android to an iPhone, developers created this helpful program that can easily help you do so. Obtaining it on your computer is quick and stress-free, especially since the tool requires only a little space, making the installation and its performance smooth.
Transfer Data From iPhone, Android, iOS, Computer to Anywhere without Any Loss.
- Move Files between iPhone, iPad, iPod touch and Android.
- Import Files from iOS to iOS or from Android to Android.
- Move Files from iPhone/iPad/iPod/Android to Computer.
- Save Files from Computer to iPhone/iPad/iPod/Android.
Meanwhile, FoneLab HyperTrans allows the transfer of various data types, such as photos, messages, videos, music files, contacts, and more. You may move your chosen pictures to different Android or iPhone models and versions, so you won’t have difficulty linking your devices to the program. The program will also categorize your content immediately, letting you find and transfer your desired images more easily.
Identify the straightforward navigation below to move photos from Android to iPhone with FoneLab HyperTrans:
Step 1Start by visiting FoneLab HyperTrans’ primary site using your trusted browser program. Its initial page will provide a Free Download button, so click it, and the program installer will shortly be in your Downloads folder. Launch it to set up the tool, and it will last only around a minute. Once everything is set, expect a Start tab to pop up, prompting you to open the tool.
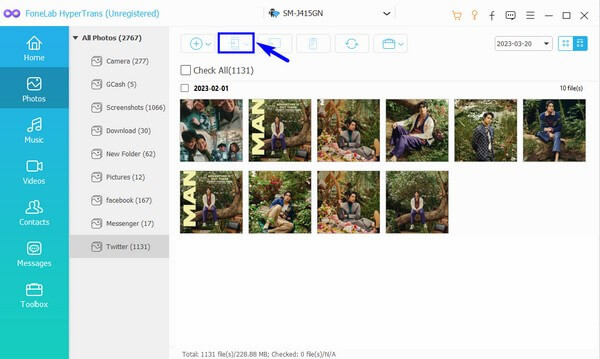
Step 2You must link your device, as the main interface instructs. Please do it for both iPhone and Android using a USB cable for the transfer tool to recognize and read their content. Afterward, click the tab at the top first and choose your Android as the sender device. Then, proceed to the Photos selection in the left column to see and find your desired image files.
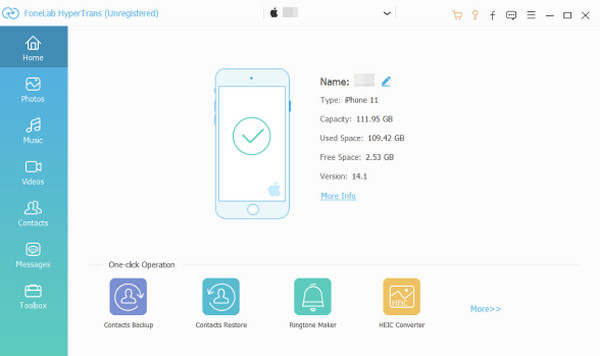
Step 3Another column, containing your image folders, will appear next. Open them accordingly, and mark the photos you intend to transfer to the iPhone. When ready, tick the mobile device tab on the upper part, then select your iPhone’s name from the linked devices. Your chosen Android photos will then shortly be transferred to the iPhone without a problem.
Part 3: Transfer Photos from Android to iPhone by Move to iOS
On the other hand, Move to iOS is an app that Apple developed, mainly to transfer data when switching from an Android device to a new iPhone. It can help you move various content, including photos, messages, contacts, videos, etc., without complication. It is accessible on Android devices’ Google Play Store, so no worries about the app’s compatibility. However, this process is only limited to new iPhone users. If not, you may need to erase the device first and set it up again.
Obey the unchallenging steps below to grasp how to move pictures from Android to iPhone using Move to iOS:
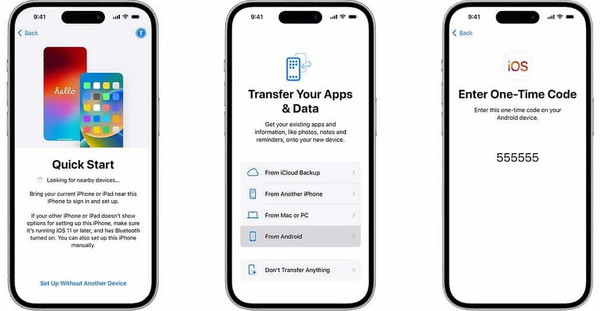
Step 1Reset the iPhone first if you’re not using a new one. Enter Settings, then choose General > Transfer or Reset iPhone. On the subsequent screen, tap Erase All Content and Settings and confirm the action. Meanwhile, get Move to iOS on your Android device’s Play Store and set it up.
Step 2When you reach the Transfer Your Apps & Data screen after restarting on the iPhone, select From Android at the bottom. Then, on the Android app interface, tap Continue and follow the prompts. Once the iPhone screen displays a 6-digit code, enter it on your Android to transfer your desired data.
Part 4: Transfer Photos from Android to iPhone Using iCloud Photos
If you’re unaware, transferring your Android pictures to the iPhone using iCloud Photos is also possible. Although its app is unavailable on the Play Store, you can still access it on Android devices through its website. You can visit iCloud and its services on almost any browsing app by providing your account credentials. Once provided, the service will let you upload the images you wish to transfer. Then, if your device’s Photos is synced to iCloud, you will automatically view the pictures on the iPhone.
Take to heart the appropriate guide below to transfer photos from Android to iPhone wirelessly using iCloud:
Step 1On your Android device, open a reliable web browser and head to the iCloud website. Sign in with your iCloud account through the text fields, and once accessed, select Photos from the homescreen. You can then upload your chosen images or videos directly to the page with the Upload symbol.
Step 2Once uploaded, ensure your iPhone is signed into the same iCloud account to which you saved the photos. Then, enable the syncing feature on Settings by tapping your profile > iCloud > Photos. Next, open the device’s Photos app from the Home screen. The pictures you have uploaded will automatically be on the interface, letting you view and enjoy them.

Part 5: Transfer Photos from Android to iPhone via Google Photos
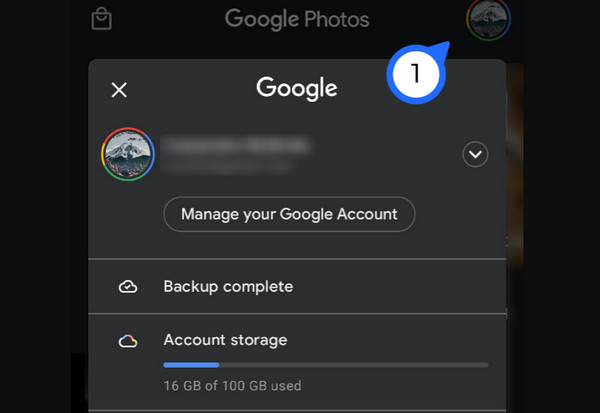
Meanwhile, you can acquire Google Photos on both Android and iPhone. Hence, it would also be an effective way to transfer your desired image files. Like iCloud, its process requires an account, an internet connection, and uploading the photos to Android. You must then only save them to your iPhone’s camera roll, transferring them successfully. On the other hand, 15 GB is free for all Google account users. If your pictures’ size exceeds the said amount of GB, they will likely fail to be uploaded.
Follow the worry-free directions below to determine how to transfer Android photos to iPhone via Google Photos:
Step 1Android devices have the Google Photos app by default, so installation is no longer needed. Open it and hit your profile icon at the top, then proceed to the Settings option. Afterward, choose Backup and turn on the Backup option to let your images be saved to your Google Photos account.
Step 2After that, get Google Photos on your iPhone through the App Store and launch it. You must then ensure you log in with the same Google account you have used on the Android device. Shortly, the images you uploaded to the account will appear on the app interface.
Part 6: FAQs about How to Transfer Photos from Android to iPhone
Can you transfer photos from Android to iPhone without the internet?
Yes, you can. Not all transfer methods require an internet connection. Sometimes, you only need a USB cable, like the first two strategies, to transfer your Android images to an iPhone successfully.
Why can’t I AirDrop from my Android to the iPhone?
Unfortunately, it’s impossible to AirDrop photos or any other data between Android and iPhone because Android doesn’t support it, and the feature is exclusive to Apple users.
Transferring photos or other content between Android devices and iPhones may seem impossible if you don’t dig enough information, but no worries. We have already provided every method’s necessary information for you, and you may use them accordingly, primarily the highly suggested tool, FoneLab HyperTrans, to move your Android data to iPhone successfully.